Monthly Digest: February 2023
Hello!
Feb was a busy month for us, with us settling into a new space, getting a hang of a new schedule. Writing these posts seem to be delayed and ofcourse as usual, nothing goes according to plan.
Anyway here is a very late (!!!) update of what happened in Feb.
Events
A a part of a local festival called Viva Vaddo, my studio along with a whole bunch of other creator’s studios in the area were open for an “open studio day”


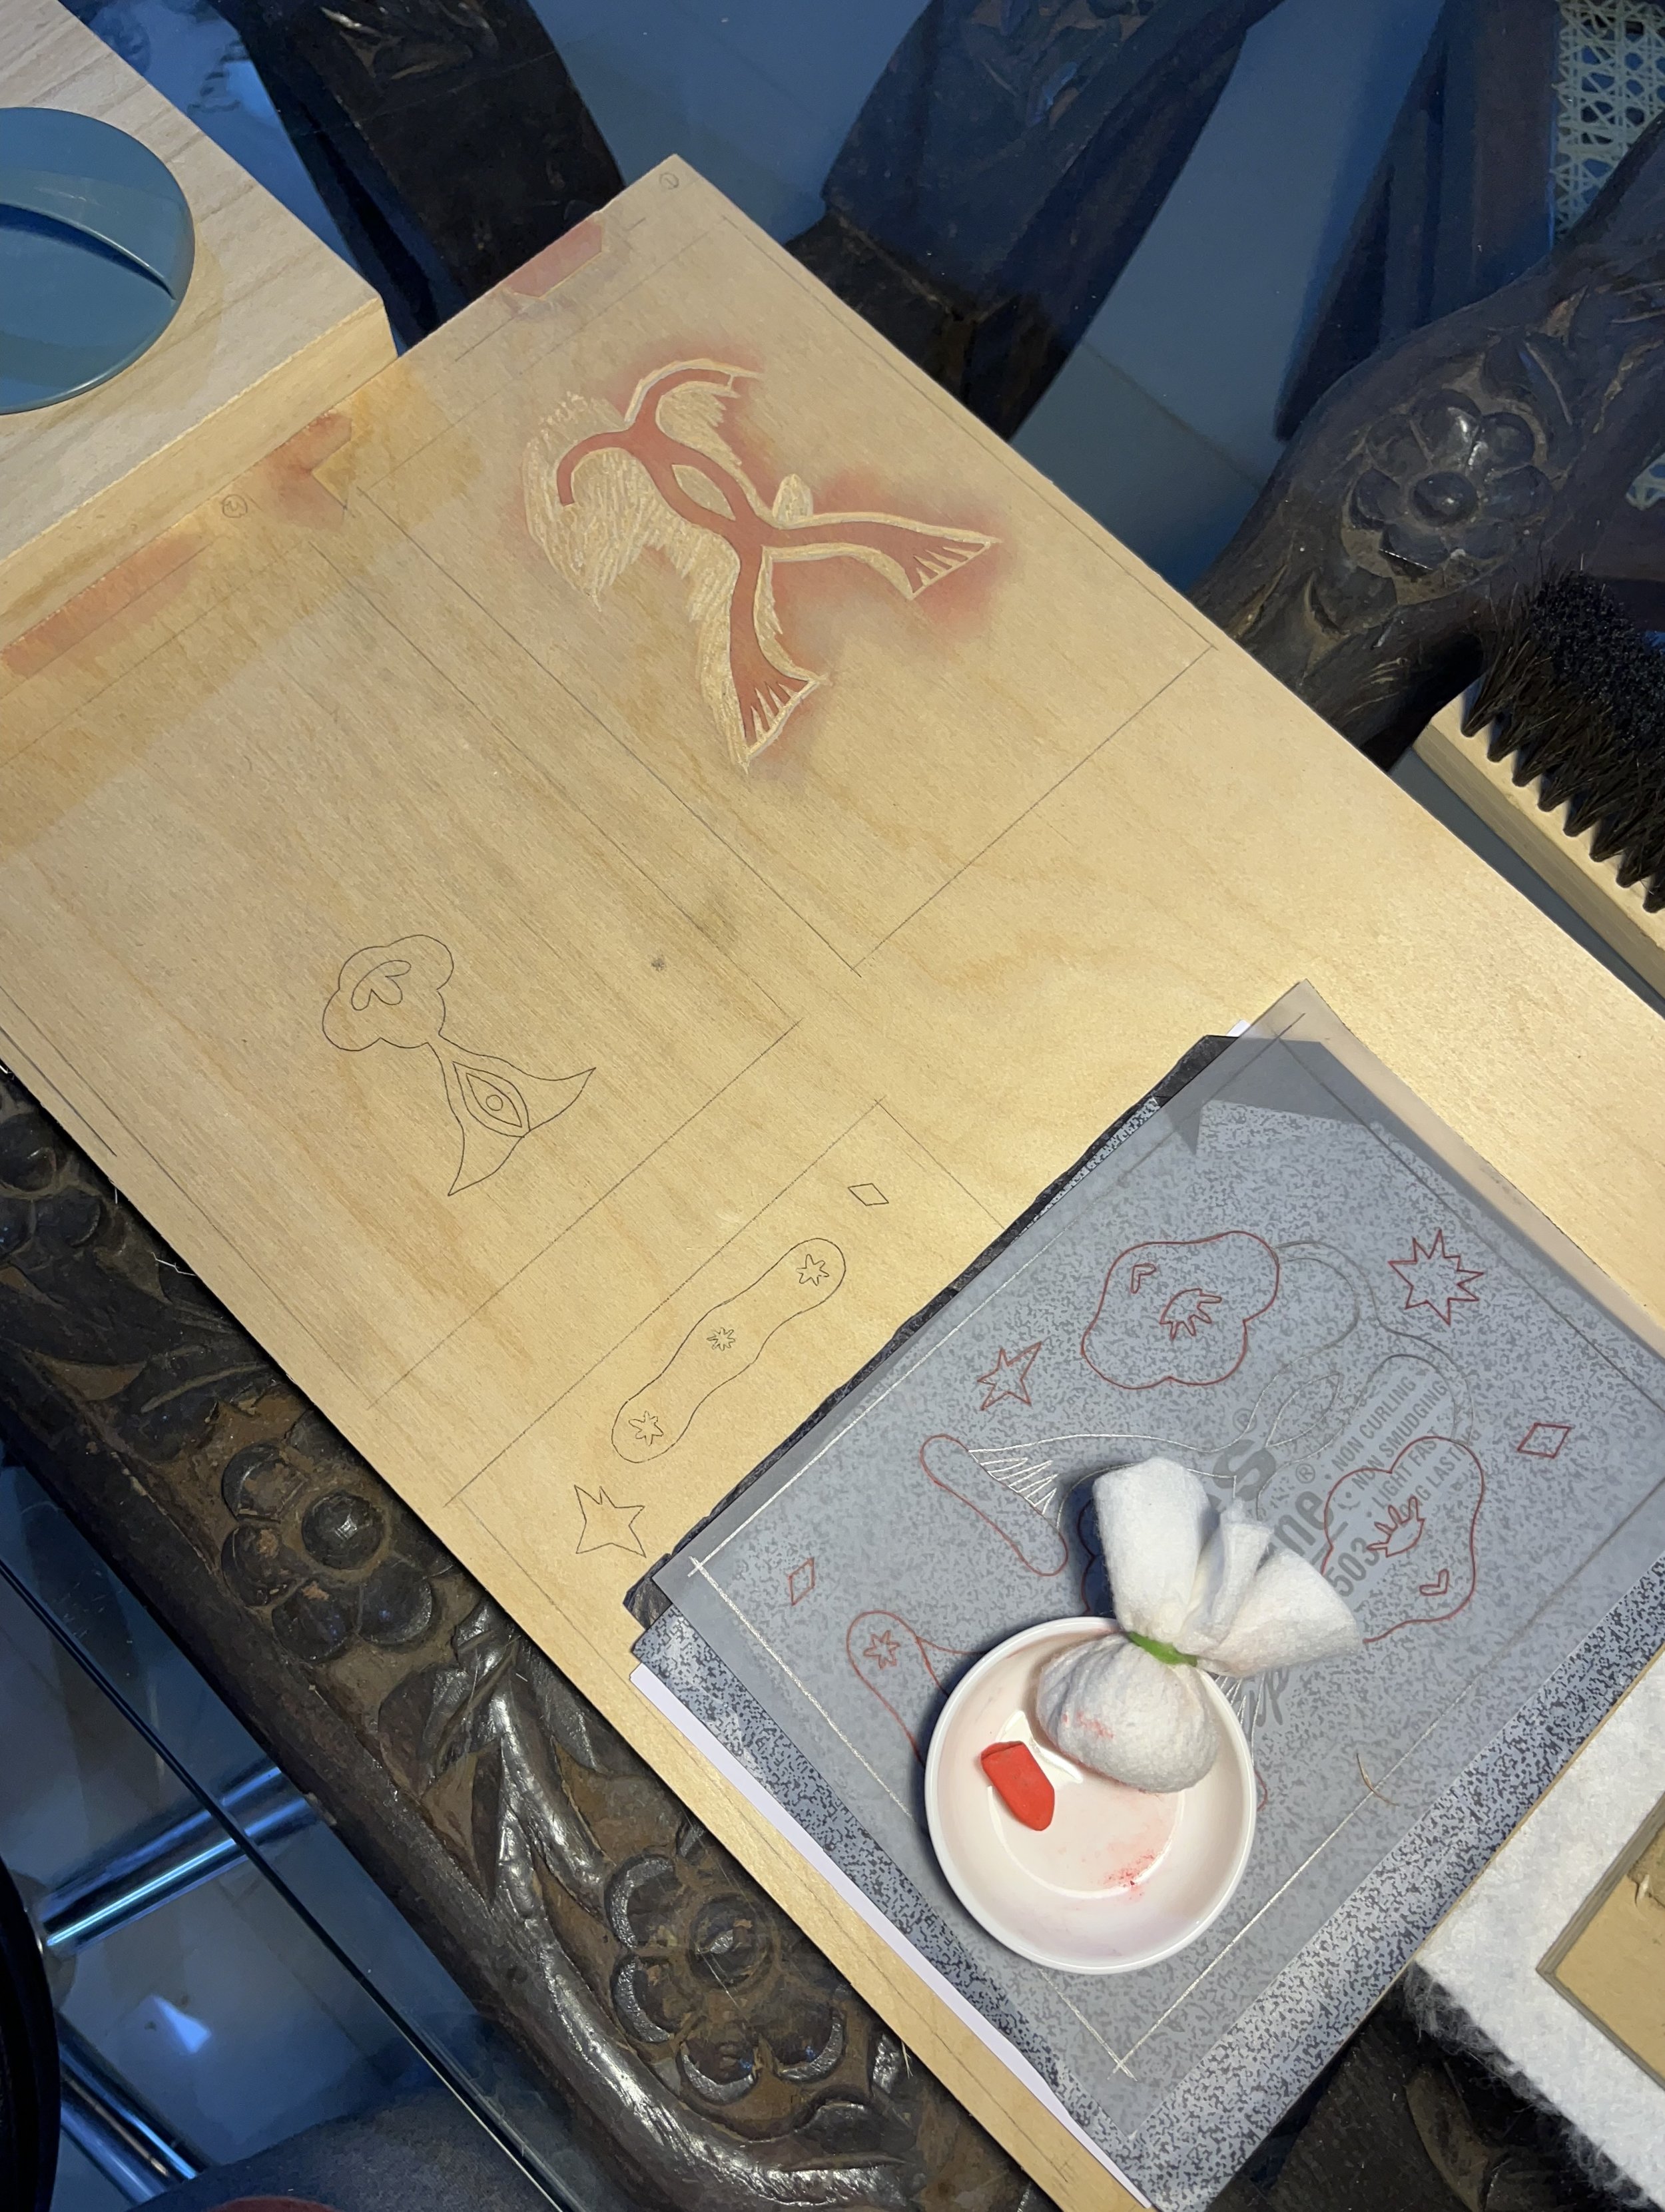


As a part of my open studio, I had a new woodblock that I had started on display for people to come in and view and look at what the process might be. I also put up all my existing work on display on the walls, in some sort of chronological order. It was a fun day, but its really exhausting to talk about your work for hours.
Music
This month I explored this classic album by Mazzy Star - So Tonight That I Might See. Its the perfect dreamy/ moody/ comforting solitude type album. The kinds you’d play in your bedroom as a teen while you wallowed in lonliness. Theres something really deep, dark about it. Almost like a look into a surreal, introverted mind.
The playlist compilation for this month isn’t far from this mood. This playlist is also dreamy, dark, feminine. I especially loved the new gems which were: the instrumental music by Crescent, doomy fem duo Mrs. Piss and the absolutely heart shattering song Ptolomaea by Ethel Cain. This song shook me the minute I heard it, from the subtle sounds of swarming insects, the feeling of despair, the screaming, the skin tingling incantation. It feels dark and Satanic but also possibly holy.
Books
This month I read finished just one book: Small Things Like These by Claire Keegan . This books was slightly disappointing but I think theres something about it that I didn’t get. The overall story is really sentimental and the scenes are beautifully descriptive of a time and mood - but this book is different - the book ends at a point where a book would REALLY start. So for me I felt a bit cheated - or maybe I’m not getting the subtleties of it

TV / Film
This month not much was watched, apart from :
The Bletchley Circle (2018):
Set in 1952, `The Bletchley Circle' tells the story of four ordinary women who have returned to their normal lives after working as code-breakers at Bletchley Park during World War II
An absolutely entertaining show and look into a period of great interest: code breakers during war.
The Little Hours (2017) :
Massetto poses as a man with hearing and speech impairment in order to seek refuge in a convent full of sexually frustrated nuns.
This show was so strange and funny. I was entertained and cringing at the same time.
The Fresh Prince of Bel-Air (1990) :
A streetwise, poor young man from Philadelphia is sent by his mother to live with his aunt, uncle and cousins in their Bel-Air mansion.
This show has problematic moments but I’ve been binging it for 2 months and counting.
Art
The personal art front was great this month! Did a bunch of ceramics and started a new woodblock print (which I’m sure I’ll never finish). I also got a new drafting table (!) Here’s an image dump of studio life:


Life
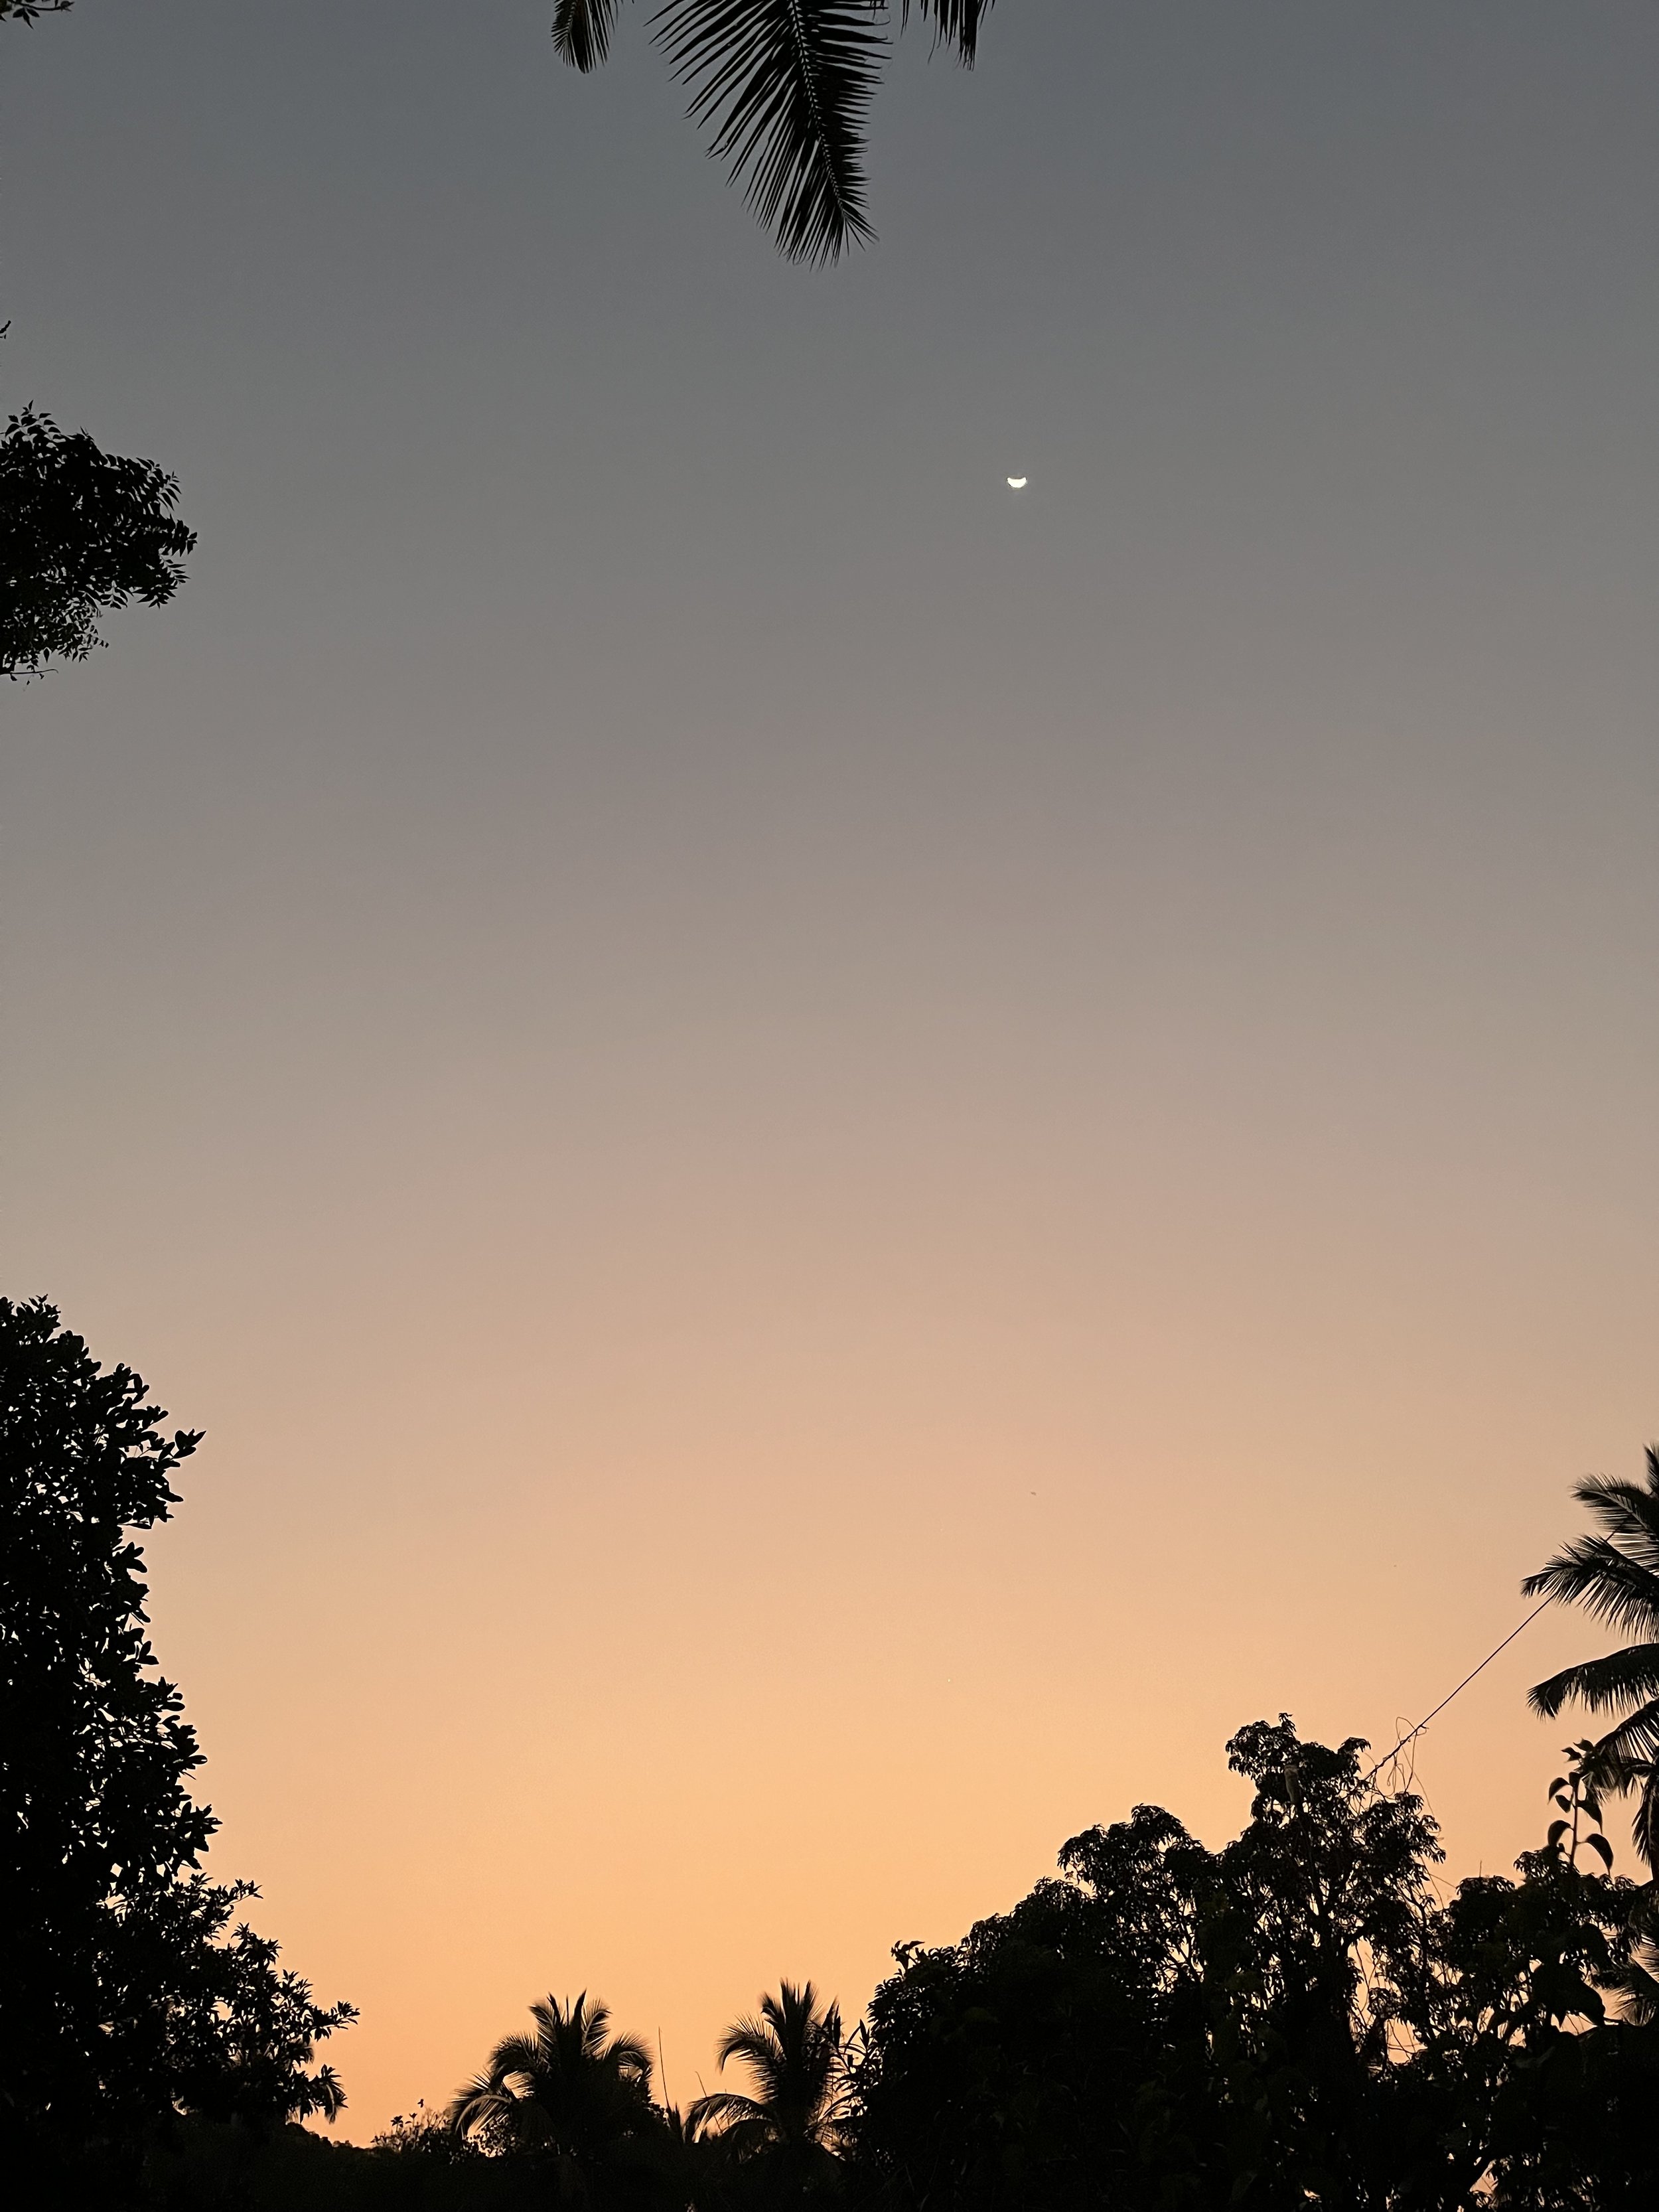
We bought some vintage/junk furniture! Here’s a photo dump of the month:


That’s All Folks!
Monthly Digest : January 2023
Hello 2023!
Whilst you’re getting your head around 2022, I thought I’d post a list of the things I loved in January.
The month was jam packed with art, events, music and people who inspired me.
Life
First up, life/studio events: We moved to Goa in December - studio, dogs and all. We found a much bigger space, with individual spaces for our studios and lots of garden space for the dogs. Life has been good here. I’ve been more inspired to work and I’ve probably gotten more done here artistically in a month than I have in years in Bangalore.
I wake up in the morning feeling calm and not fried. The day isn’t packed with overwhelming stimulation and I realised that I was being over-stimulated in Bangalore. So much so that I was so overwhelmed through the day that I was being unproductive and in a bad mental state. The only thing I managed to do in Bangalore was client work which left me feeling really really sad and subdued. I didn’t feel challenged and my artistic brain wasn’t being exercised deeply.
After moving here its been busy! We set up our home and studio (and still in the middle of the process) - the month started off with going to the local Circus that was in town (!!) It was a wild experience.


Events
On the 13th of Jan was Potter’s Fest, Goa - a flea market of many, many potters from Goa and all over India that had little stalls with their wares on offer.

I procured a few pieces from the potter’s at the event. Two of my favourites are:

a this-and-that dish that I loved by Kabita Lindenmeyer . She not only uses the Japanese technique of Nerikomi to marble the clay body but also uses a Korean technique of inlay

Lakhan Kaushik’s pottery from The Cold Mountain Studio was really beautiful. The glazes they had prepared were almost iridescent.
On Jan 21st , I had a stall at Maker’s Asylum ‘s event - Maker’s Market. At this event I had my woodblock prints, small paintings, stickers and half a table’s worth of Pigmenta paints. I had set-up a little corner to test out all the colours I have on offer, and there were sets available too.
The event was a great success for me (mostly for Pigmenta sales) and I got to meet so many artists who were really into hand-made paints.


Music
As a part of my monthly deep dive into things I wanted to explore music either albums, artists or songs with intention.
Vivaldi’s Four Seasons : Winter
This month I have been really into Vivaldi’s Four Seasons - namely the section Winter.
Four Seasons by Antonio Vivaldi was composed in 1723 and is in my opinion a piece that stands the test of time. It is split up into four parts : Spring, Summer, Autumn, and Winter.
I’ve been deep diving into Winter. I have never intentionally listened to classical music ever before, but right now I feel like I’m in a place where my body and mind are responding to it, my mind it creating imagery associated with it, my body is feeling the emotions arising from the music. Maybe not every month, but some months I might touch upon a classical piece as my monthly deep dive.
The first part of Winter (in F Minor): Allegro non molto - begins with a menacing feeling that builds up to a trembling feeling of the cold. It sounds bleak, yet exciting and energetic. Like trembling while looking at the snow piling up outside. It then goes into a more uplifting moment of feeling inspired by a white landscape before you. Maybe feeling more at ease by a fireplace. This is my favourite part.
Part II : Largo - feels more uplifting and gives a sense of family. The imagery would be a family bustling inside, serving warm drinks and talking by a fire. The bustling atmosphere in the song, especially the string instruments could even be the bustle of people rushing around and braving the weather outside
Part III : Allegro-Lento-Allegro - the beginning feels a bit dangerous, uncertainty. Possibly the feeling of braving the weather. It builds up suddenly and sadly, almost suggesting a tragedy that occurred in the great outdoors. There is a tense sense of despair, sadness and drama. It lulls before it picks up again, probably suggestive of the braving the elements and failing.
Playlist of the Month:
This playlist has been being pieced together since October of 2022 - and I feel like it’s finally ready to be wrapped up and closed off. Its a fun funky playlist of Hip Hop/ Rap / Gangsta Rap from the 1990s upto 2010’s
TV / Film
This month I’ve been watching a whole bunch of stuff, I’m just going to briefly list them below:
TV:
The Makanai - Cooking for the Maiko House (2023)
Two inseparable friends move to Kyoto to chase their dreams of becoming maiko, but decide to pursue different passions while living under the same roof.
A fun and really heartwarming story set in Kyoto, Japan. I really liked it because its set in such a particular and specific time and space : a girl being a cook for a Maiko (think Geisha) house in modern day Kyoto. It’s the kind of setting you would never know about but you would love to dive deep into their world.
That 90’s Show (2023)
In the summer of 1995, Leia Forman makes friends with a new generation of Point Place kids while visiting her grandparents, Red and Kitty, in Wisconsin.
I love That 70’s Show, its such an important part of my youth and growing up. I was so disappointed in this show but for some reason I can still watch it?? Like its entertaining yet slow, familiar yet not familiar enough, fun but also lame??
Beecham House (2019)
Beecham House is set on the cusp of the 19th century in Delhi. Tom Bateman stars as John Beecham, a former soldier starting a new life with his family.
This show ticks all the boxes - drama, mystery, visually stunning, possibly accurate representation of the times but I found it so tiring and slow. Would recommend it for the sets / outfits. It never got past SE 01. I’m a sucker for period shows/ films.
FILM:
Clueless (1995)
Shallow, rich and socially successful Cher is at the top of her Beverly Hills high school's pecking scale. Seeing herself as a matchmaker, Cher first coaxes two teachers into dating each other.
I mean I don’t even have to tell you how much fun this movie is, its like a staple watch every few years. I was entertained as always and cringed a bit remembering my youth and how dumb we were in high school, but this time the relationship between Cher and her step-brother Josh is just ???yuck???
Persuation (2022)
Eight years after Anne Elliot was persuaded not to marry a dashing man of humble origins, they meet again. Will she seize her second chance at true love?
Another period film, this time I found the characters way too annoying and the whole drama behind their relationship too frustrating. Is it just me or is Dakota Johnson is just deadpan and emotionless.
Books
As someone who never used to read apart from some Princess Diaries/Harry Potter in school - I’ve started challenging myself to start. I have a few books that I will probably take forever to read. I find it hard to pay attention. Words literally dance on a page and I know I could slip into an audiobook here and there to makee consuming books easier but I really like the format of a physical book where I can underline and annotate. Anyway starting the year strong with ONE book LOL

Hippie by Paulo Coelho
I got this book during a book fair for cheap, and to be honest the only two things that attracted me to this book was the cover and that the subject matter was about the hippie movement/ counter culture. The entire storyline, where it is set and the journey he takes could have made for a great book but I found so many basic problems - he is so descriptive and talks so much but it goes nowhere? Like I feel fatigued reading his ramblings and waiting for he next part to begin. That being said there are enjoyable parts too - I found certain tidbits about life back then to be intriguing enough to go research it further - like how the hippie peace symbol is an inverted Viking rune, The Magic Bus that ferried passengers along the Hippie Trail , drug dens of Amsterdam etc.
The book however successfully fulfils one role - making you feel absolutely inspired to travel, rough it out, see the world, break free from the man , embrace all your freedoms, seek out new experiences and want to live slow and hope for brief moments of something extraordinary.
ART
I have found a lot of interesting artist , techniques and information this month. I think the easiest way to share the info would be finding some relevant videos and sharing it on here. Welcome to your monthly Youtube Art playlist I guess?
January’s playlist has 10 videos :)
That’s all for this month Folks!

Studio Practices: Paper Making - 2
This week I’m exploring paper making, not only as a break from work but also as an experiment to see if I can introduce handmade paper into my projects, as well as understanding if it’s possible to incorporate paper making into my regular studio practice.
The last post spoke about turning scrap paper into pulp. This pulp can go on to becoming sheets of paper, or the pulp can be used as some sort of ‘clay’ to be used for sculptural projects.
This post will go further into two sections: Making a frame or deckle and Making paper.
A deckle is a frame with mesh stretched over it. To turn pulp into sheets, the pulp is sieved through this flat mesh to evenly distribute the fibres.
How to make a deckle:
Things you will need:
- Two wooden frames of the same size: either picture frames, old painting canvases with the fabric removed- here I’m using two old screen printing frames
- A staple gun or nails
- Fine mesh : either cloth, mosquito/screen mesh, metal mesh (make sure it’s rust proof)
1. Take two identical wooden frames (in size and frame thickness) - one will hold a mesh, the other will be as is
2. Get some mesh material. I’m using this fabric mesh I had lying around
3. You can also use mosquito mesh/screen door mesh. I actually prefer this, but I didn’t have any spare
4. Start stretching the material over the top of frame 1
5. Secure the stretched edges with a staple gun or nails. Make sure there are no wrinkles and that it is fairly taut
6. Now this is an important arrangement to keep in mind: frame 1 (with mesh side up) sits at the bottom and the blank frame sits on top of it
Making Paper :
You will need:
- A basin larger than your deckle
- Lots of water
- A sponge
- Lots of old smooth fabrics/towels - maybe old bedsheets folded
- Tea Tree oil (optional)
- A glass/non-porous surface for drying
- A lot of place to lay paper to dry
- Heavy books to flatten
To setup:
- Keep in mind- this is a very watery and messy process
- Fill the basin with sufficient water and keep ready on the left of your workspace
- On the right, cover a table with layer of towels, old bed sheets etc anything to place the soggy paper on to drain out. The paper will pick up the texture of the cloth it is placed on, so choose the topmost layer of cloth accordingly
- Find a non-porous surface like glass to transfer your paper to for final drying
7. Fill a large basin/vat with plenty of water
8. I added a few drops of Tea Tree oil for its anti-fungal properties
9. Disperse the pulp into the water
10. Use your hands to disperse the pulp, stirring the water with your hands is enough. You will see the pulp suspended in the water.
11. Arrange your frame and keep it ready (read step 6 in How to Make a Deckle)
12. Orient it landscape and hold them firmly on either side of the frame
13. Begin by inserting the bottom of the frame into the pulpy water. You want to basically scoop up some pulp.
14. While scooping up the pulp, gently move the frame from side to side so the pulp gets evenly distributed onto the mesh.
15. Gently lift out of the water and remove the top (blank) frame. You will notice that the paper collected on the mesh. The top blank frame has helped contain the pulp and prevent it from flowing out.
16. You will see the layer of pulp sitting on the frame. Gently tip the frame to the right and let the water drain out. Do not to disturb the pulp.
17. You can wipe off the excess from the edge of the frame, this helps the paper release better.
18. Get ready to flip the frame over onto the layers of fabric you have kept ready, this will soak the excess water away and leave behind only the paper sheet.
19. Gently but swiftly flip the frame over onto the fabric - pulp side down. Be careful not to disturb the pulp.
20. Gently press down onto the towels. You can also use a sponge to dab and remove excess. You can let the frame rest for awhile to let the water drain out/dry up before lifting off.
21. Once the pulp starts losing water it will slowly release from the mesh. You can either let the frame sit there for a while or keep trying to reduce the water content by dabbing with a sponge. A fan on high speed will help.
22. You will see the paper has stuck to the cloth is releasing from the mesh. If it doesn’t that means the pulp is still too wet.
23. Once the paper is quarter or half dry on the cloth, you will be able to pull it away and place it on a glass sheet to flatten. At this point another round of dabbing with a sponge will flatten it further.
24. While it’s damp you can roll the edges with your finger to create an interesting edge
25. Once the papers are dry you can press them under heavy books to finally flatten.
If you want coloured paper the vat of water can be tinted with inks and dyes to produce colored paper.
Alternatively, you can tint small batches of pulp in small bowls and then pour onto the deckle to form colored sections of paper.
Important Note:
Anything that is damp needs air circulation to dry, do not press damp papers without periodically checking on them.
If they are not dried properly they can develop fungus or mold. The same applies for any other wet materials and tools.
Hope you enjoy experimenting with paper this week! If you try this at home, tag me on Instagram @piameenakshig. I would love to see what you have made!

Studio Practices: Paper Making - 1
Lately I have been thinking a lot about the different studio practices of an artist. The modern system seems to dictate that an artist should be focused on churning out work that revolves around their primary line of creation: if your’e a painter you paint, if you’re a sculptor you sculpt.
Personally, I find myself drawn to exploring various other creative pursuits in the midst of my primary work- and that has proven to be the most effective in keeping me creatively refreshed. It keeps my mind busy and gives my hands some new unfamiliar sensations to work with.
A lot of artists through history experimented in various mediums on the side. Picasso experimented with junk sculptures, painting, lithography, bronze casting, plaster casting, ceramics and wire sculptures to name a few. Salvador Dali experimented with photography, sculpture, furniture etc.
Most artists are restless, both physically and mentally. I have found that Introducing medium-experimentation into my studio practice is possibly the most effective way to be productive, while taking a break from my primary medium.
This week I have been experimenting with paper-making - a craft I have been drawn to for years. A few years ago, I had attempted making paper on my own and even though the results were not the best, the process left me curious to know more.
During my residency in Japan, we were lucky to be taken to the Ozu Washi store in Tokyo, a premier maker and retailer of washi paper worldwide. We were shown a film on how washi paper is made using kozo fibers and how the plant is harvested. This was followed by a mini-workshop where we made some paper and during that brief demo I picked up a few tricks that helped me improve my paper-making.

Our instructor showing us the correct position to hold the frame

The paper I made at the demo. Once the pulp was laid on the frame I used a hose to sprinkle water on the surface to create the dotted pattern.

The paper’s thinness and transparency seen against a light.
I wanted to use this week to experiment with making paper. I am currently working on a picture book with my husband, and the work had started overwhelming me. The idea of paper-making seemed to be a refreshing change and my aim was to try and make paper to use for painting and printmaking. At the residency we were taught a bonus technique of sizing paper.
‘Sizing’ is the process of preparing the surface of the paper to take on paint/ink. If paper is unsized then the ink and pigments will blot ( like tissue/toilet paper). Sizing prevents the pigments from going all the way through and spreading out.
My plan for the week was to make paper, size it and test it for printmaking and painting.
Below, I am going to briefly explain how I went about doing this, in the hope that it would be useful to anyone who would also like to attempt paper making.
I will start with making paper pulp, talking about how to make a frame/deckle and then the actual paper making process.
Part 1: MAKING PULP
Now all paper is made from pulp. Where does one source this pulp? Well, any scraps you have at home will do. Maybe old envelopes, old printer paper discards, unwanted sketches etc.
Few things to keep in mind:
- Paper thats gone through a printer will result in grey pulp - this includes documents, newspaper etc.
- Most courier packaging will end up giving you brown pulp
Practicing with whatever paper is on hand is the best way to begin. There is a lot of trial and error with paper making.
(Note: Please don’t use coated paper with glossy finishes/laminate or plastic coatings. As close to natural is best)
I had a small watercolour sketchbook with paper texture that I didn’t like so decided to recycle it. There were maybe 4-5 sheets of A5 papers.
What you need to make pulp (please read and prepare materials before starting)
- Scrap paper
- Kitchen mixie (the juicer fitting works best)
- 2-3 large vessels
- A cotton cloth
- Something like a plate with holes/sieve
1. Tear up paper scraps into small pieces
2. Soak scraps in a basin of water. All the paper should be submerged. Leave overnight
3. After soaking, grab small amounts and blitz in a blender with water
4. Make sure there is sufficient water added, otherwise the blades won’t move
5. As the paper disintegrates it absorbs more water, so keep adding water until the paper becomes a chunky pulp
6. This is stage 1 of blending. The point of this initial round of blending is to make sure all the paper is pulped and there are no large pieces
7. The paper pulp should come apart and no large pieces should remain
8. Repeat the blending process, this time with small amounts of pulp and more water. The more time spent blitzing the finer the pulp will become. The finer the pulp, the finer the paper
9. You can use a metal sieve to press out water from a fist-full of pulp
10. Then squeeze out the last bits of water by hand
11. Or you can wrap a fist full of pulp in a smooth cloth and wring out the water. Smooth fabric works best, textured fabric holds a lot of the pulp which gets hard to clean later
12. I form the paper into bundles, which I then spray with a mixture of water and tea tree oil to prevent mold
13. They can be used immediately to make paper or sun dried and stored away for a later day
14. I usually make pulp and keep in batches according to the paper type and here is an example of a bunch that didn’t dry properly and ended up with mold. Sun drying is the best way to avoid this. Once dry don’t put in a jar or any enclosed container for a week at least. Let it dry inside out .
My next post will explore making a frame/deckle and making paper.
Trip to the Government Museum, Bangalore
On Valentine’s day, we went on a morning trip to the Government Museum in Bangalore. The museum is really old, set up in 1865, and is housed in the beautiful red building sandwiched between the Vishvesvaraya Industrial & Technological Museum and the Venkatappa Art Gallery.

Here is an image of the building back in the day when there was nothing much around. From Wikipedia

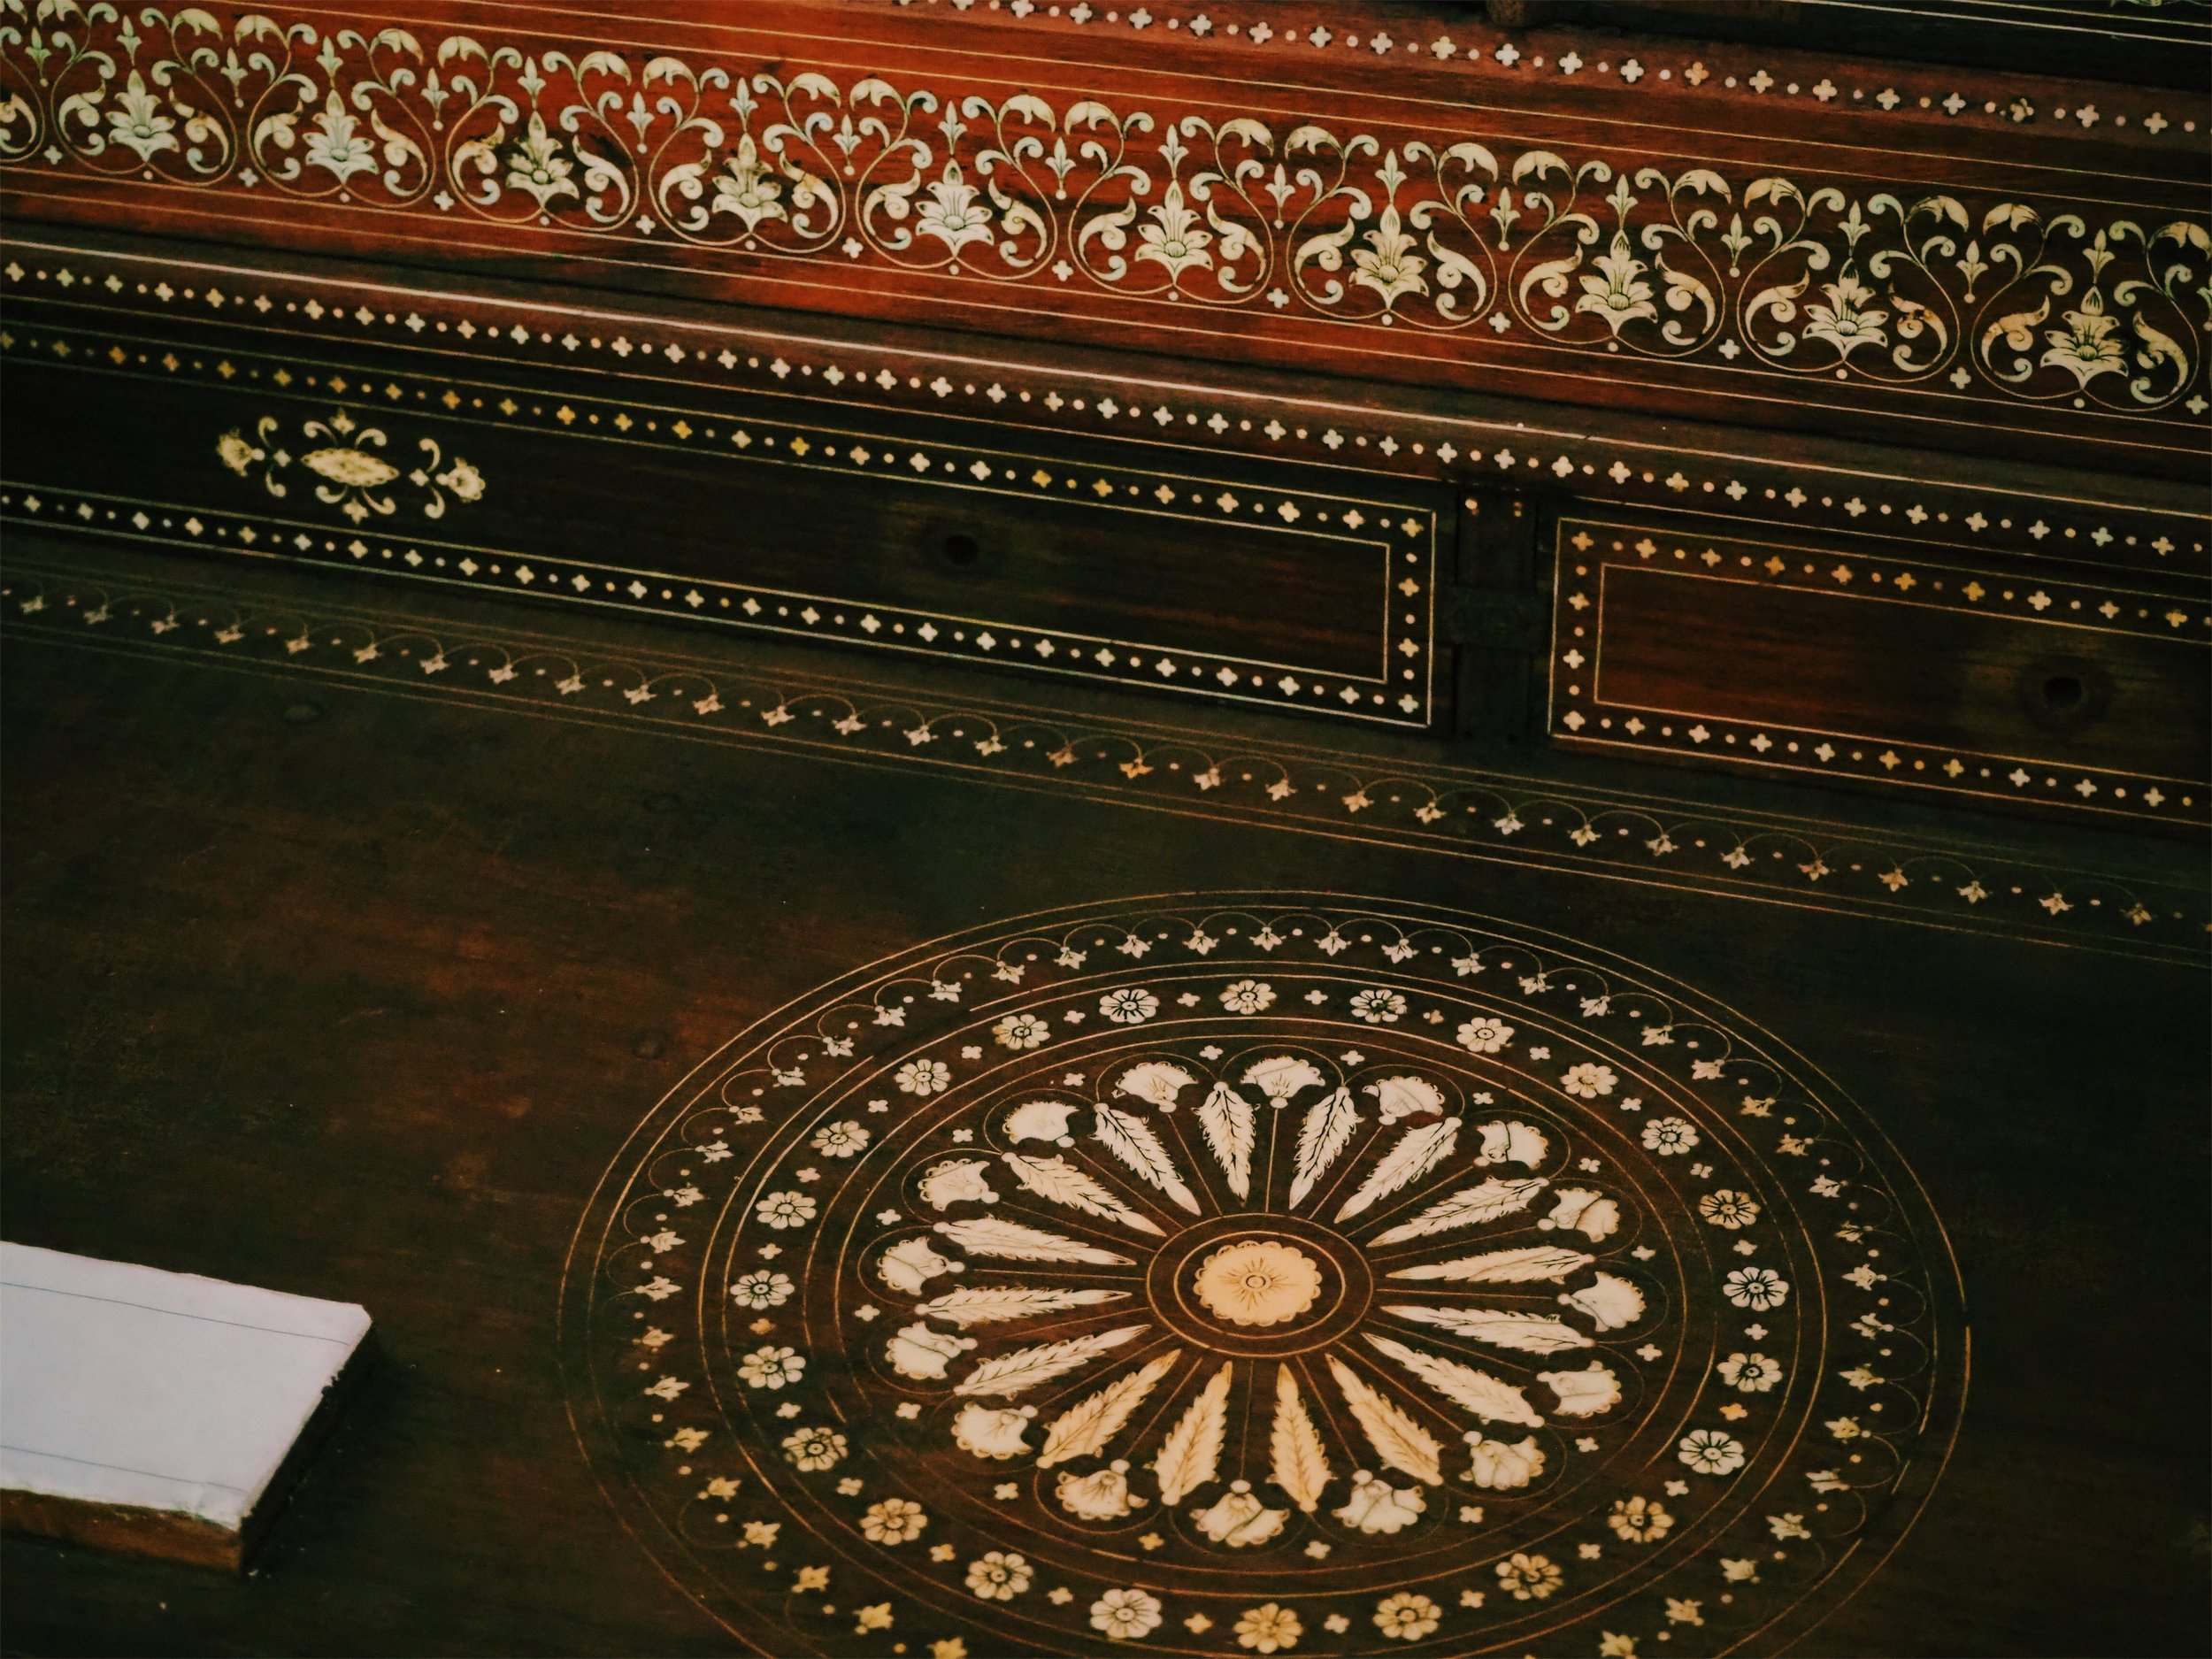
The museum is fairly small with only two floors and an additional wing. The ground floor (above) houses mostly archeological artefacts (majority from Hampi), some very interesting Kodava (?) weapons, some lithos (?) of illustrations of Mysore/Lal Bagh etc. and a random beautiful dressing table inlaid with ivory (no info). My favourite section was the weapons.
The unfortunate thing about this museum is there is barely enough information about any of the artefacts. A lot of them are not labeled, there is no information about whether the prints are lithos and some objects like the dressing table just says Don’t Touch. The museum was quite small and compared to the other museums I’ve visited in life, its quite pathetic, but never the less its better than nothing.
My plan for this trip was to explore 3 things:
- Test out my new camera: Olympus OMD EM10 Mark III
- Practice my standing-and-drawing-from-life skills
- Explore colour grading. I always wanted to use VSCO properly and colour grade a series of images and try and give the batch a certain ‘aesthetic’. Here in this set I wanted to explore a warm aesthetic.
The photographs I’ve taken below are by no means artistic, they were just taken as reference/documentation. Maybe they will come in handy for future illustrations?
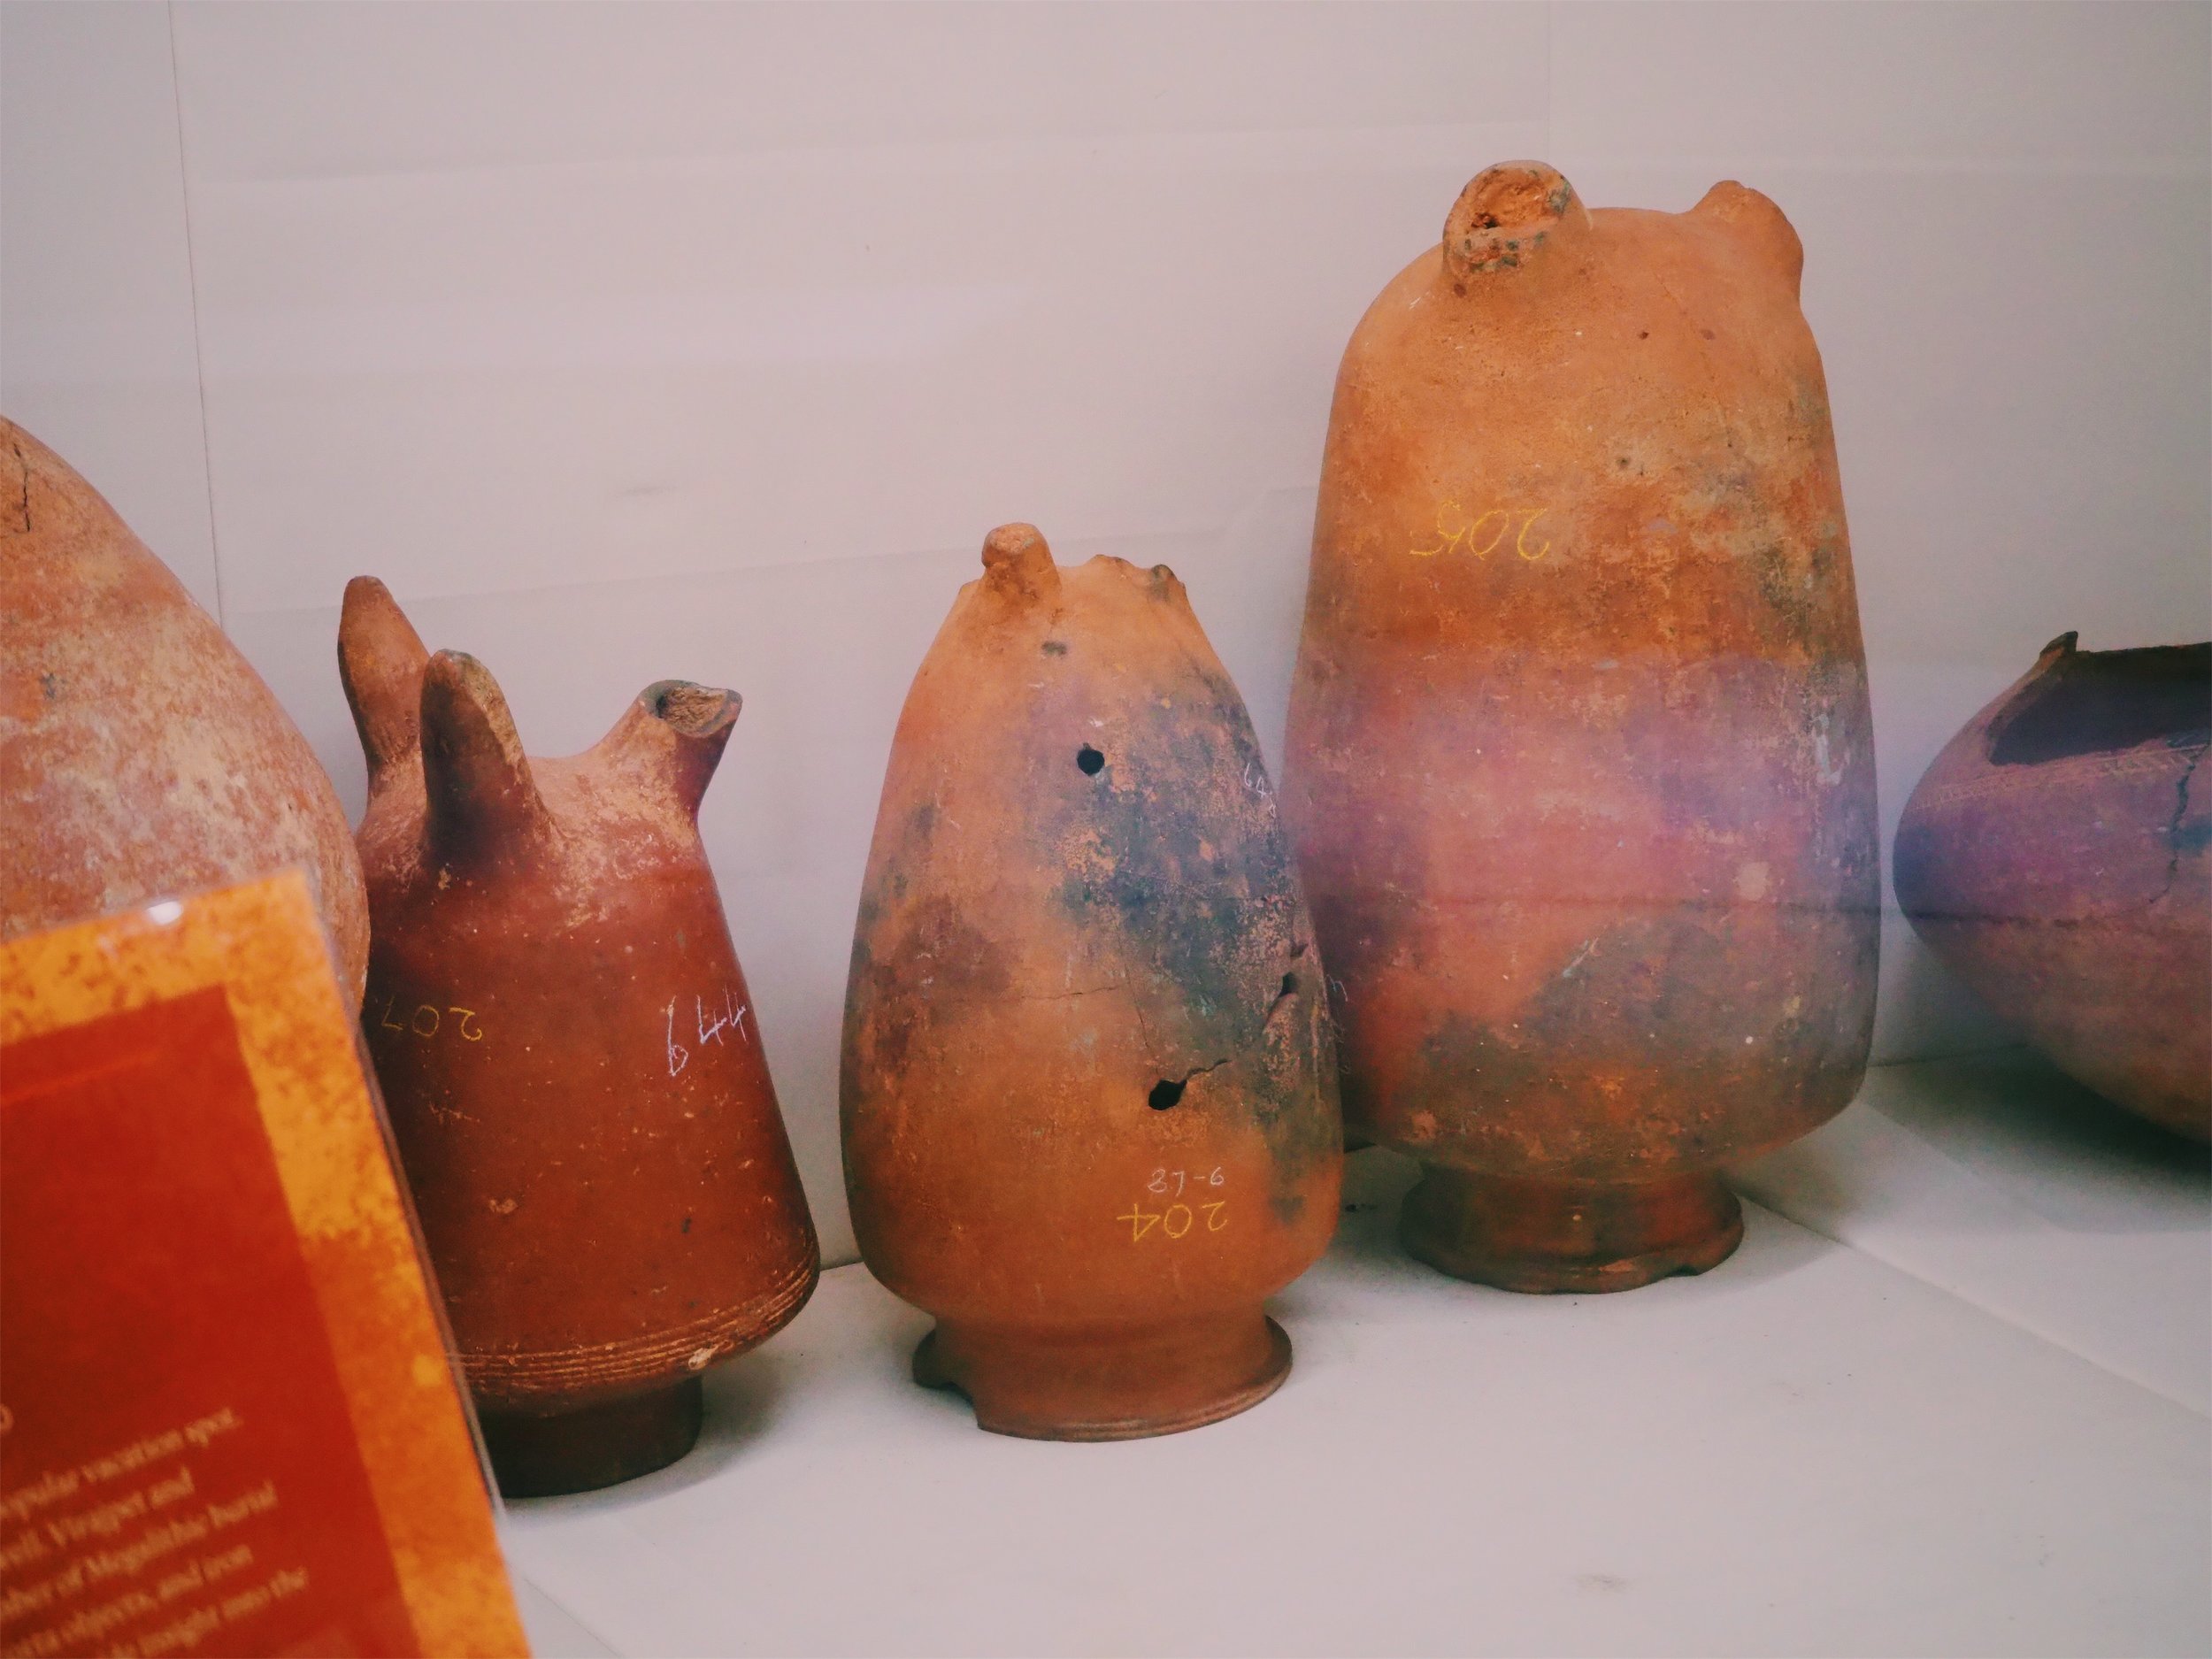
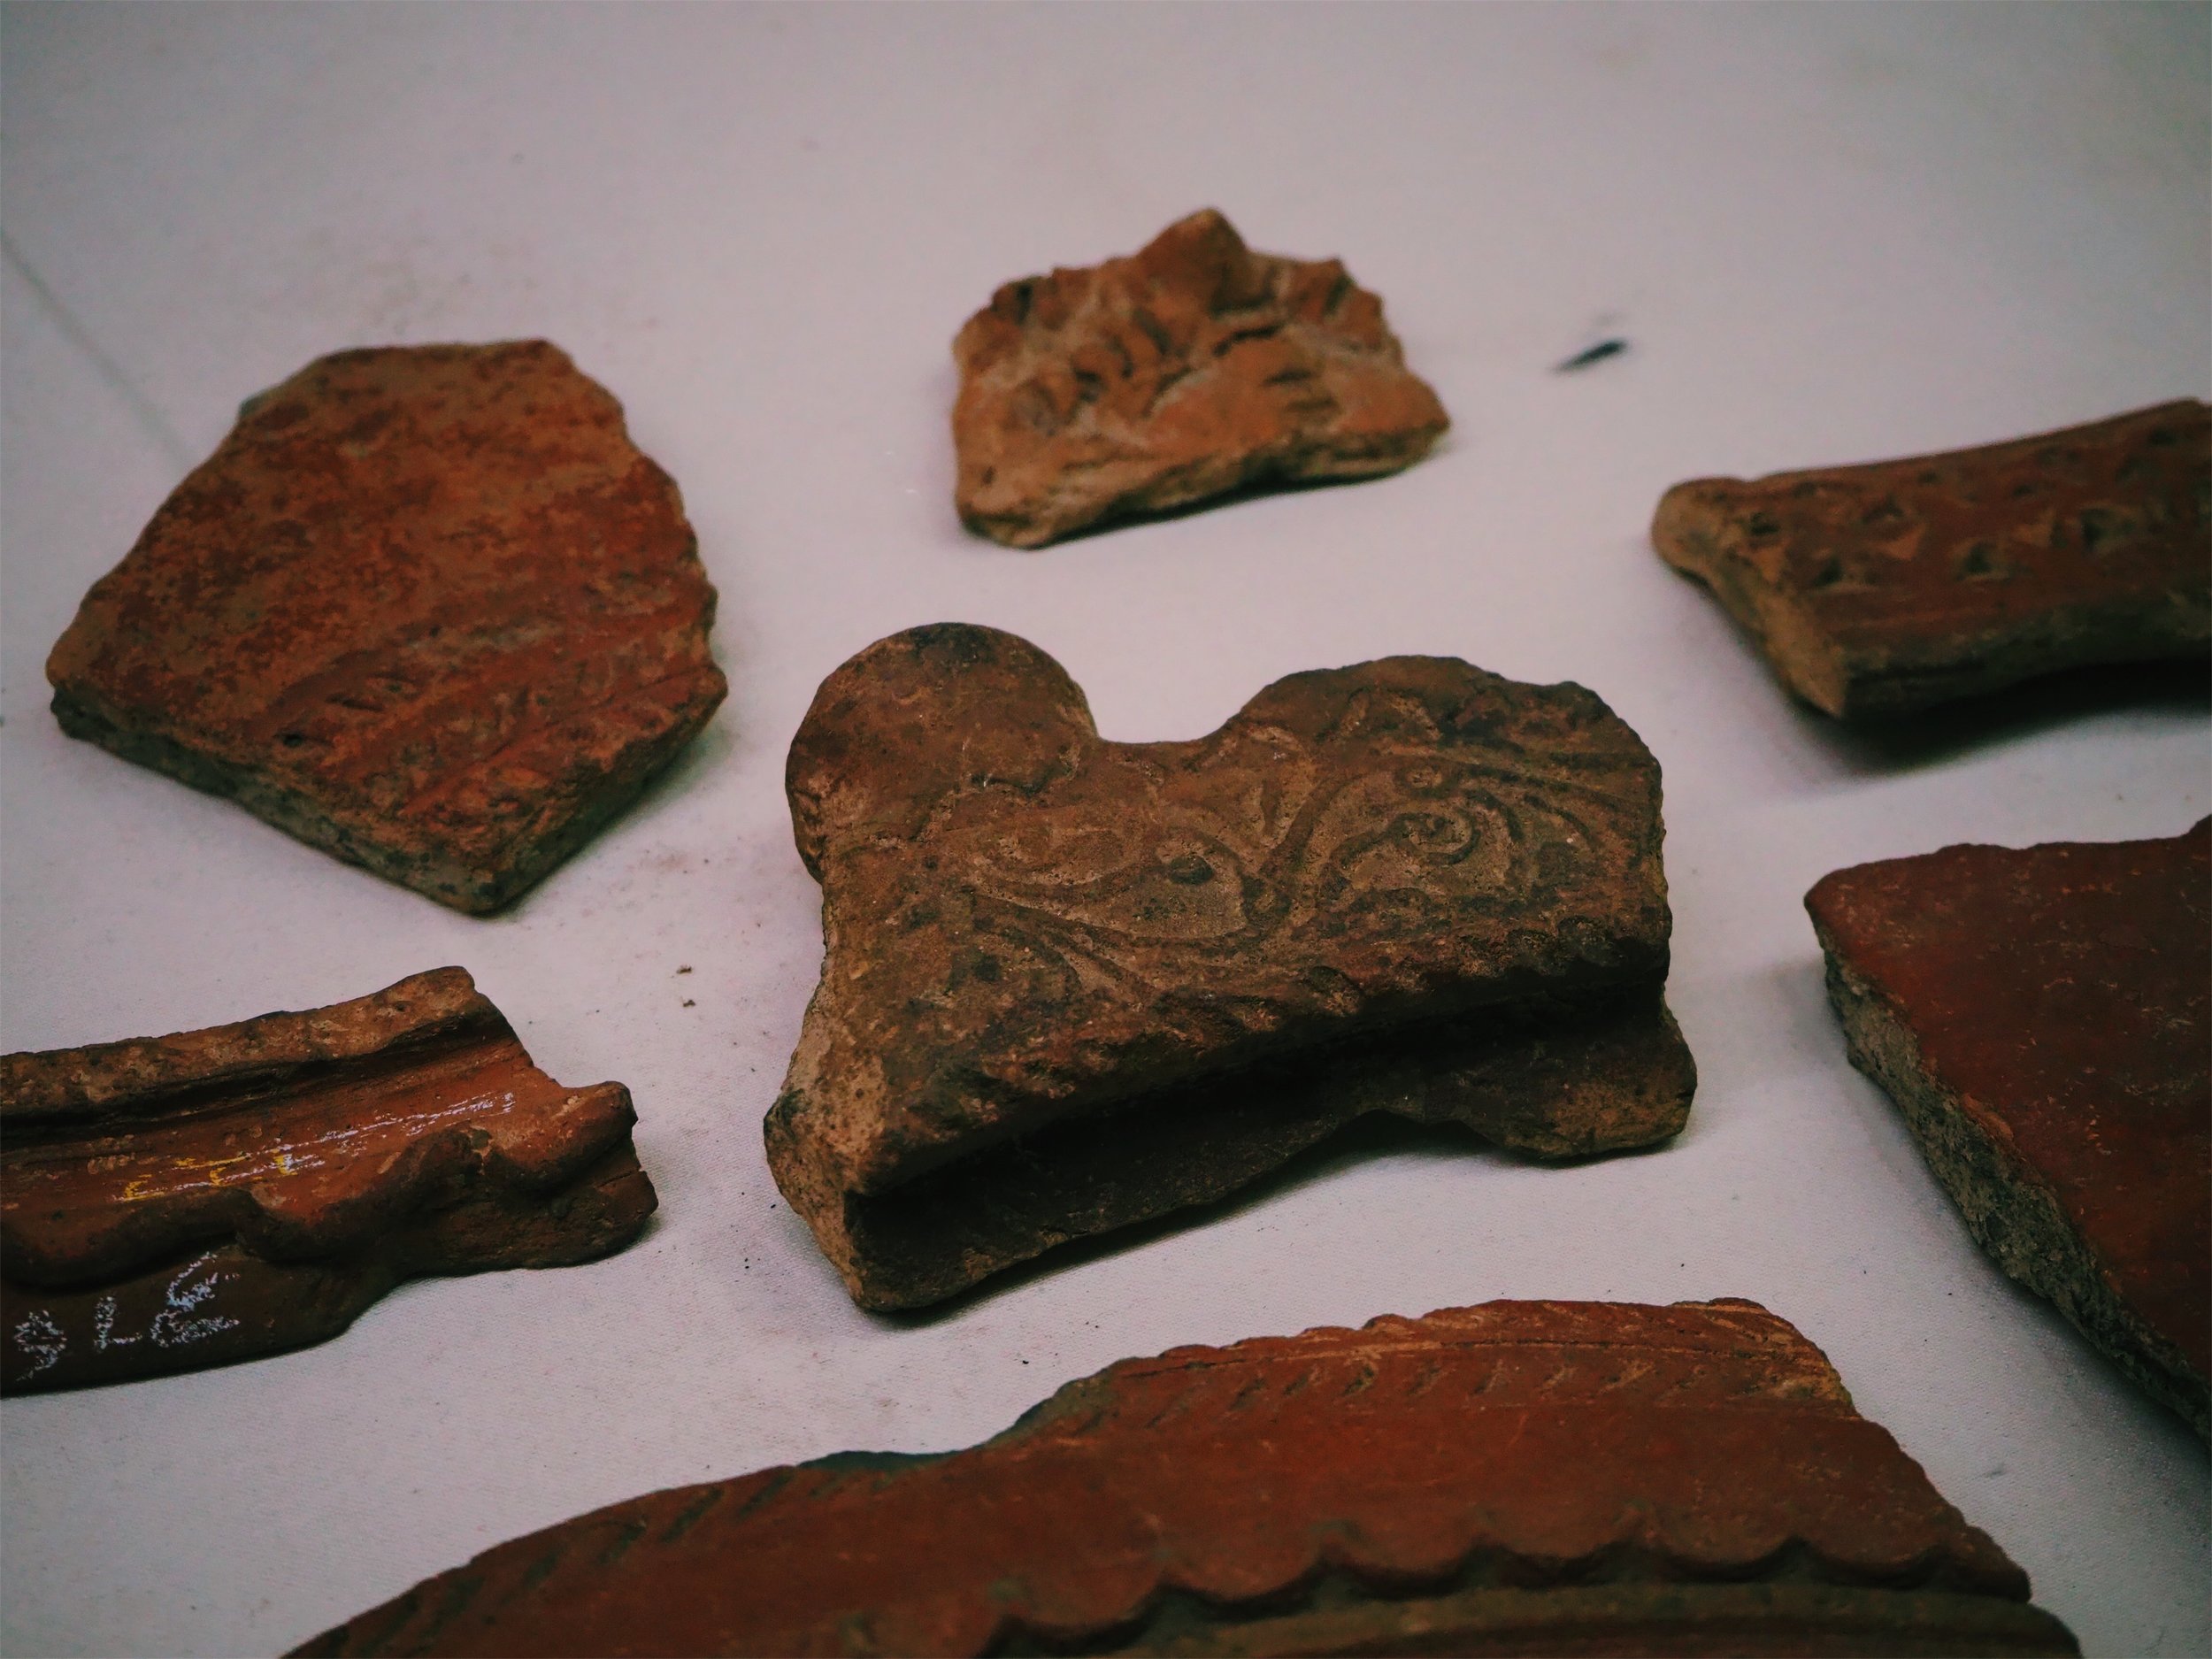
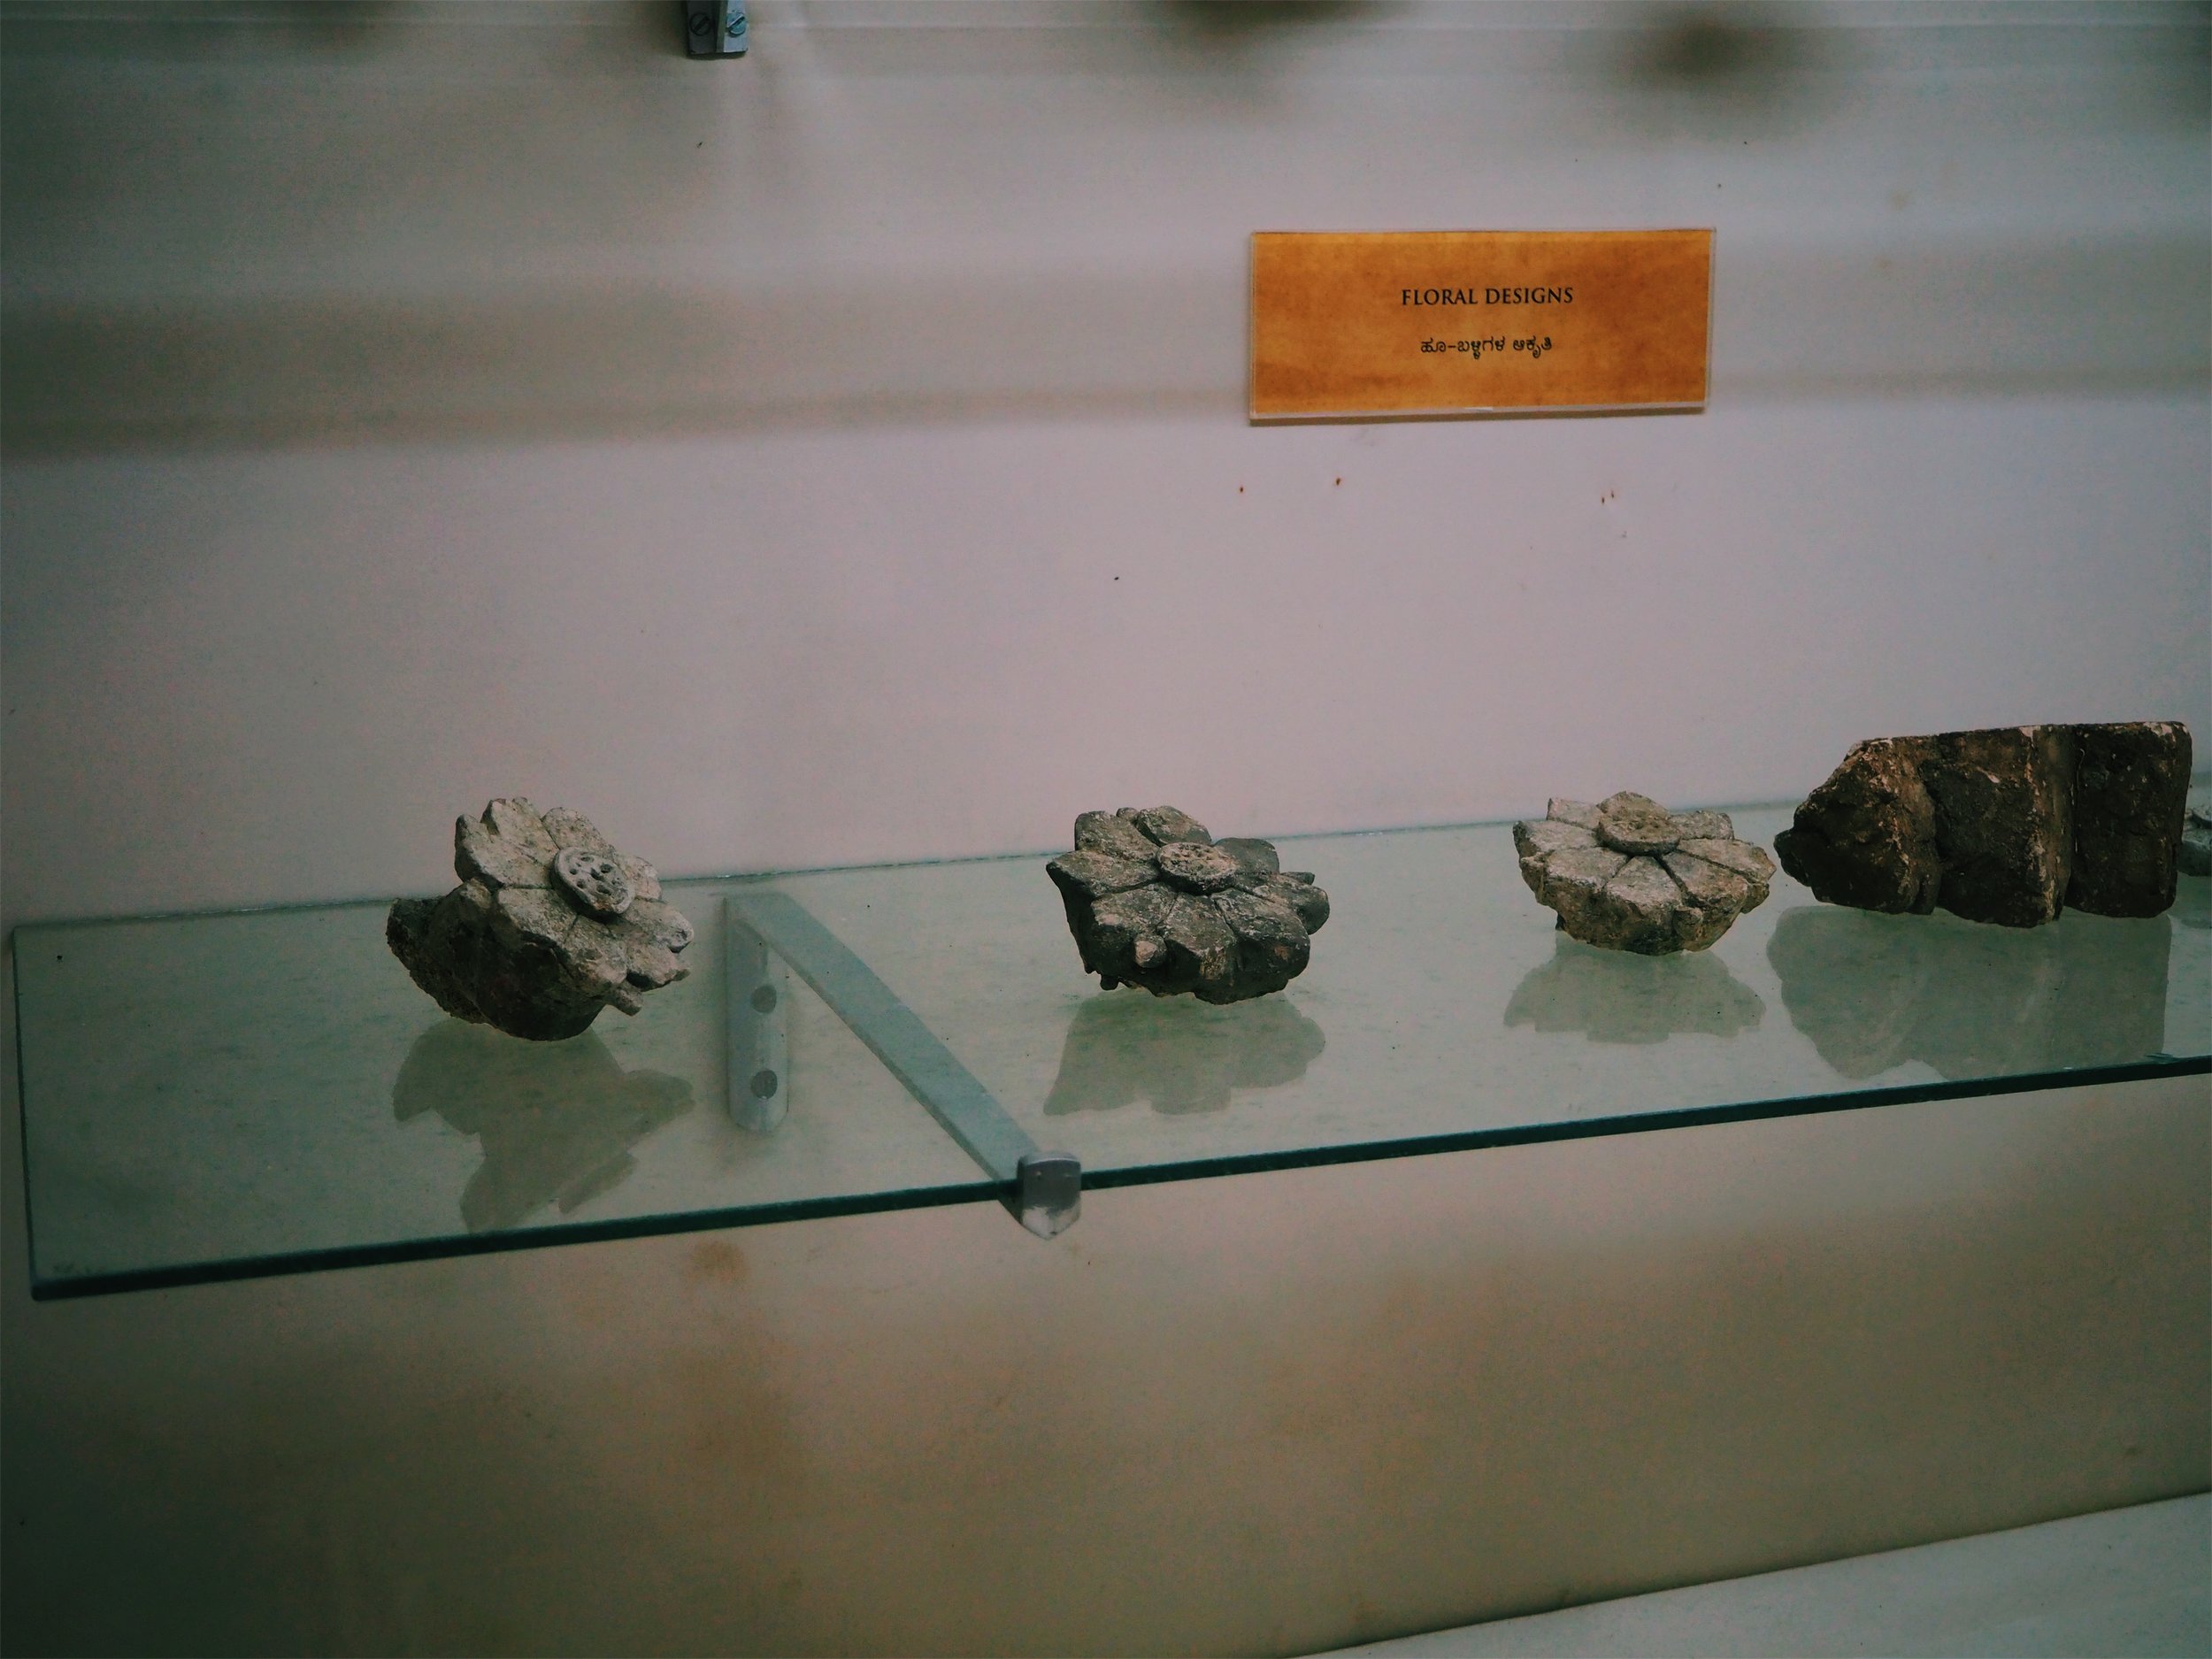
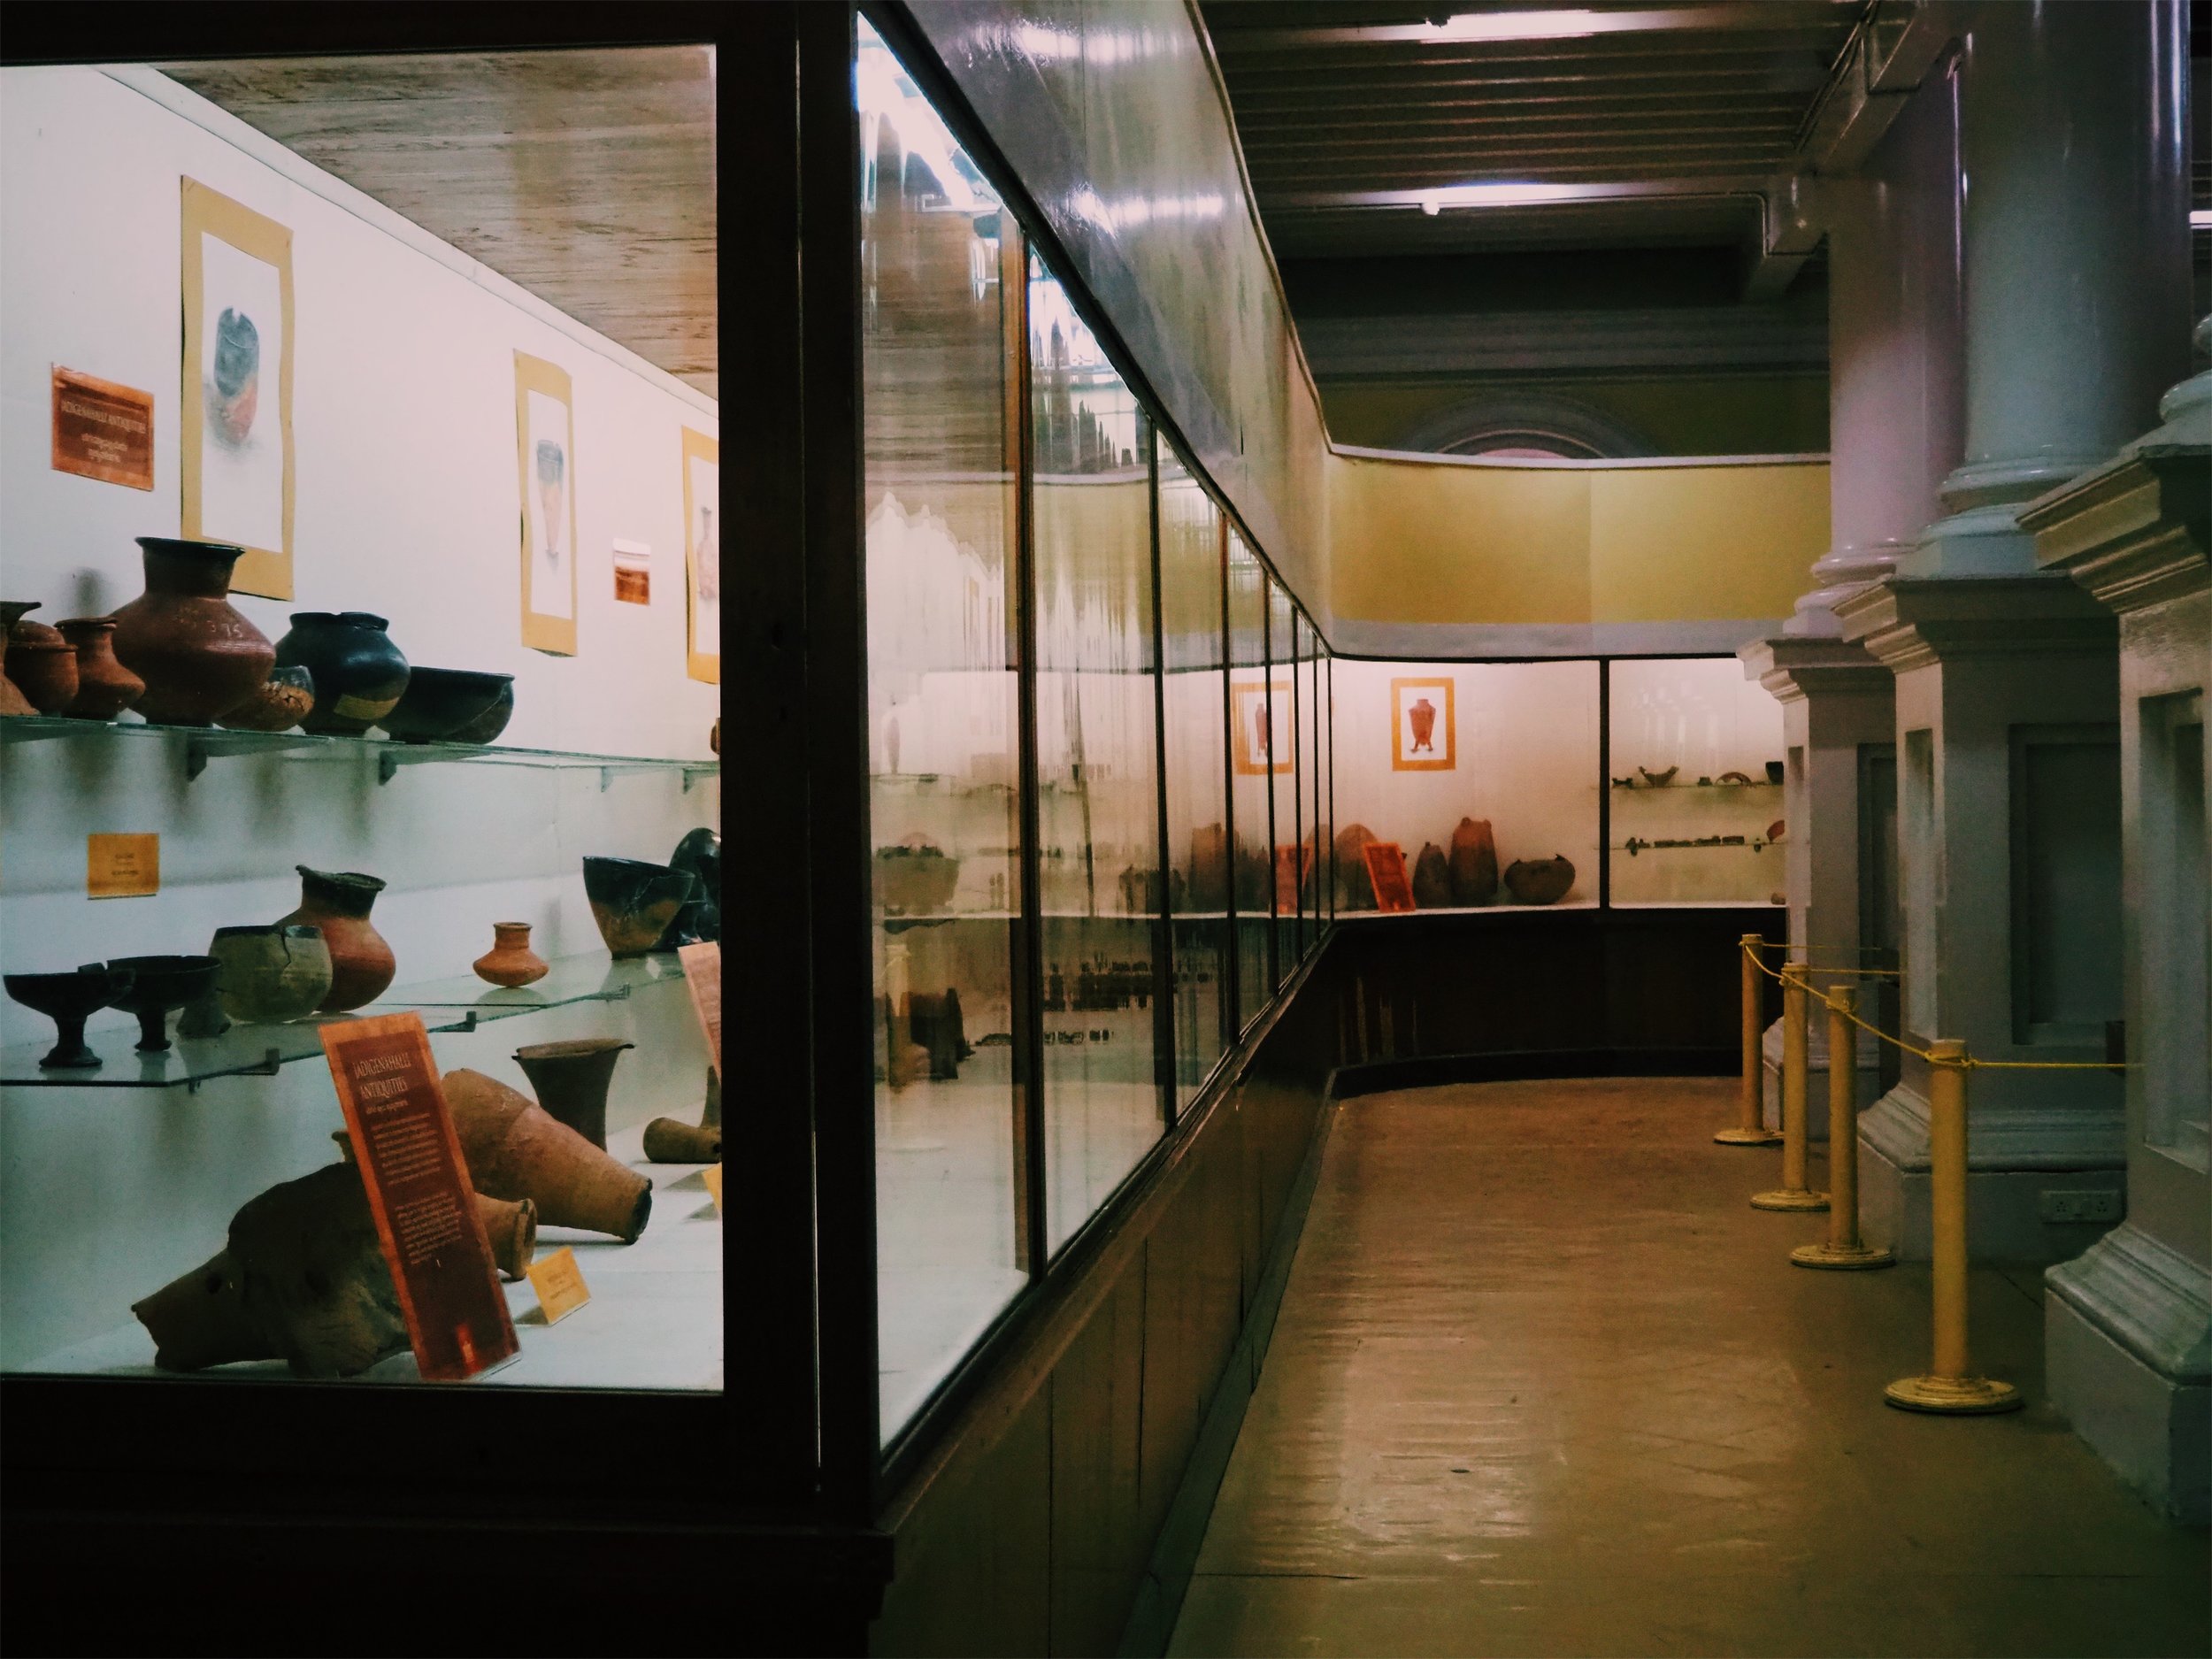
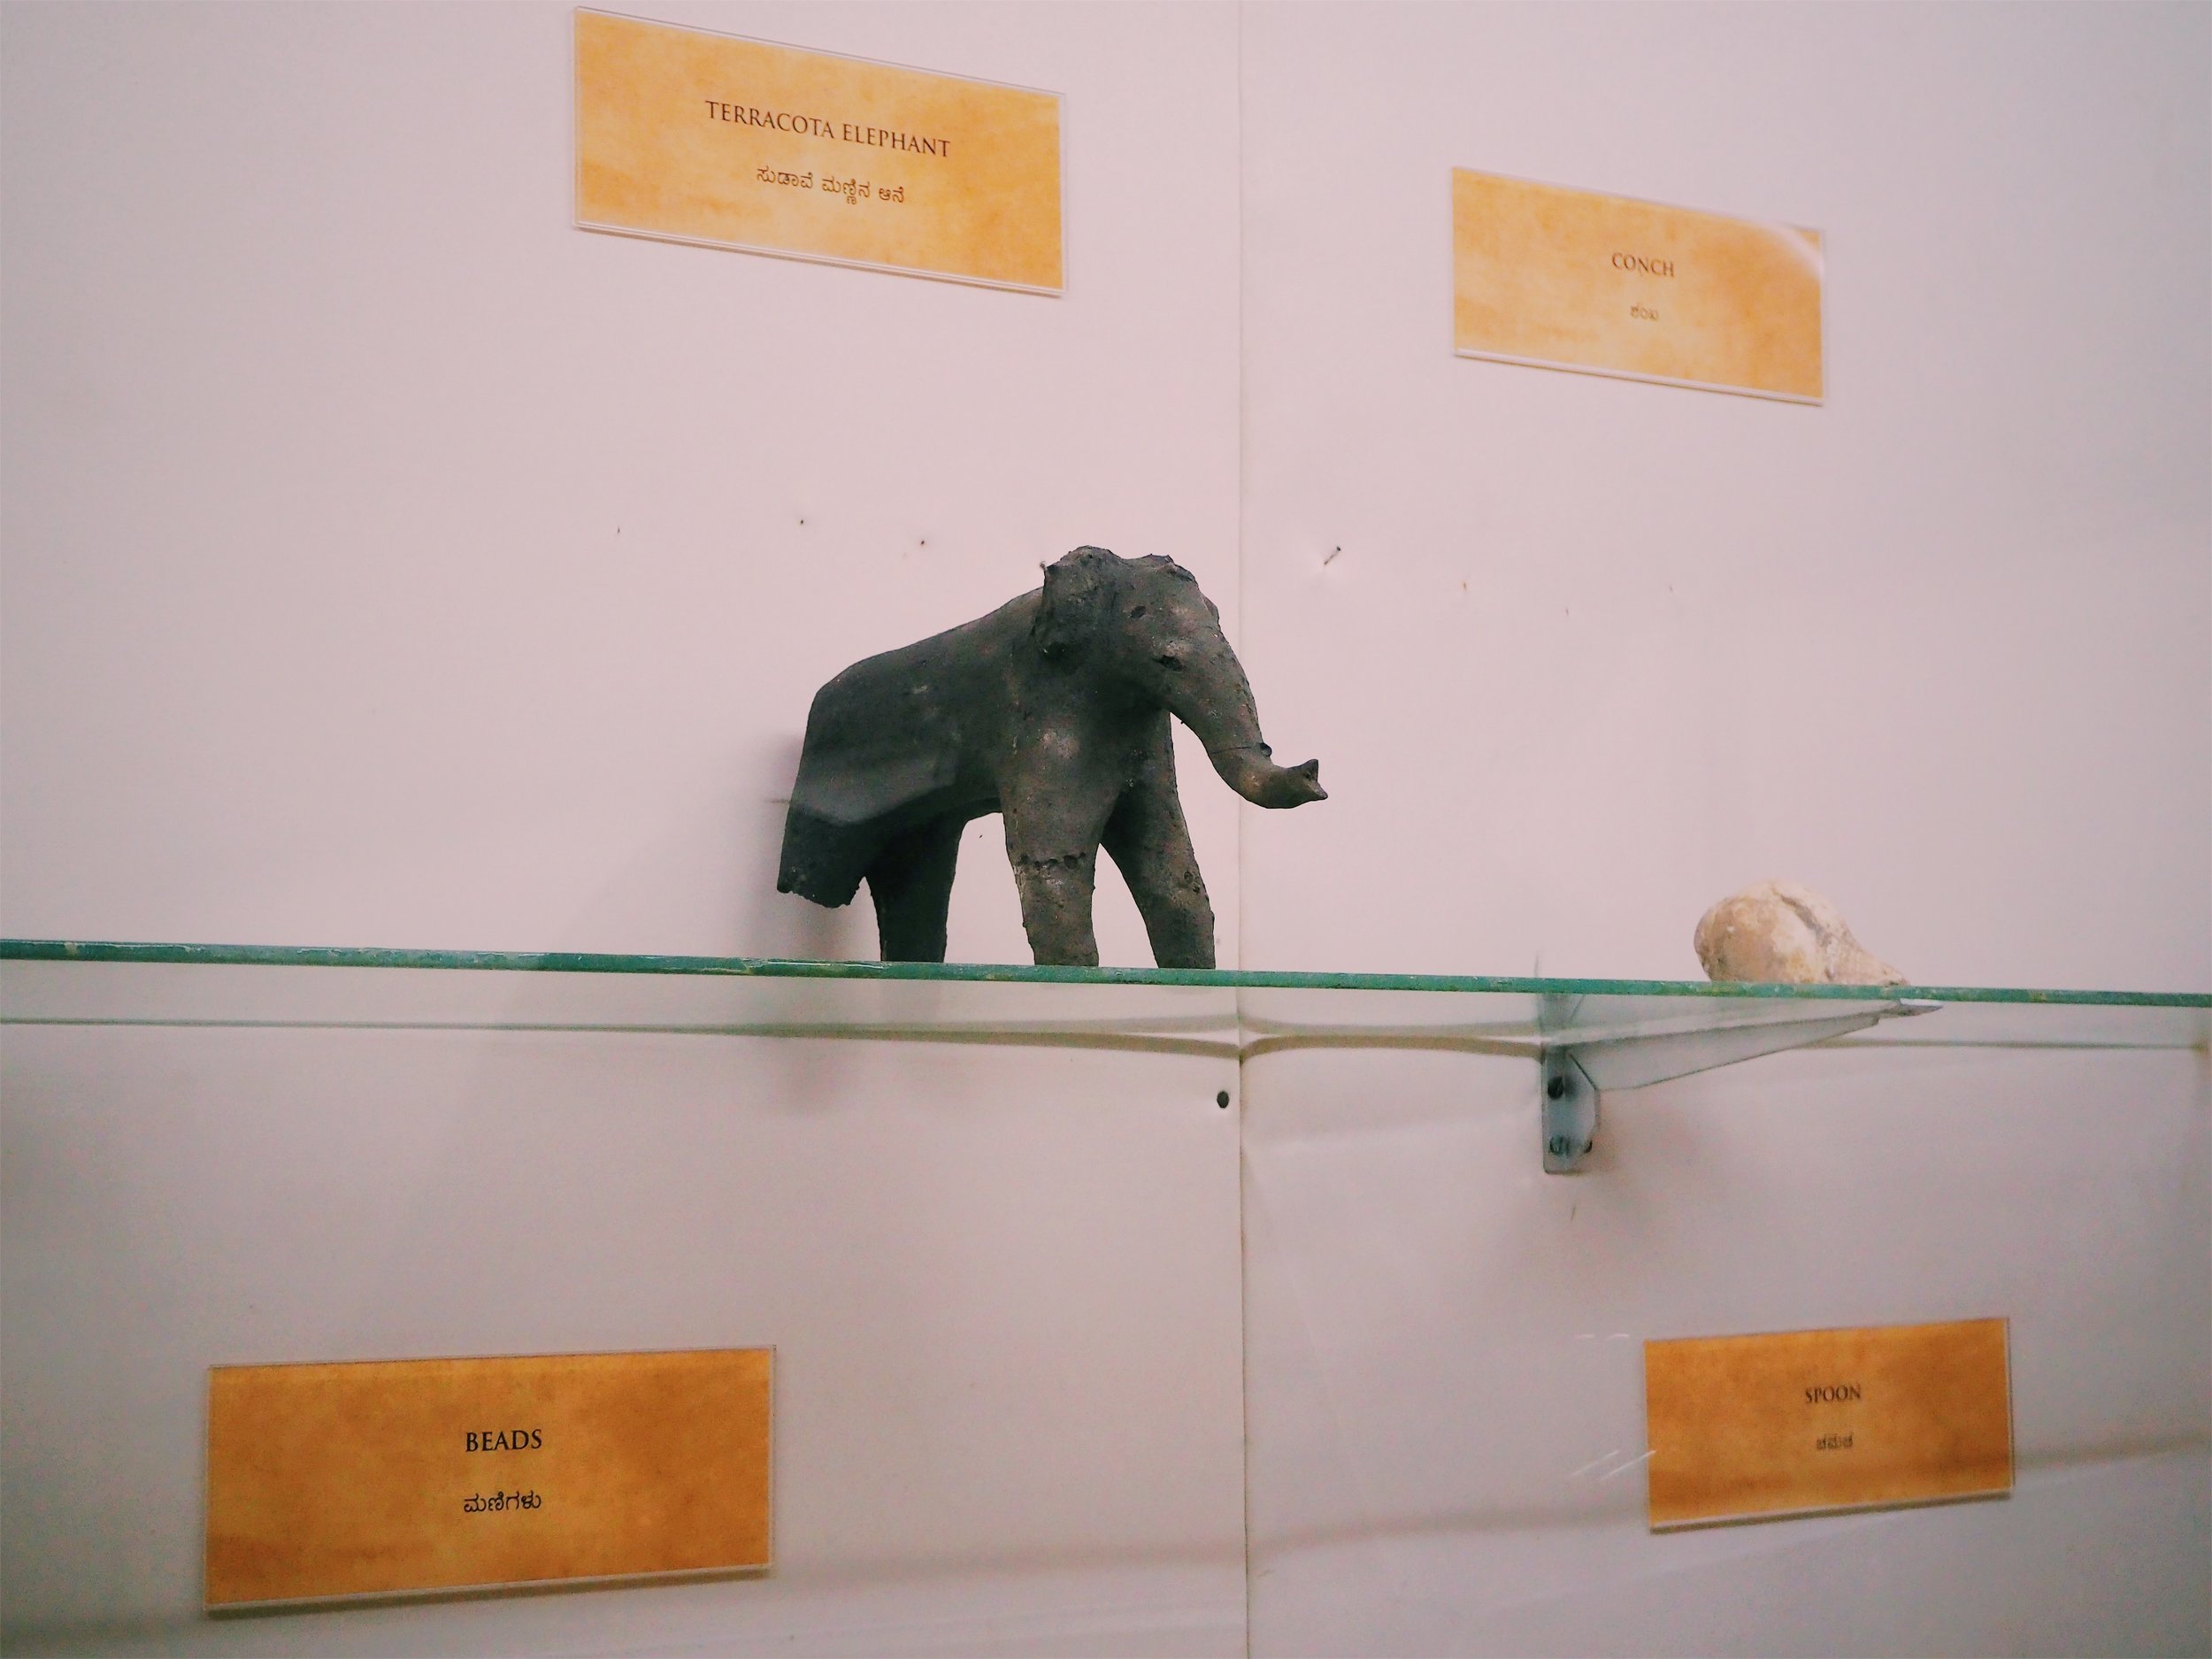

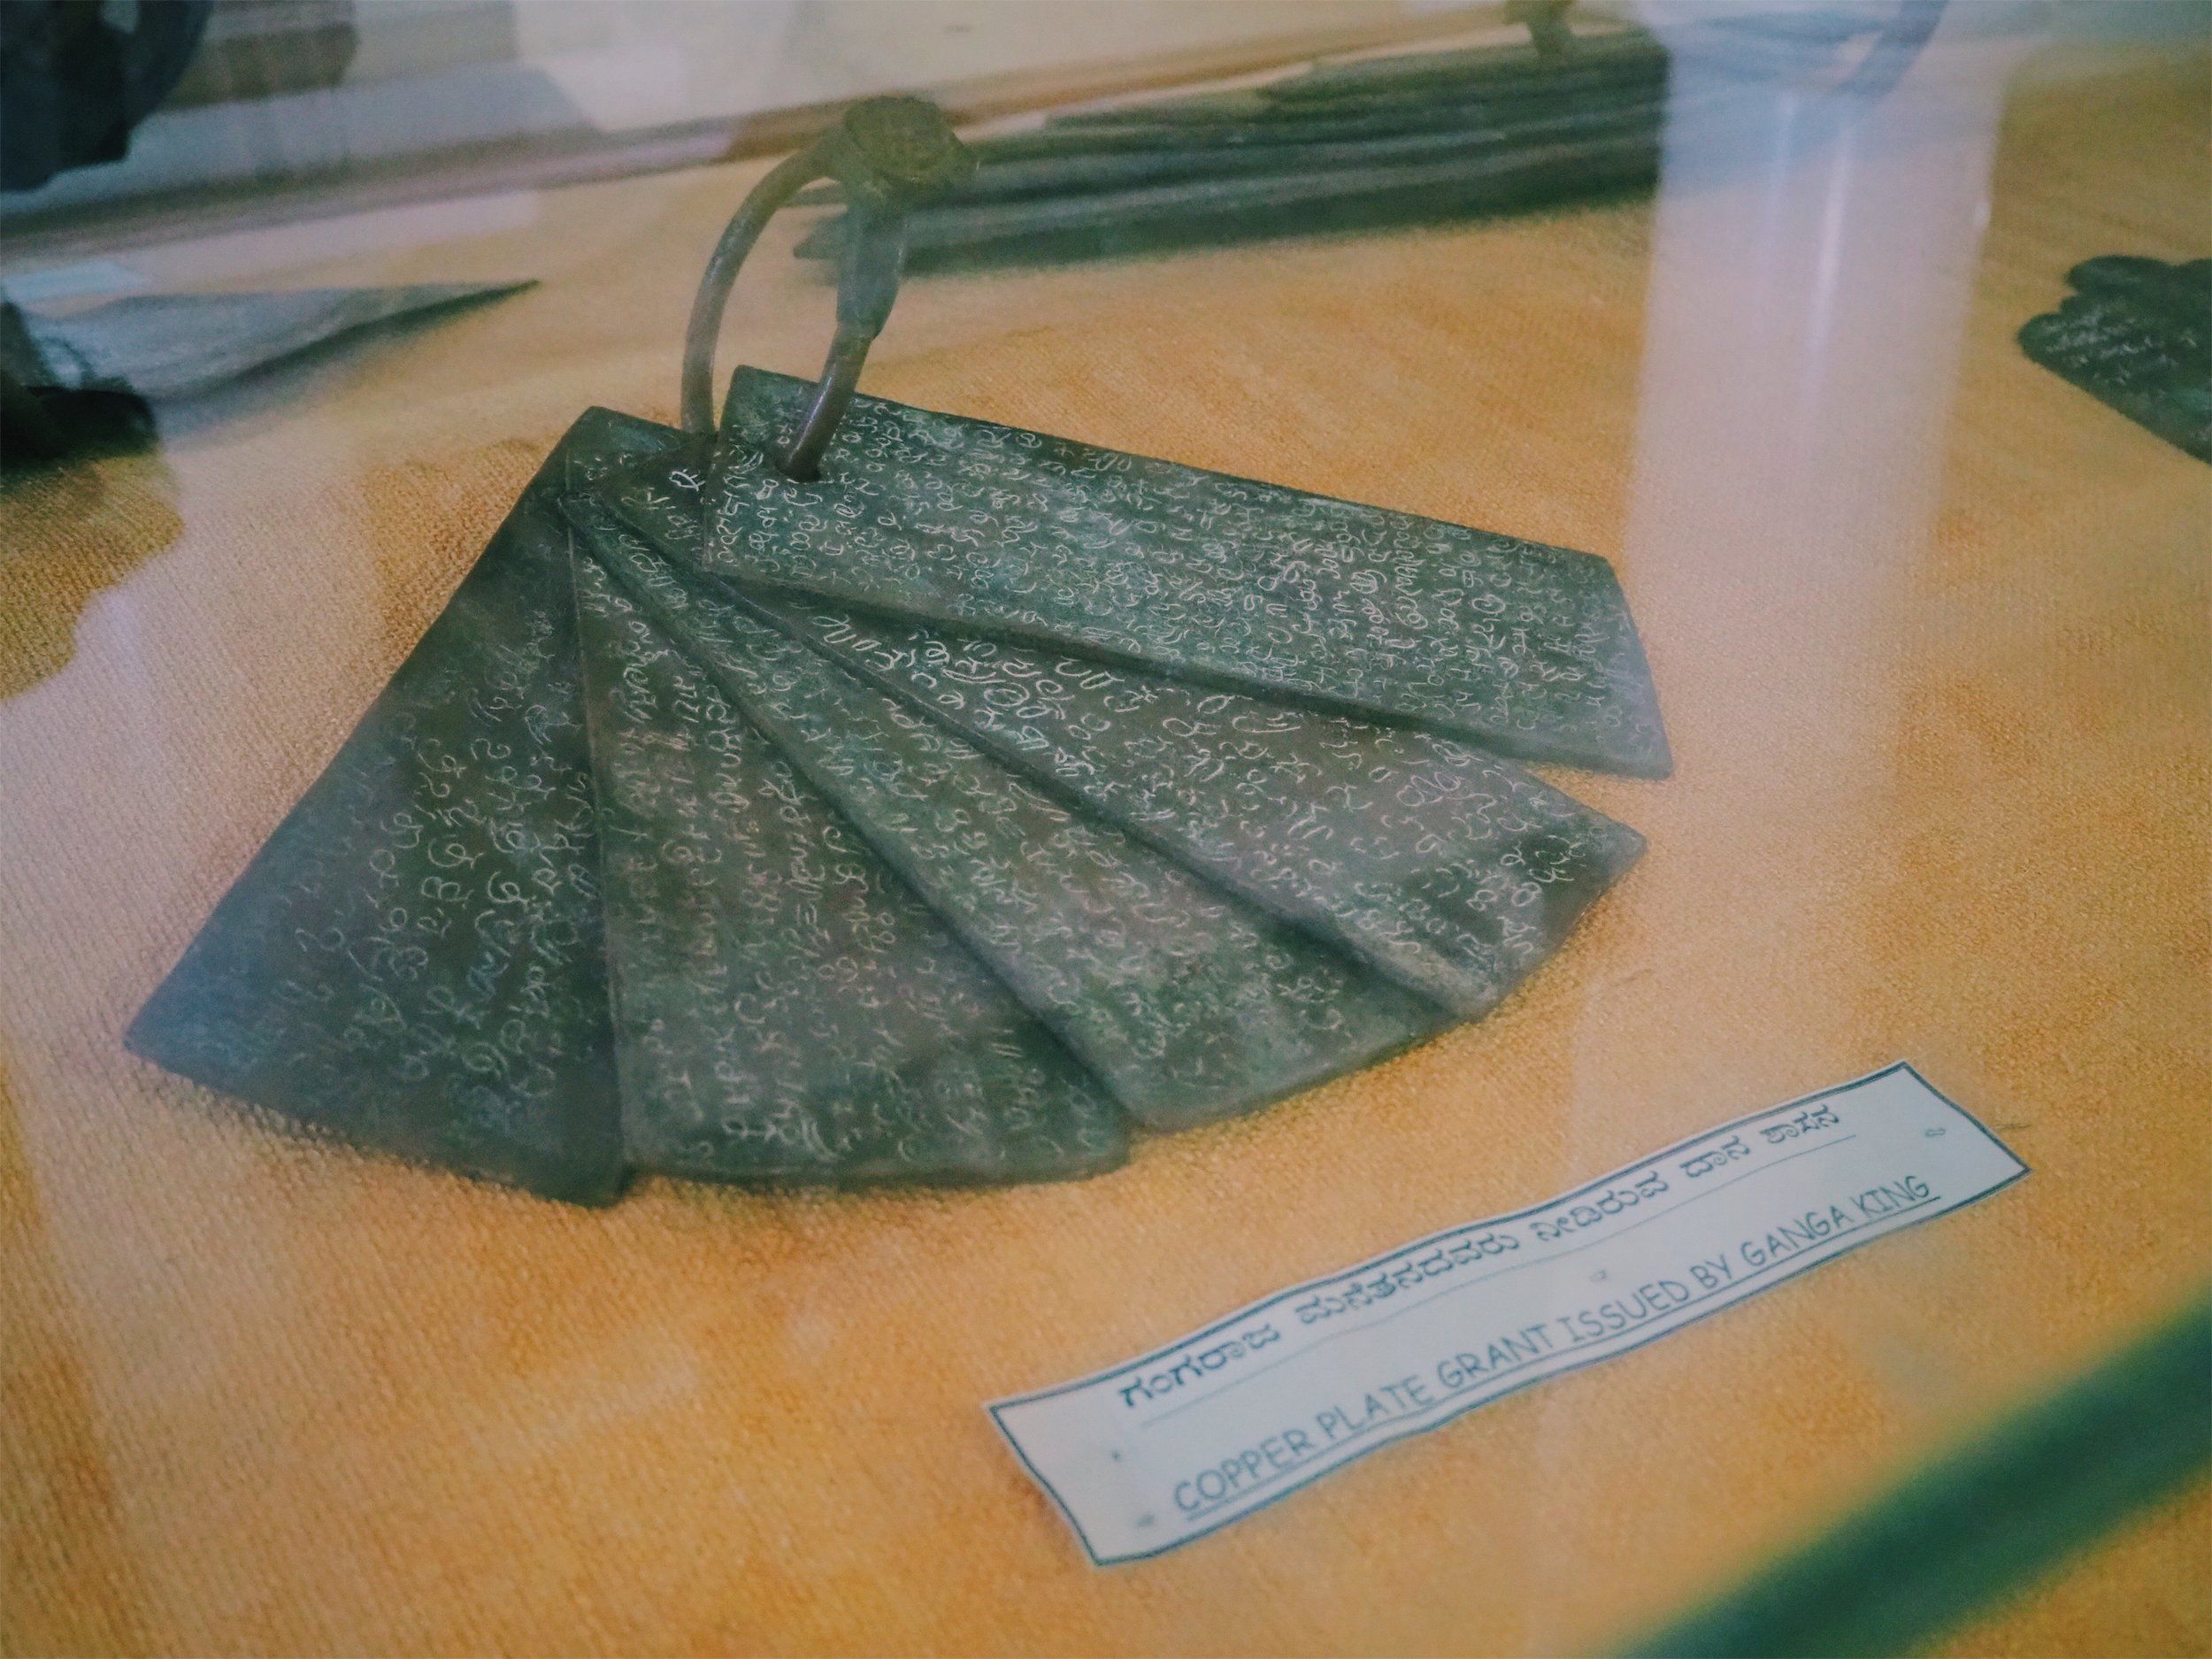
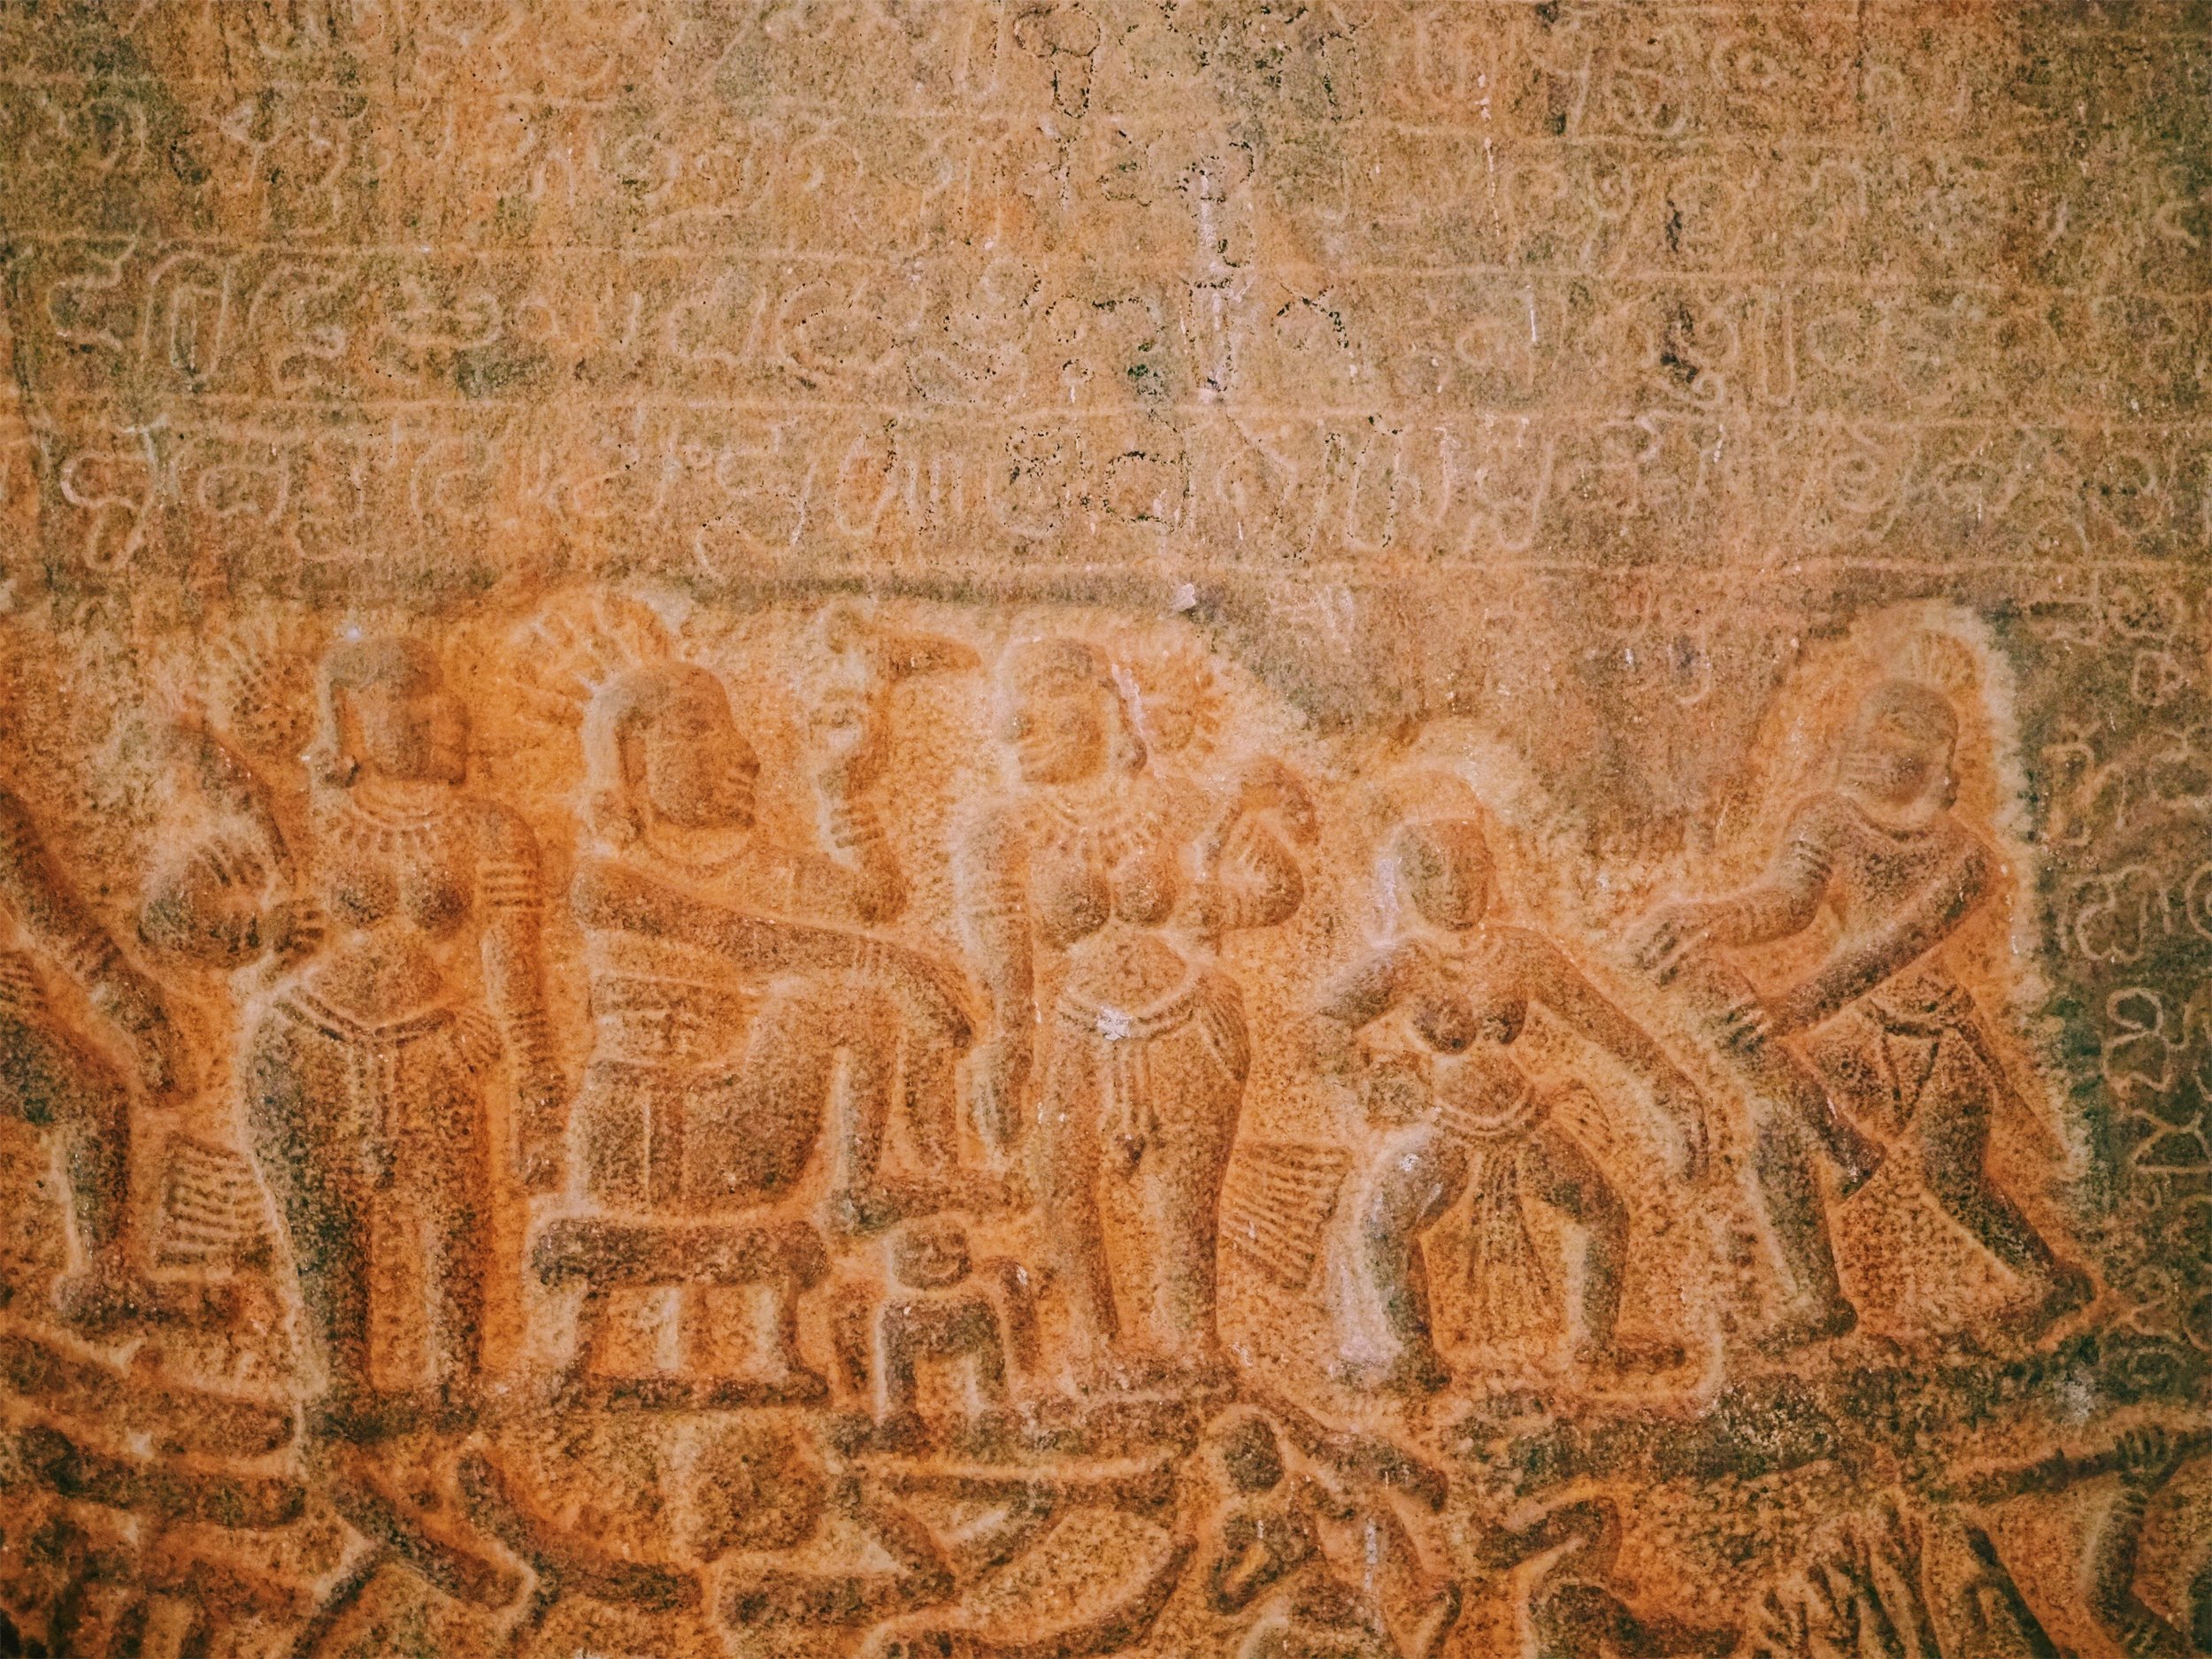
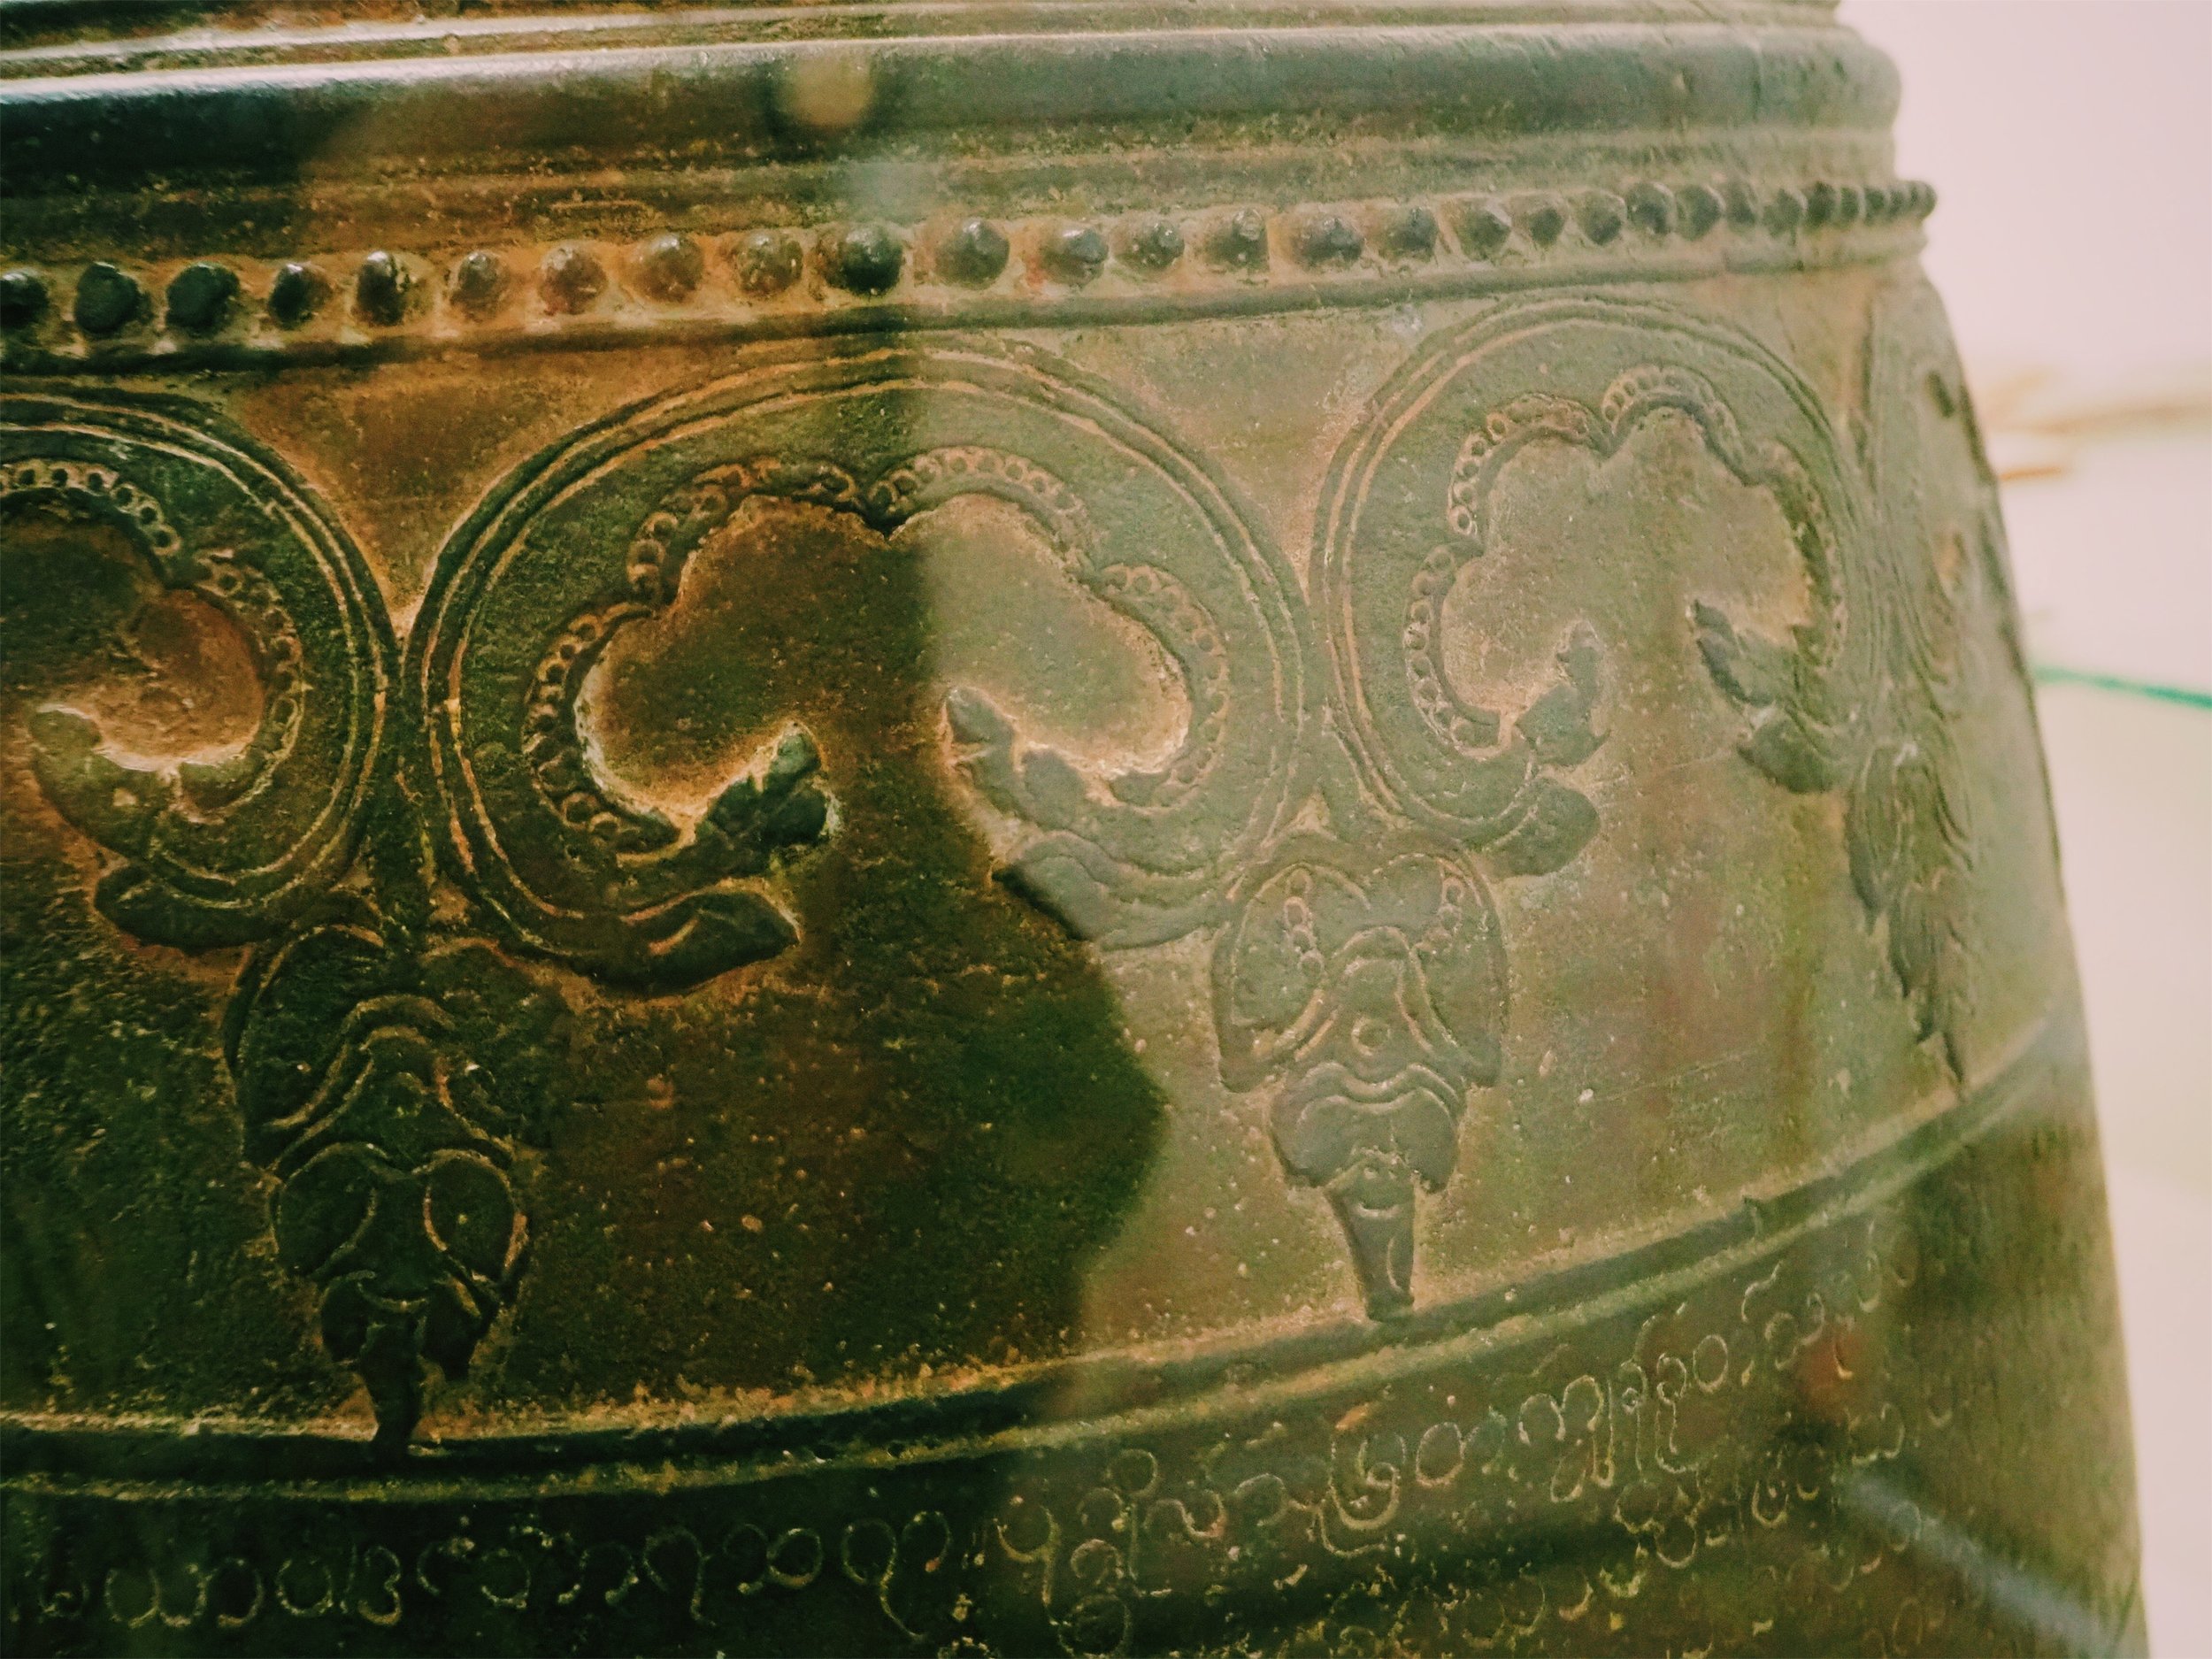
The first section was archeological artefacts. Majority of it was pottery, mostly broken. There were also small trinkets and ornamental pieces but the lack of information of what it was or what it could have been a part of was extremely frustrating.

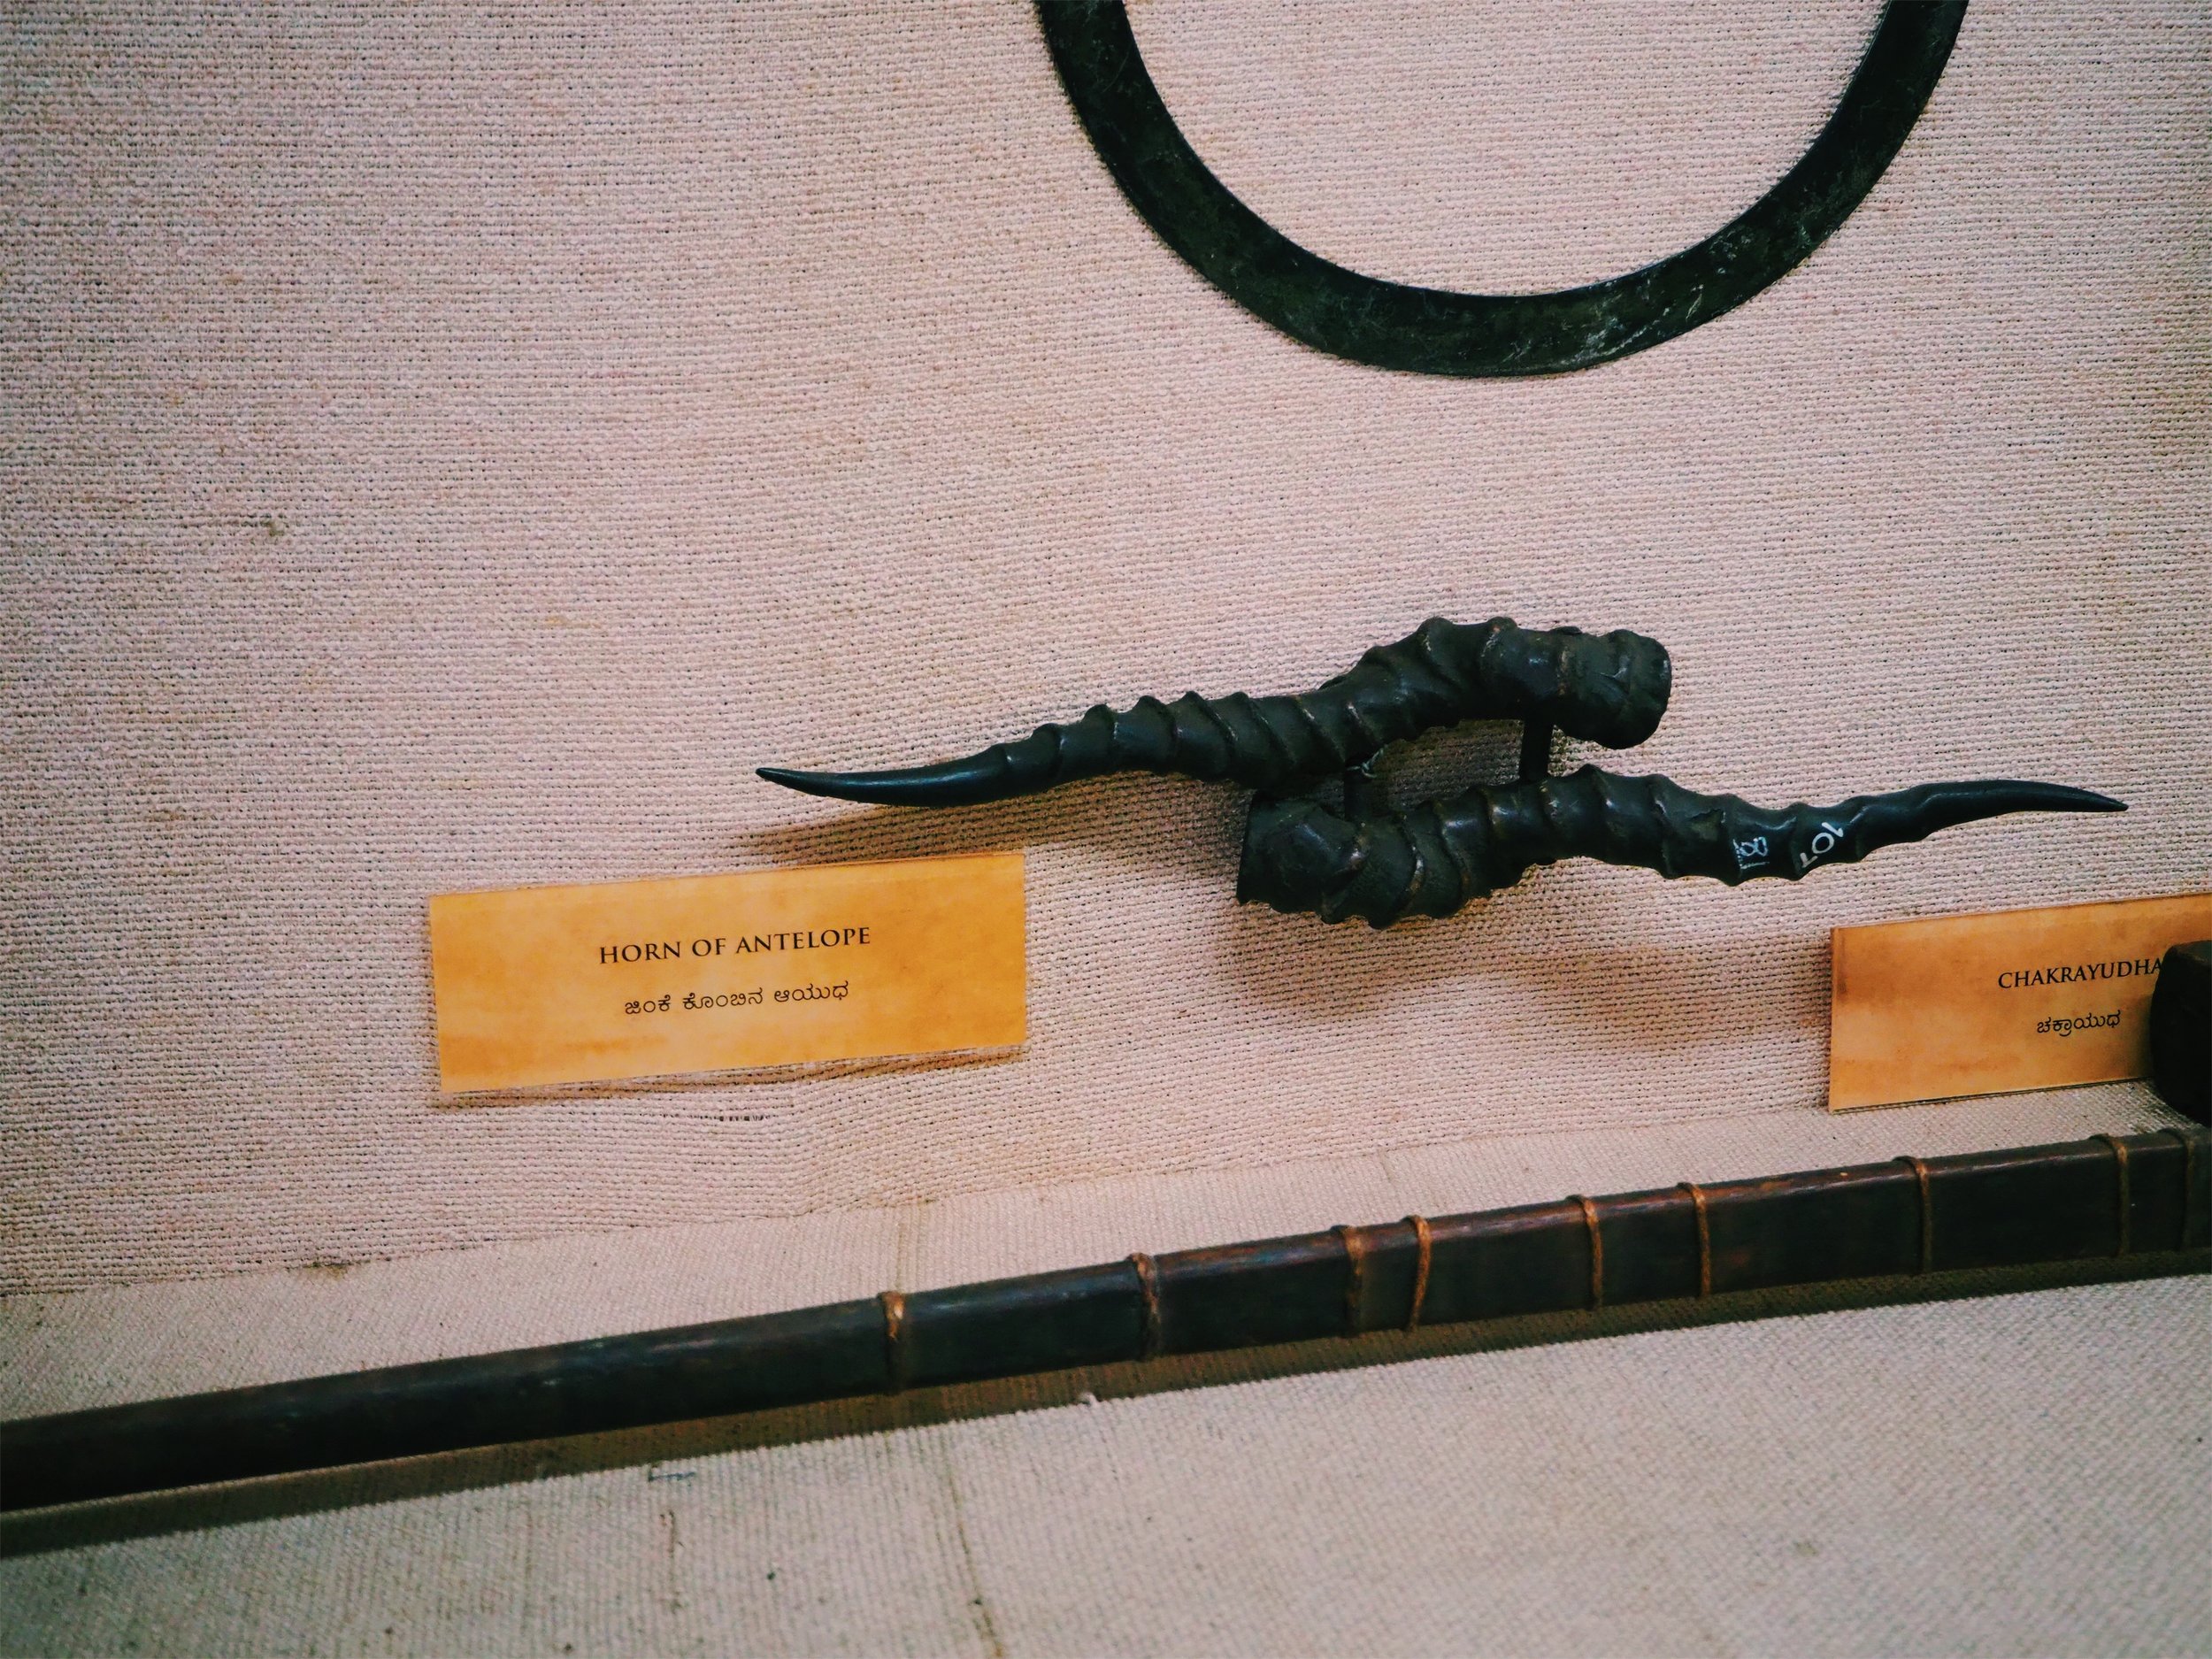
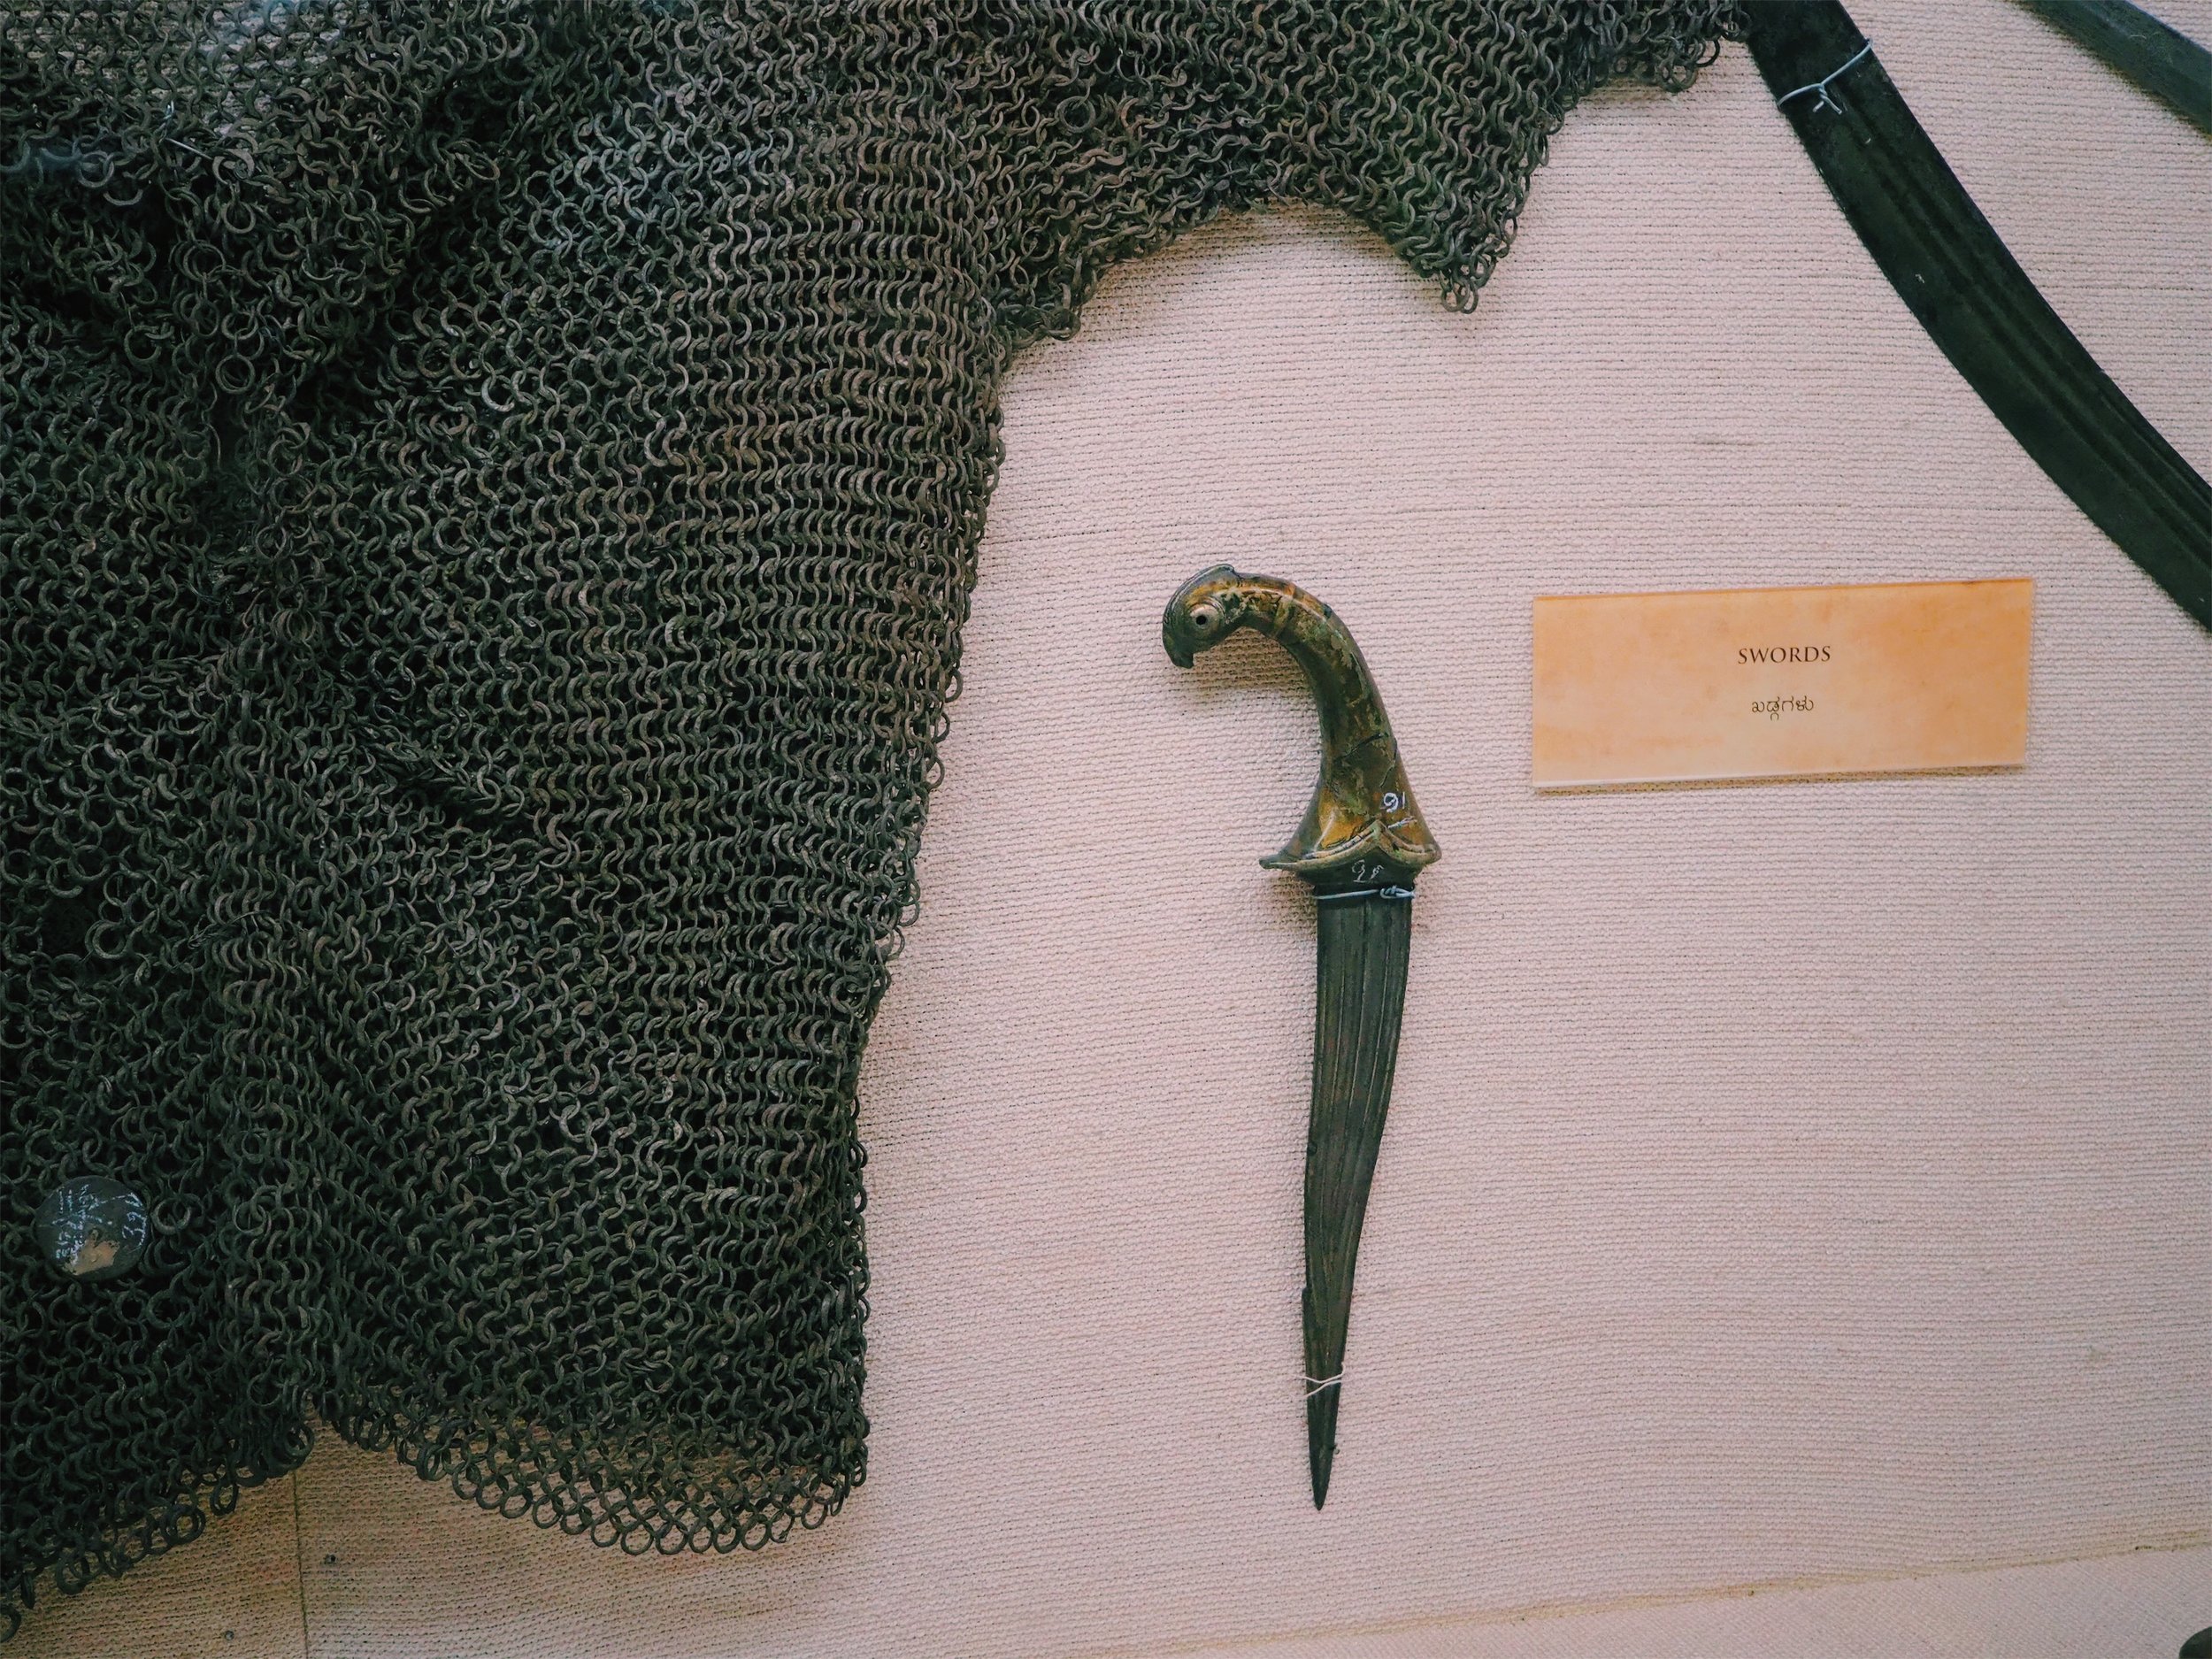
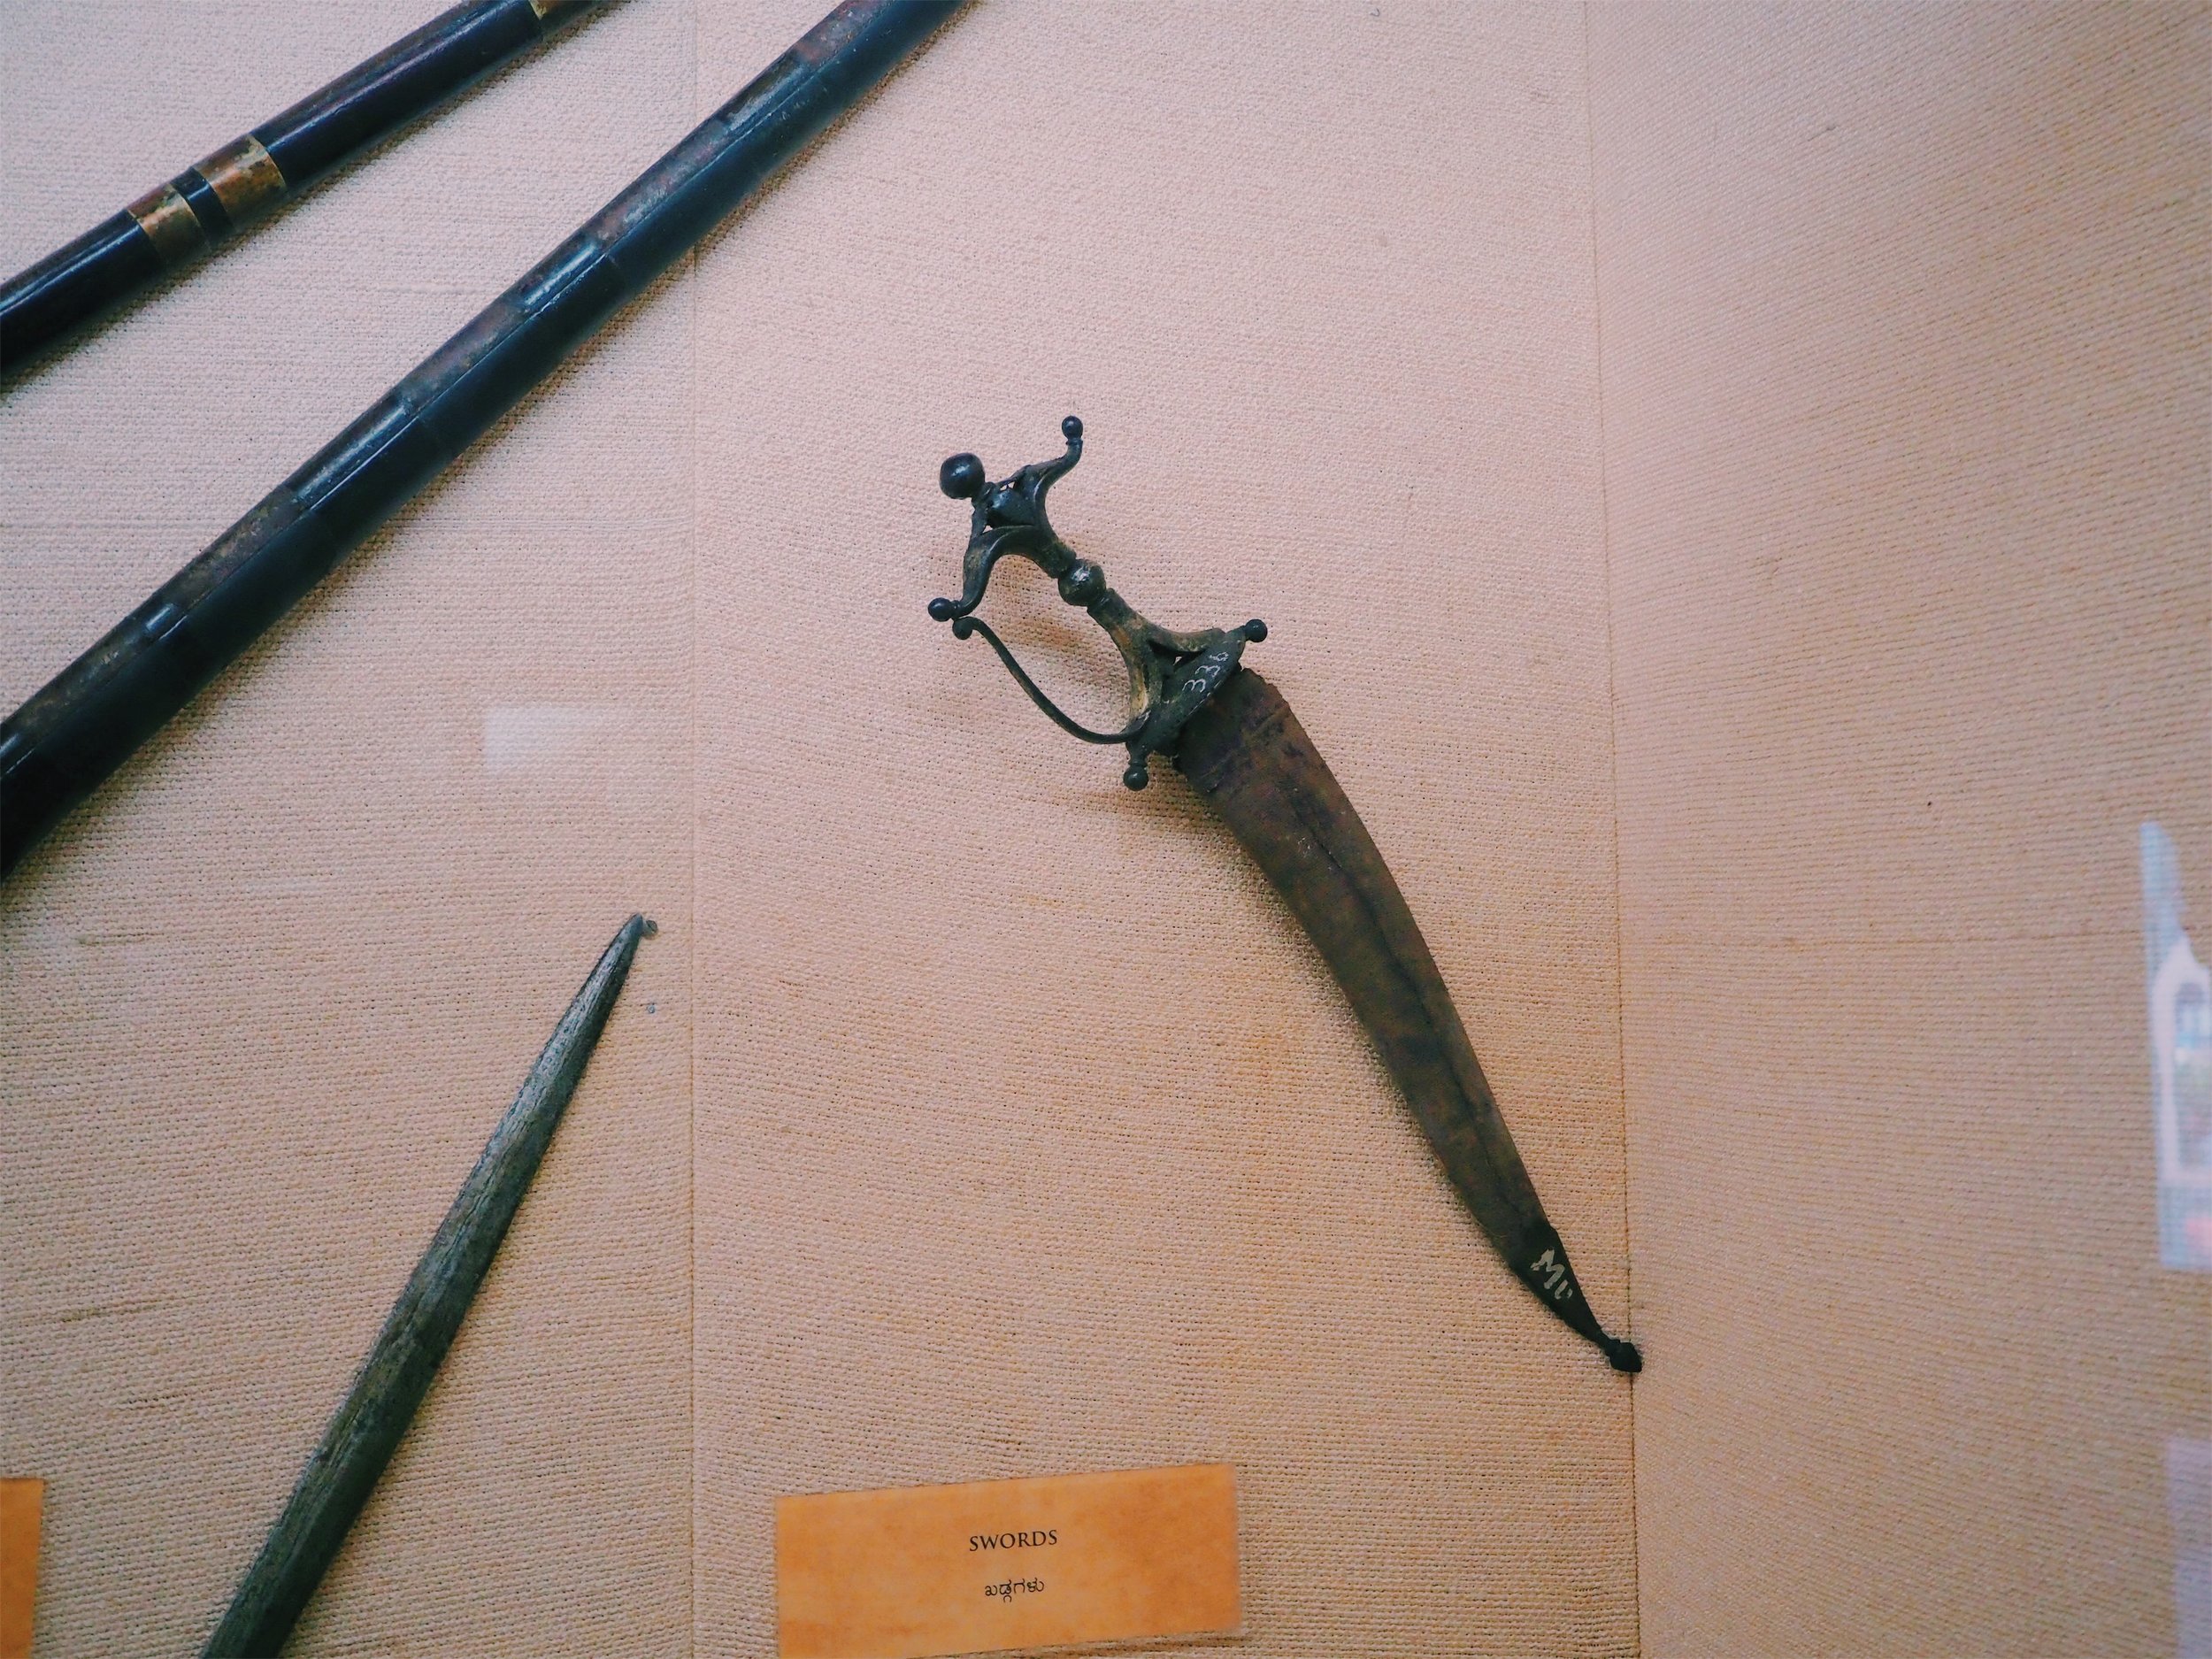
The weapons display was well stocked and there even was a chain-mail suit. I couldn’t help but wonder if they mixed up South Indian and North Indian weapons. As usual there wasn’t much information. The most stunning of the lot was an axe with a beautiful blue stone inlay and hand knives with the most interesting handles. The things that stood out visually to me was a hand weapon made from antler horns and a ginormous cross bow that can actually go unnoticed.

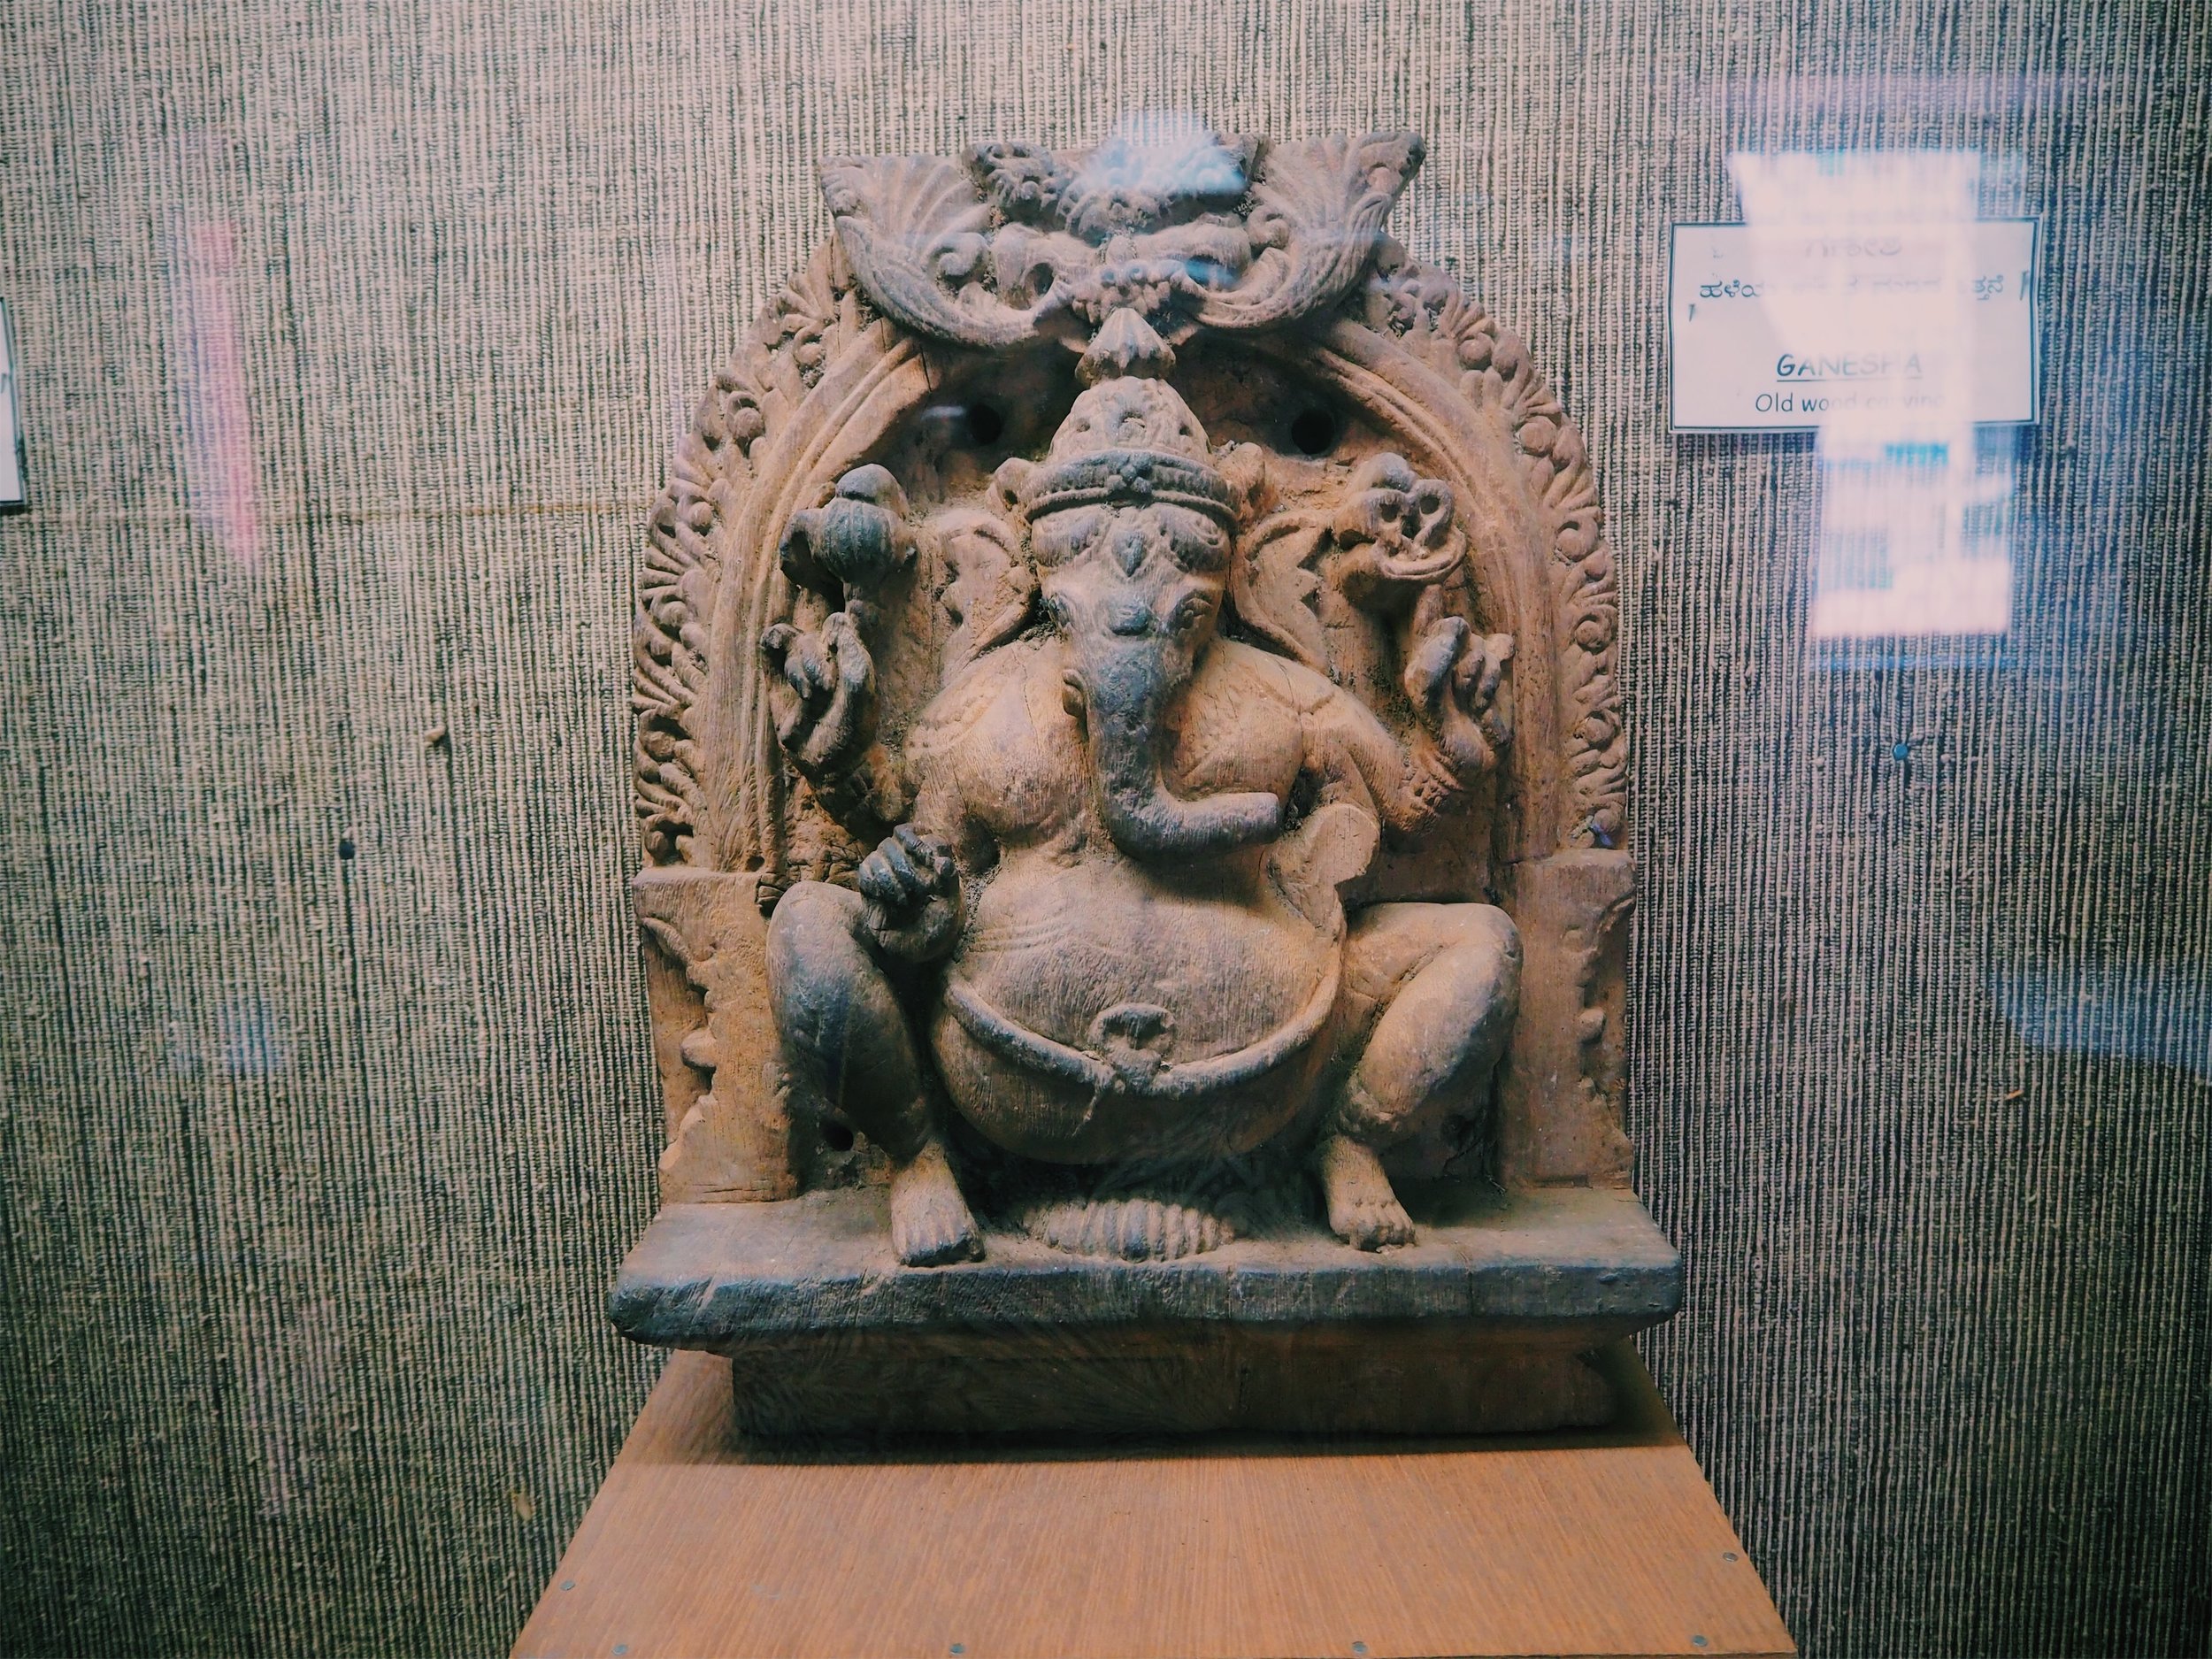
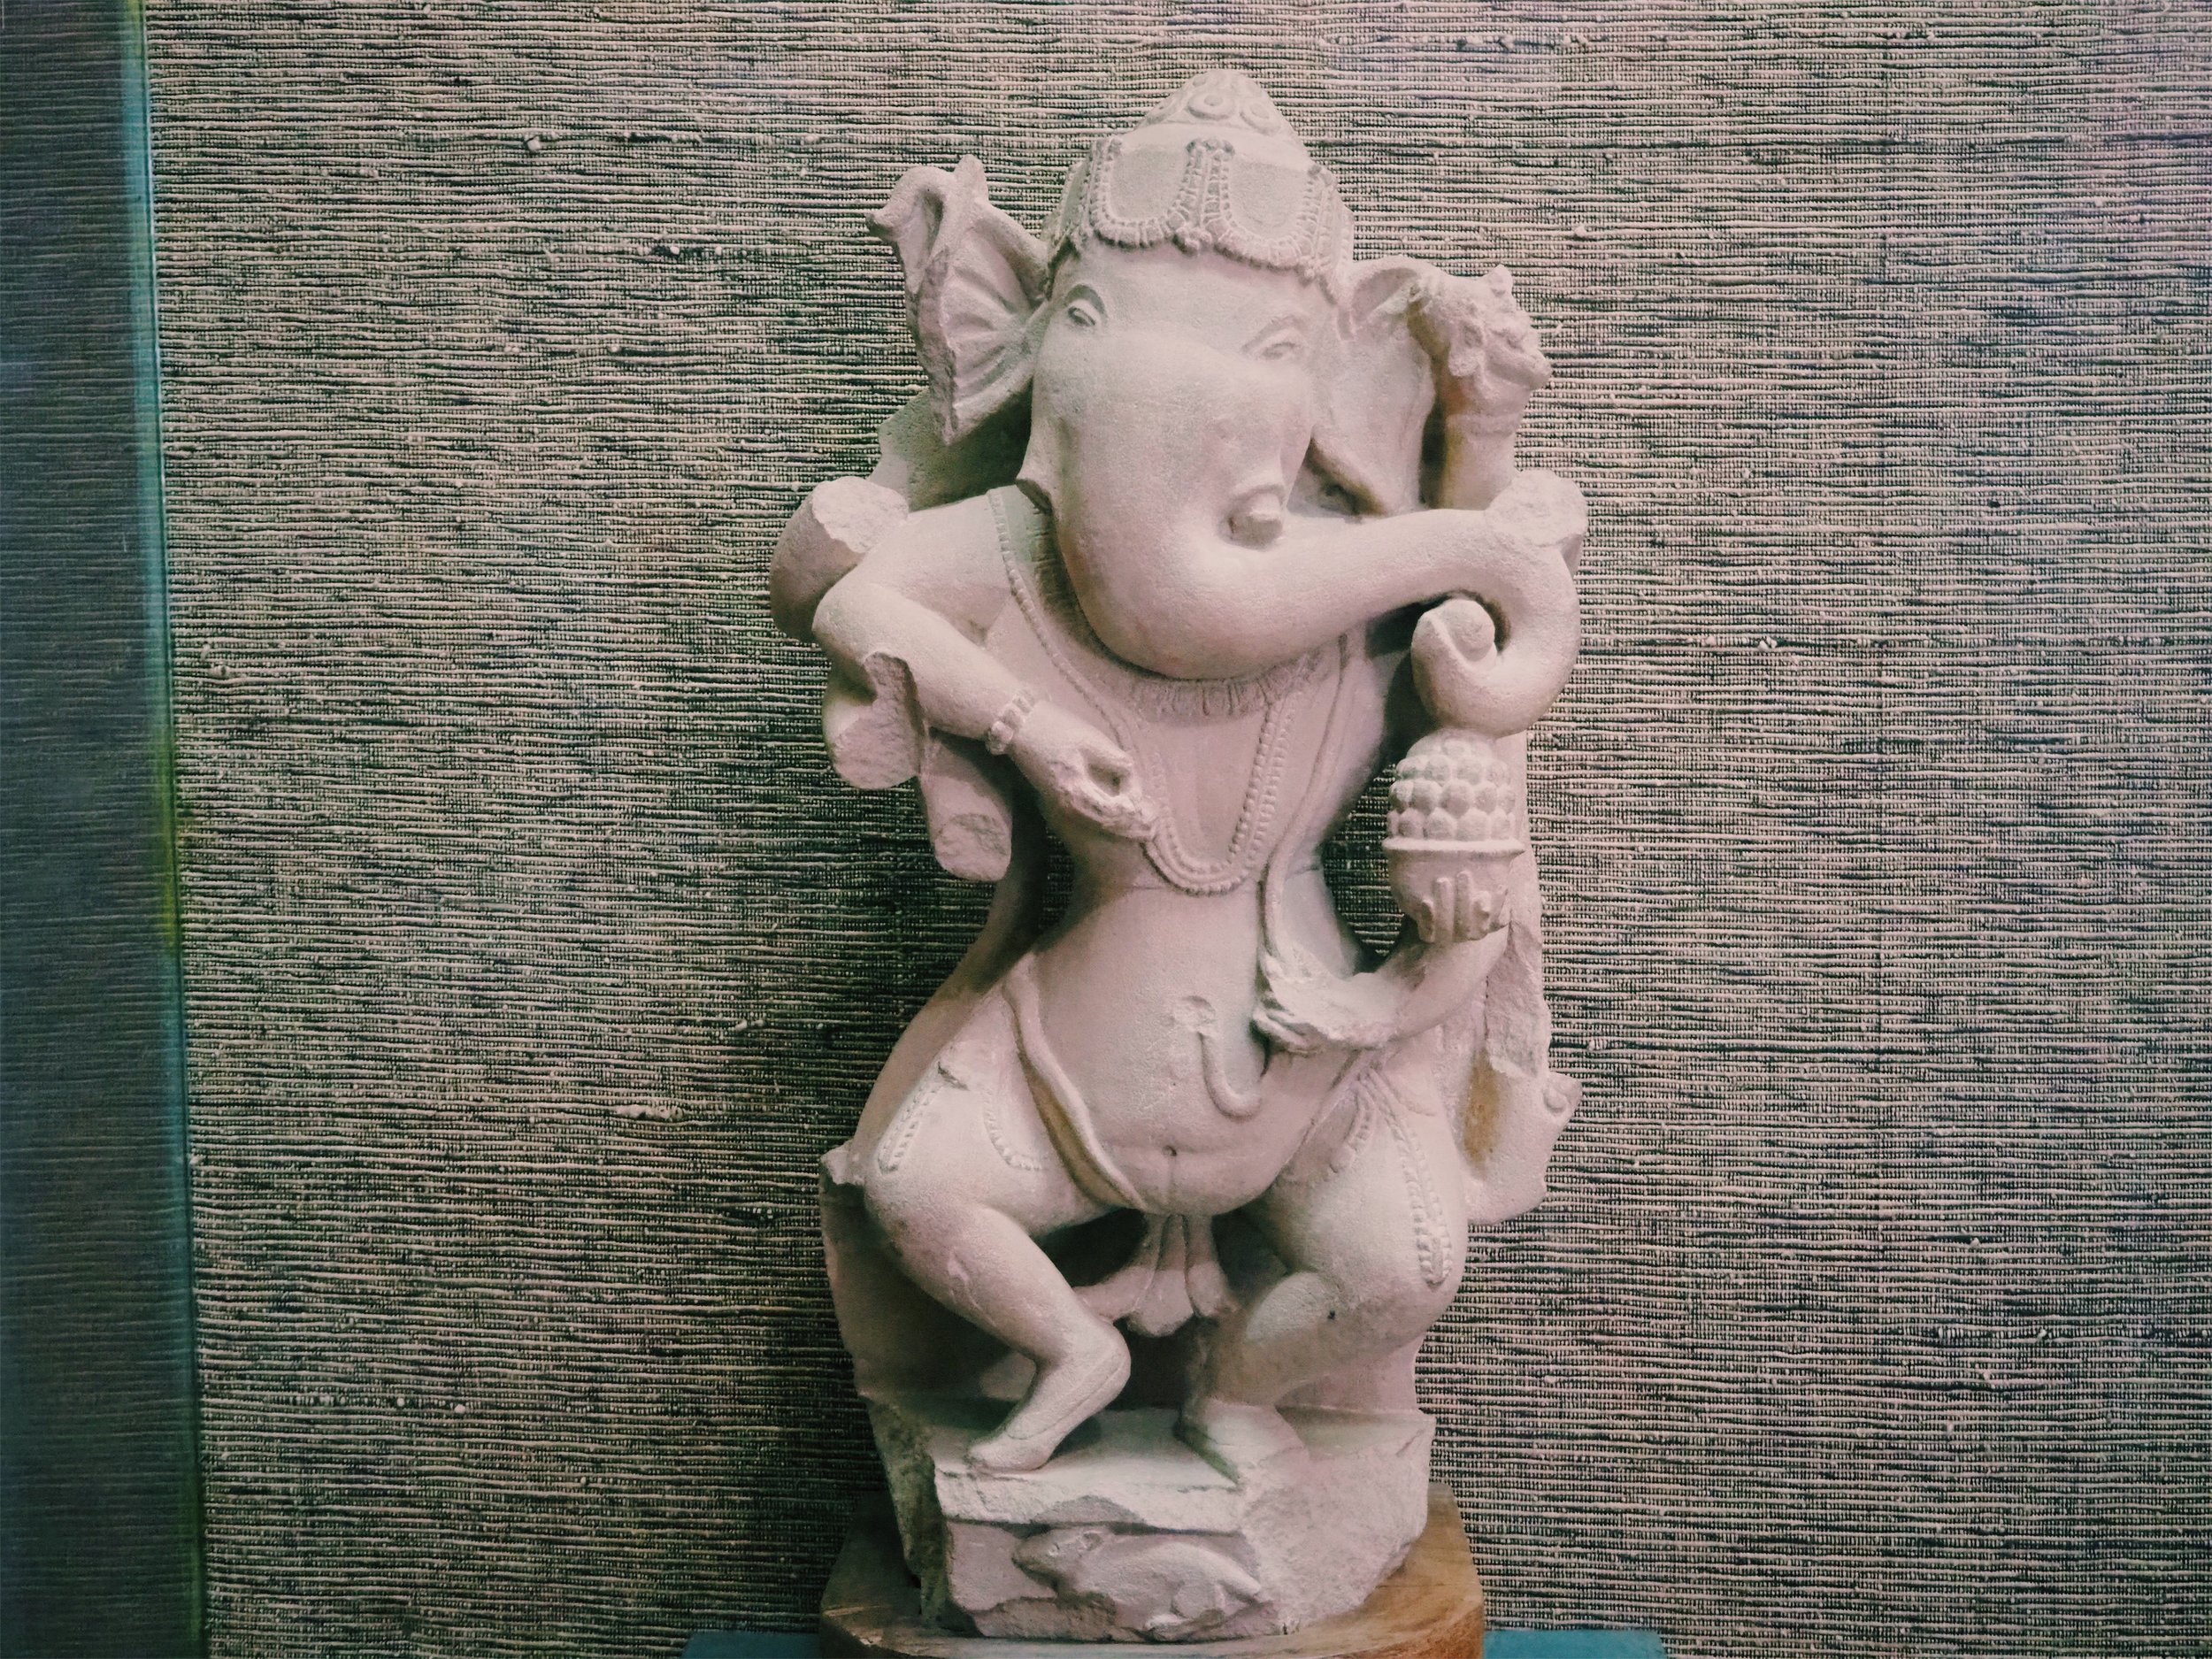
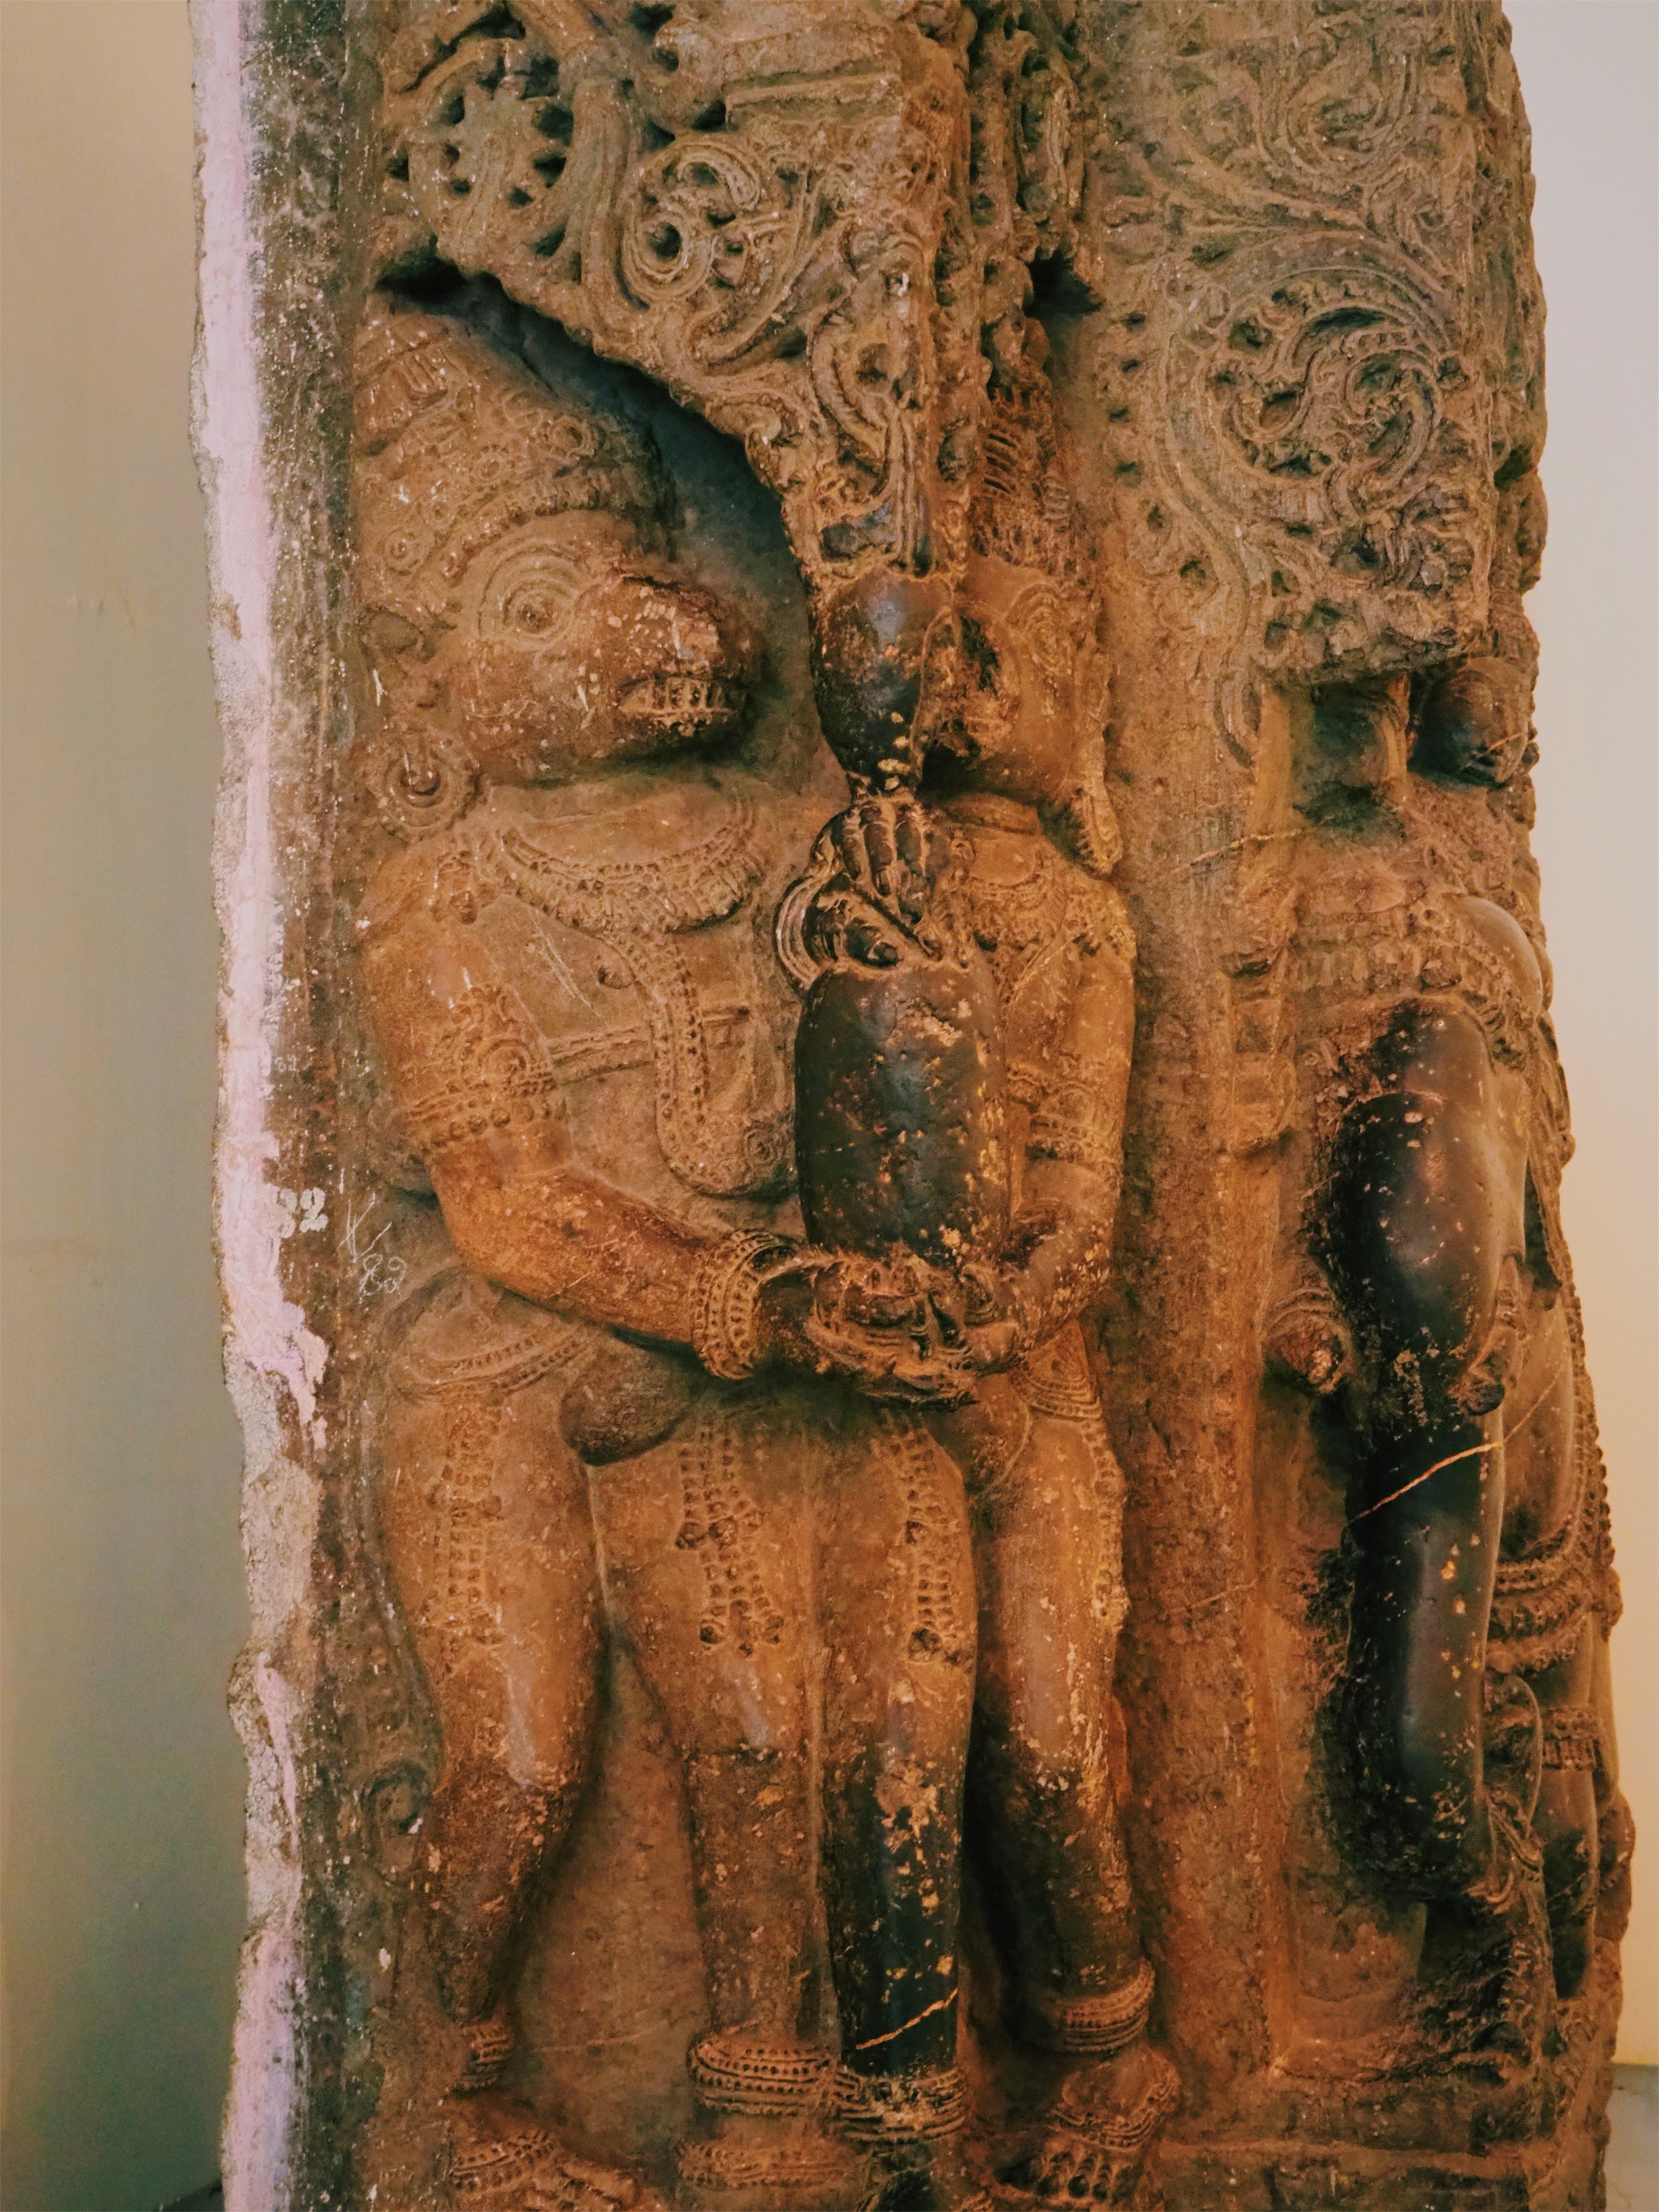
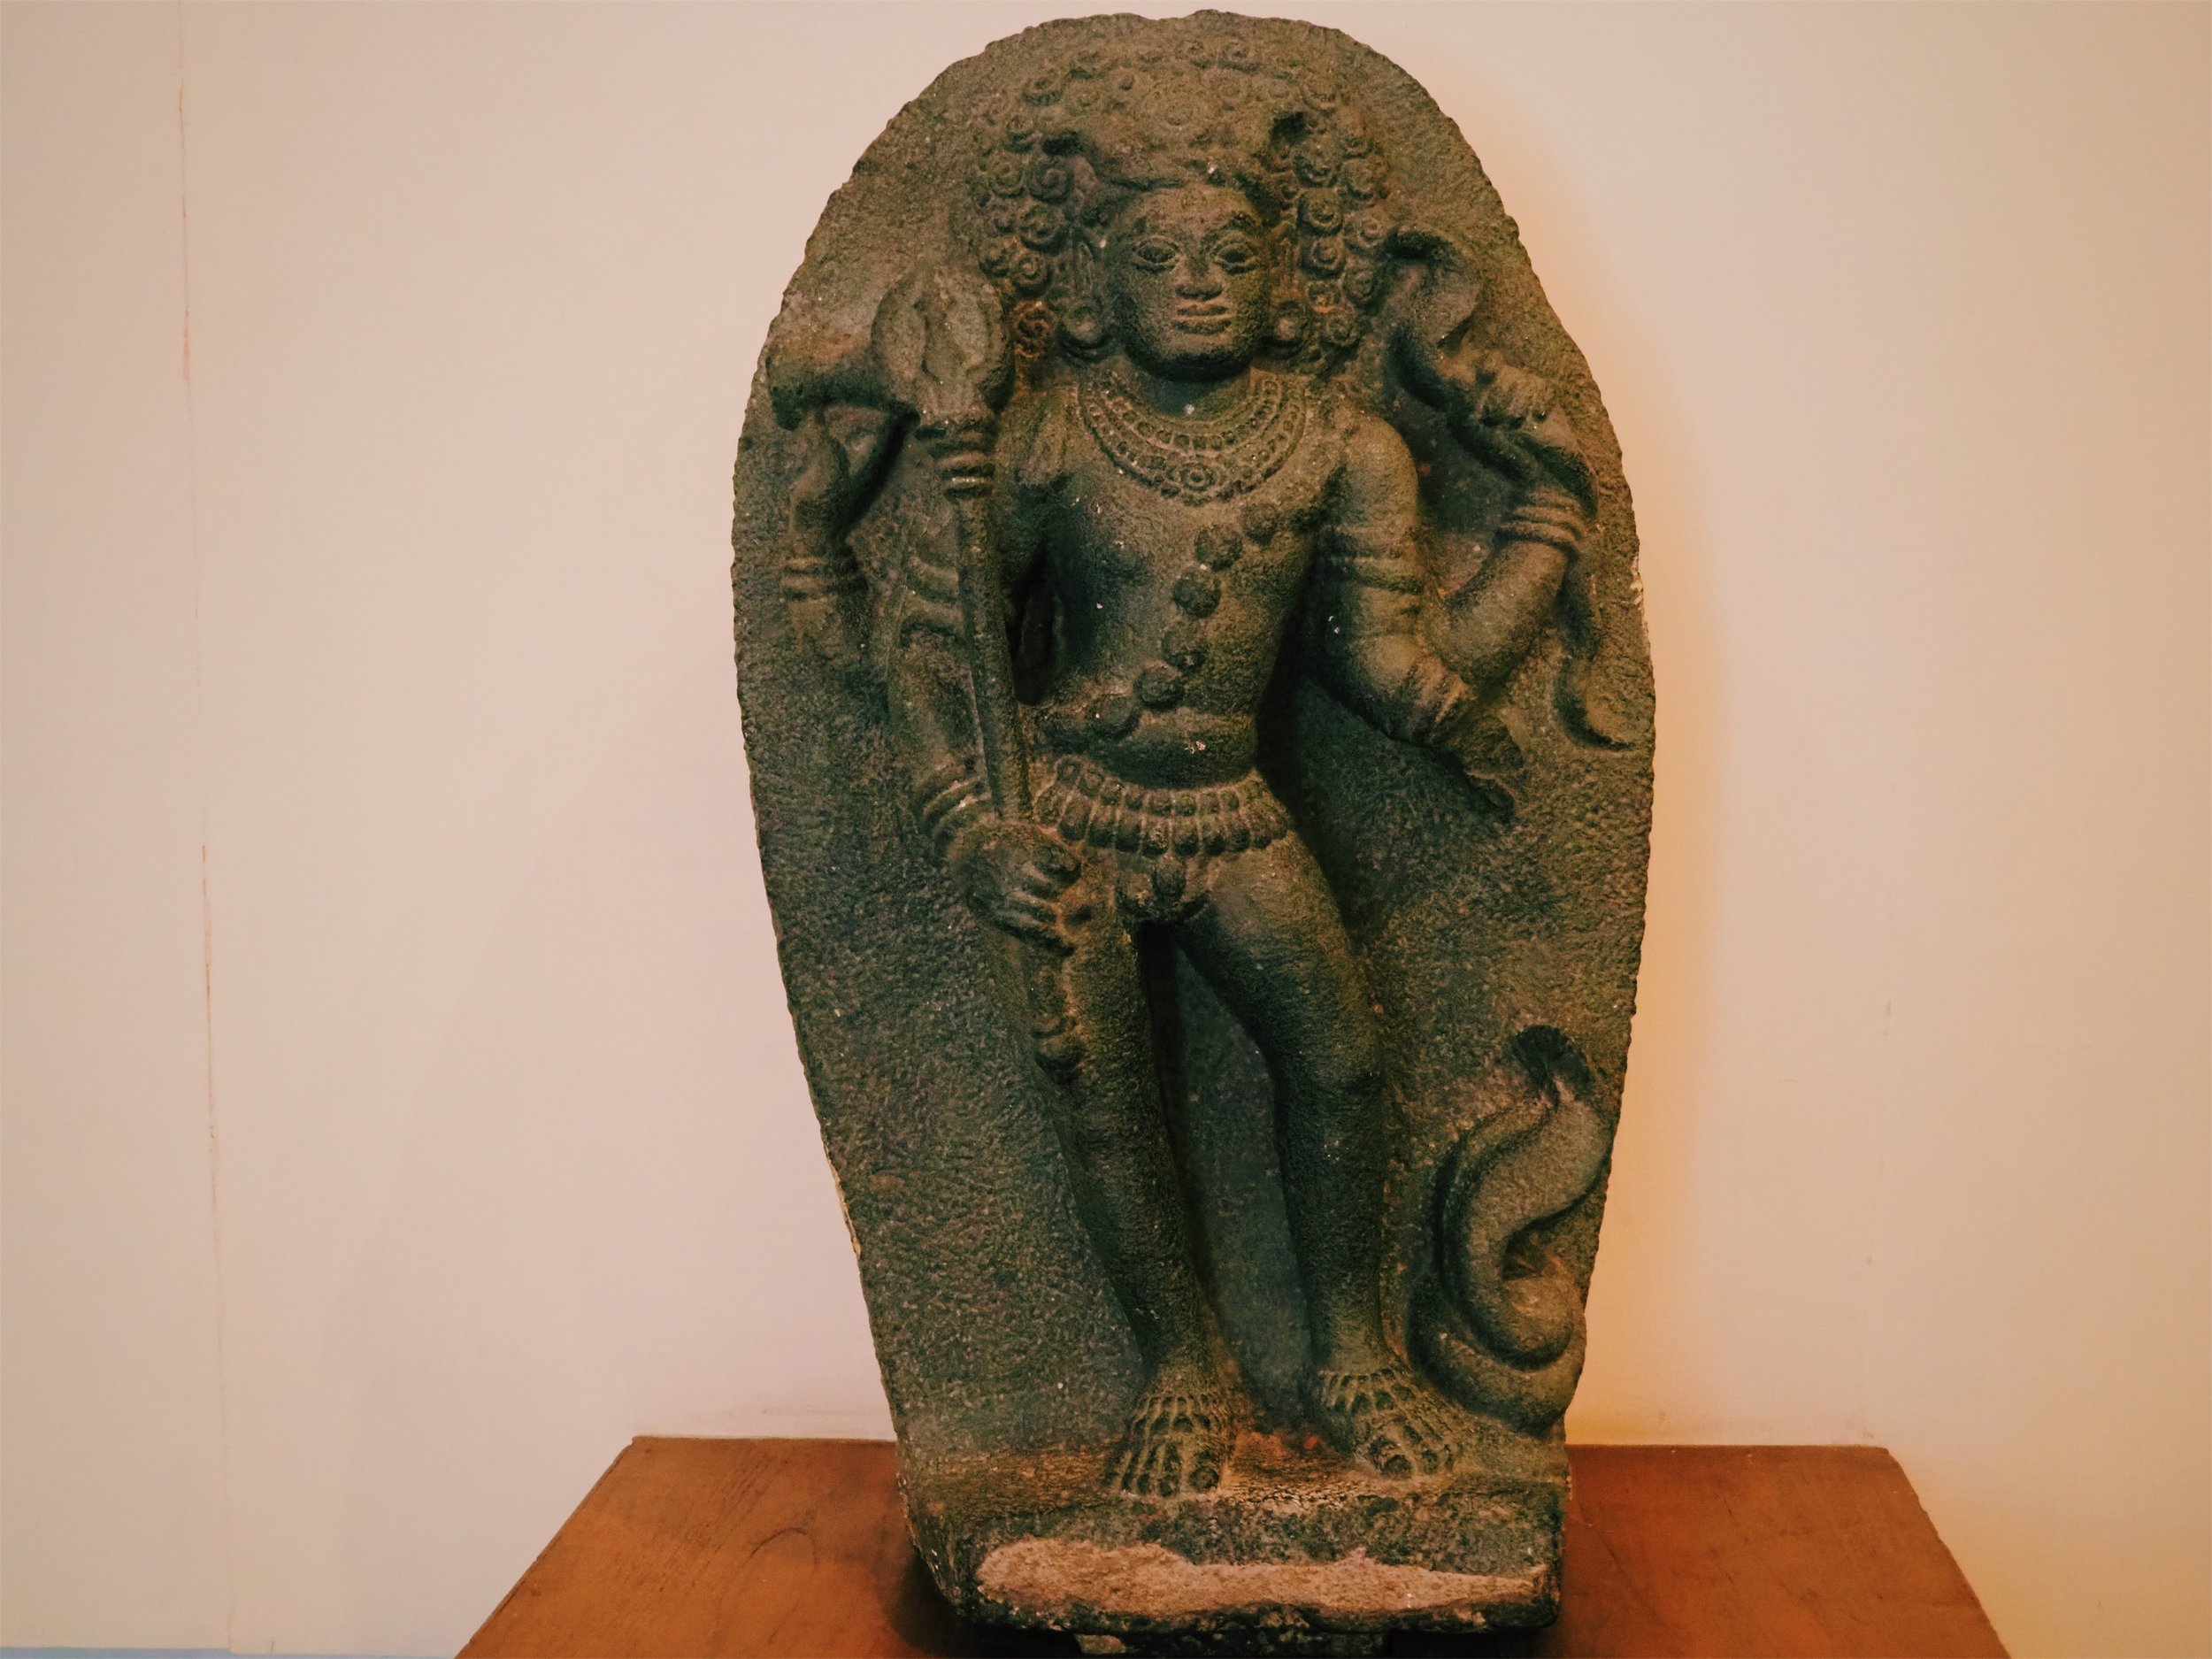
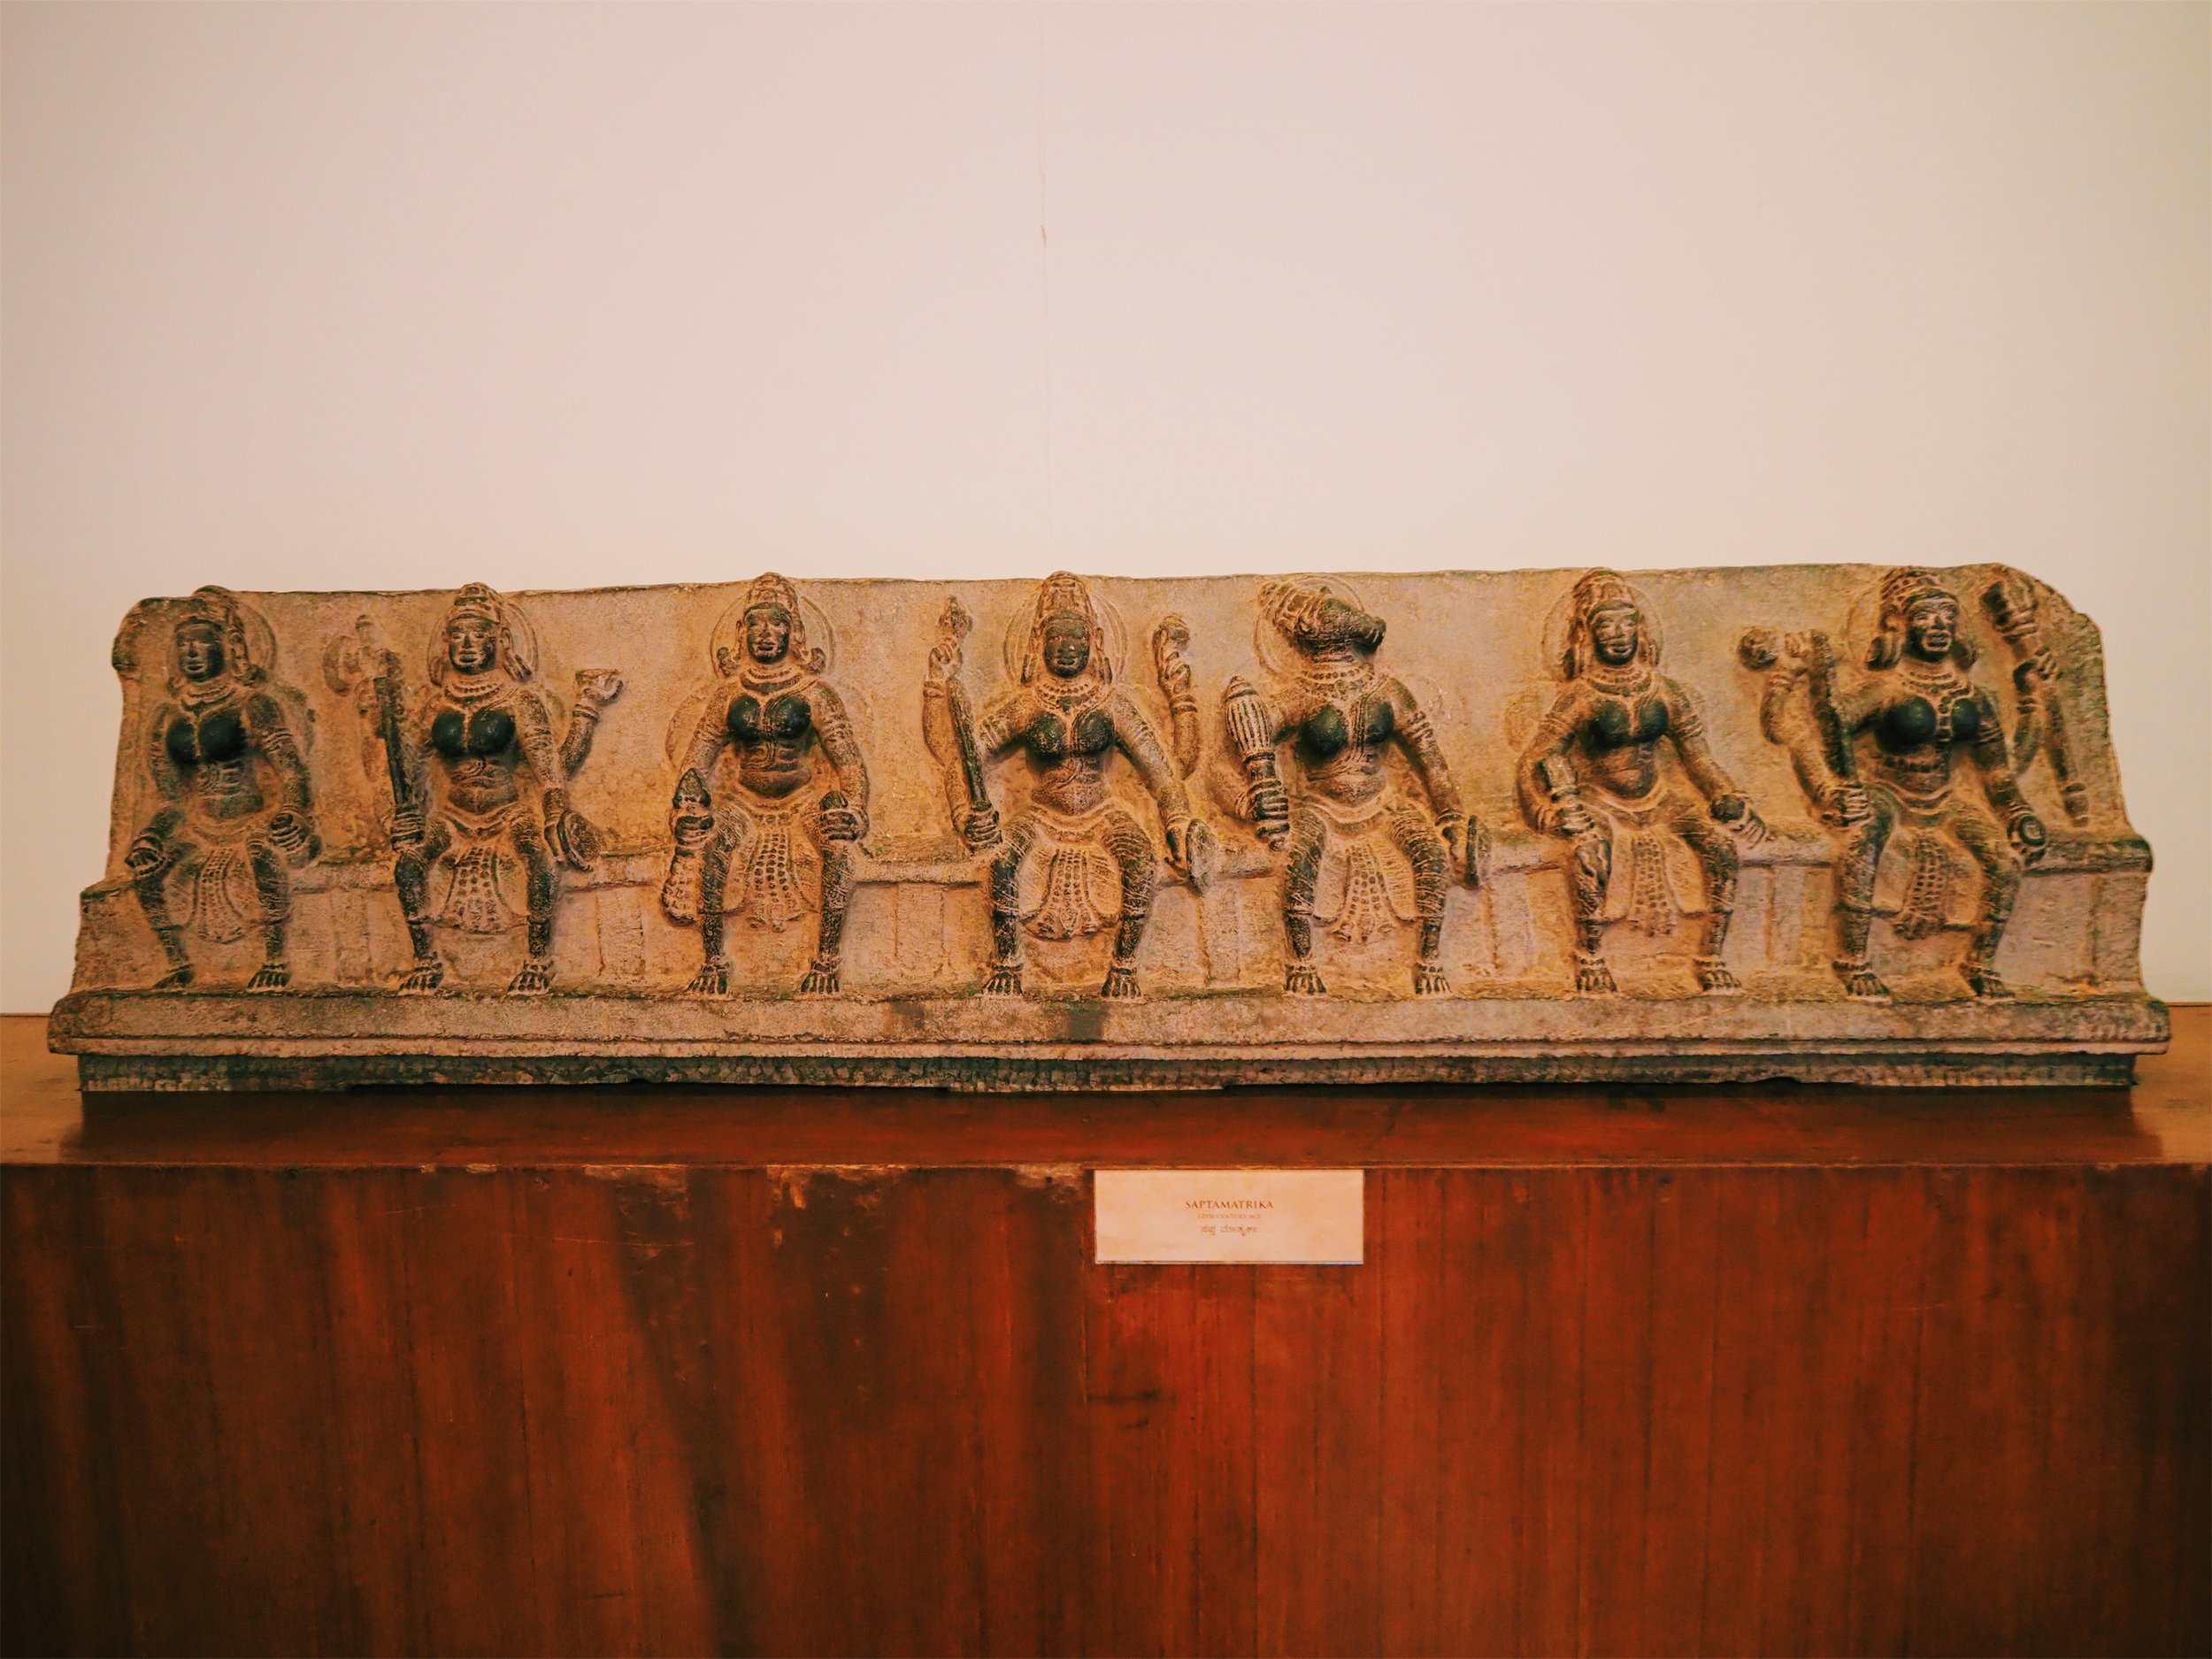
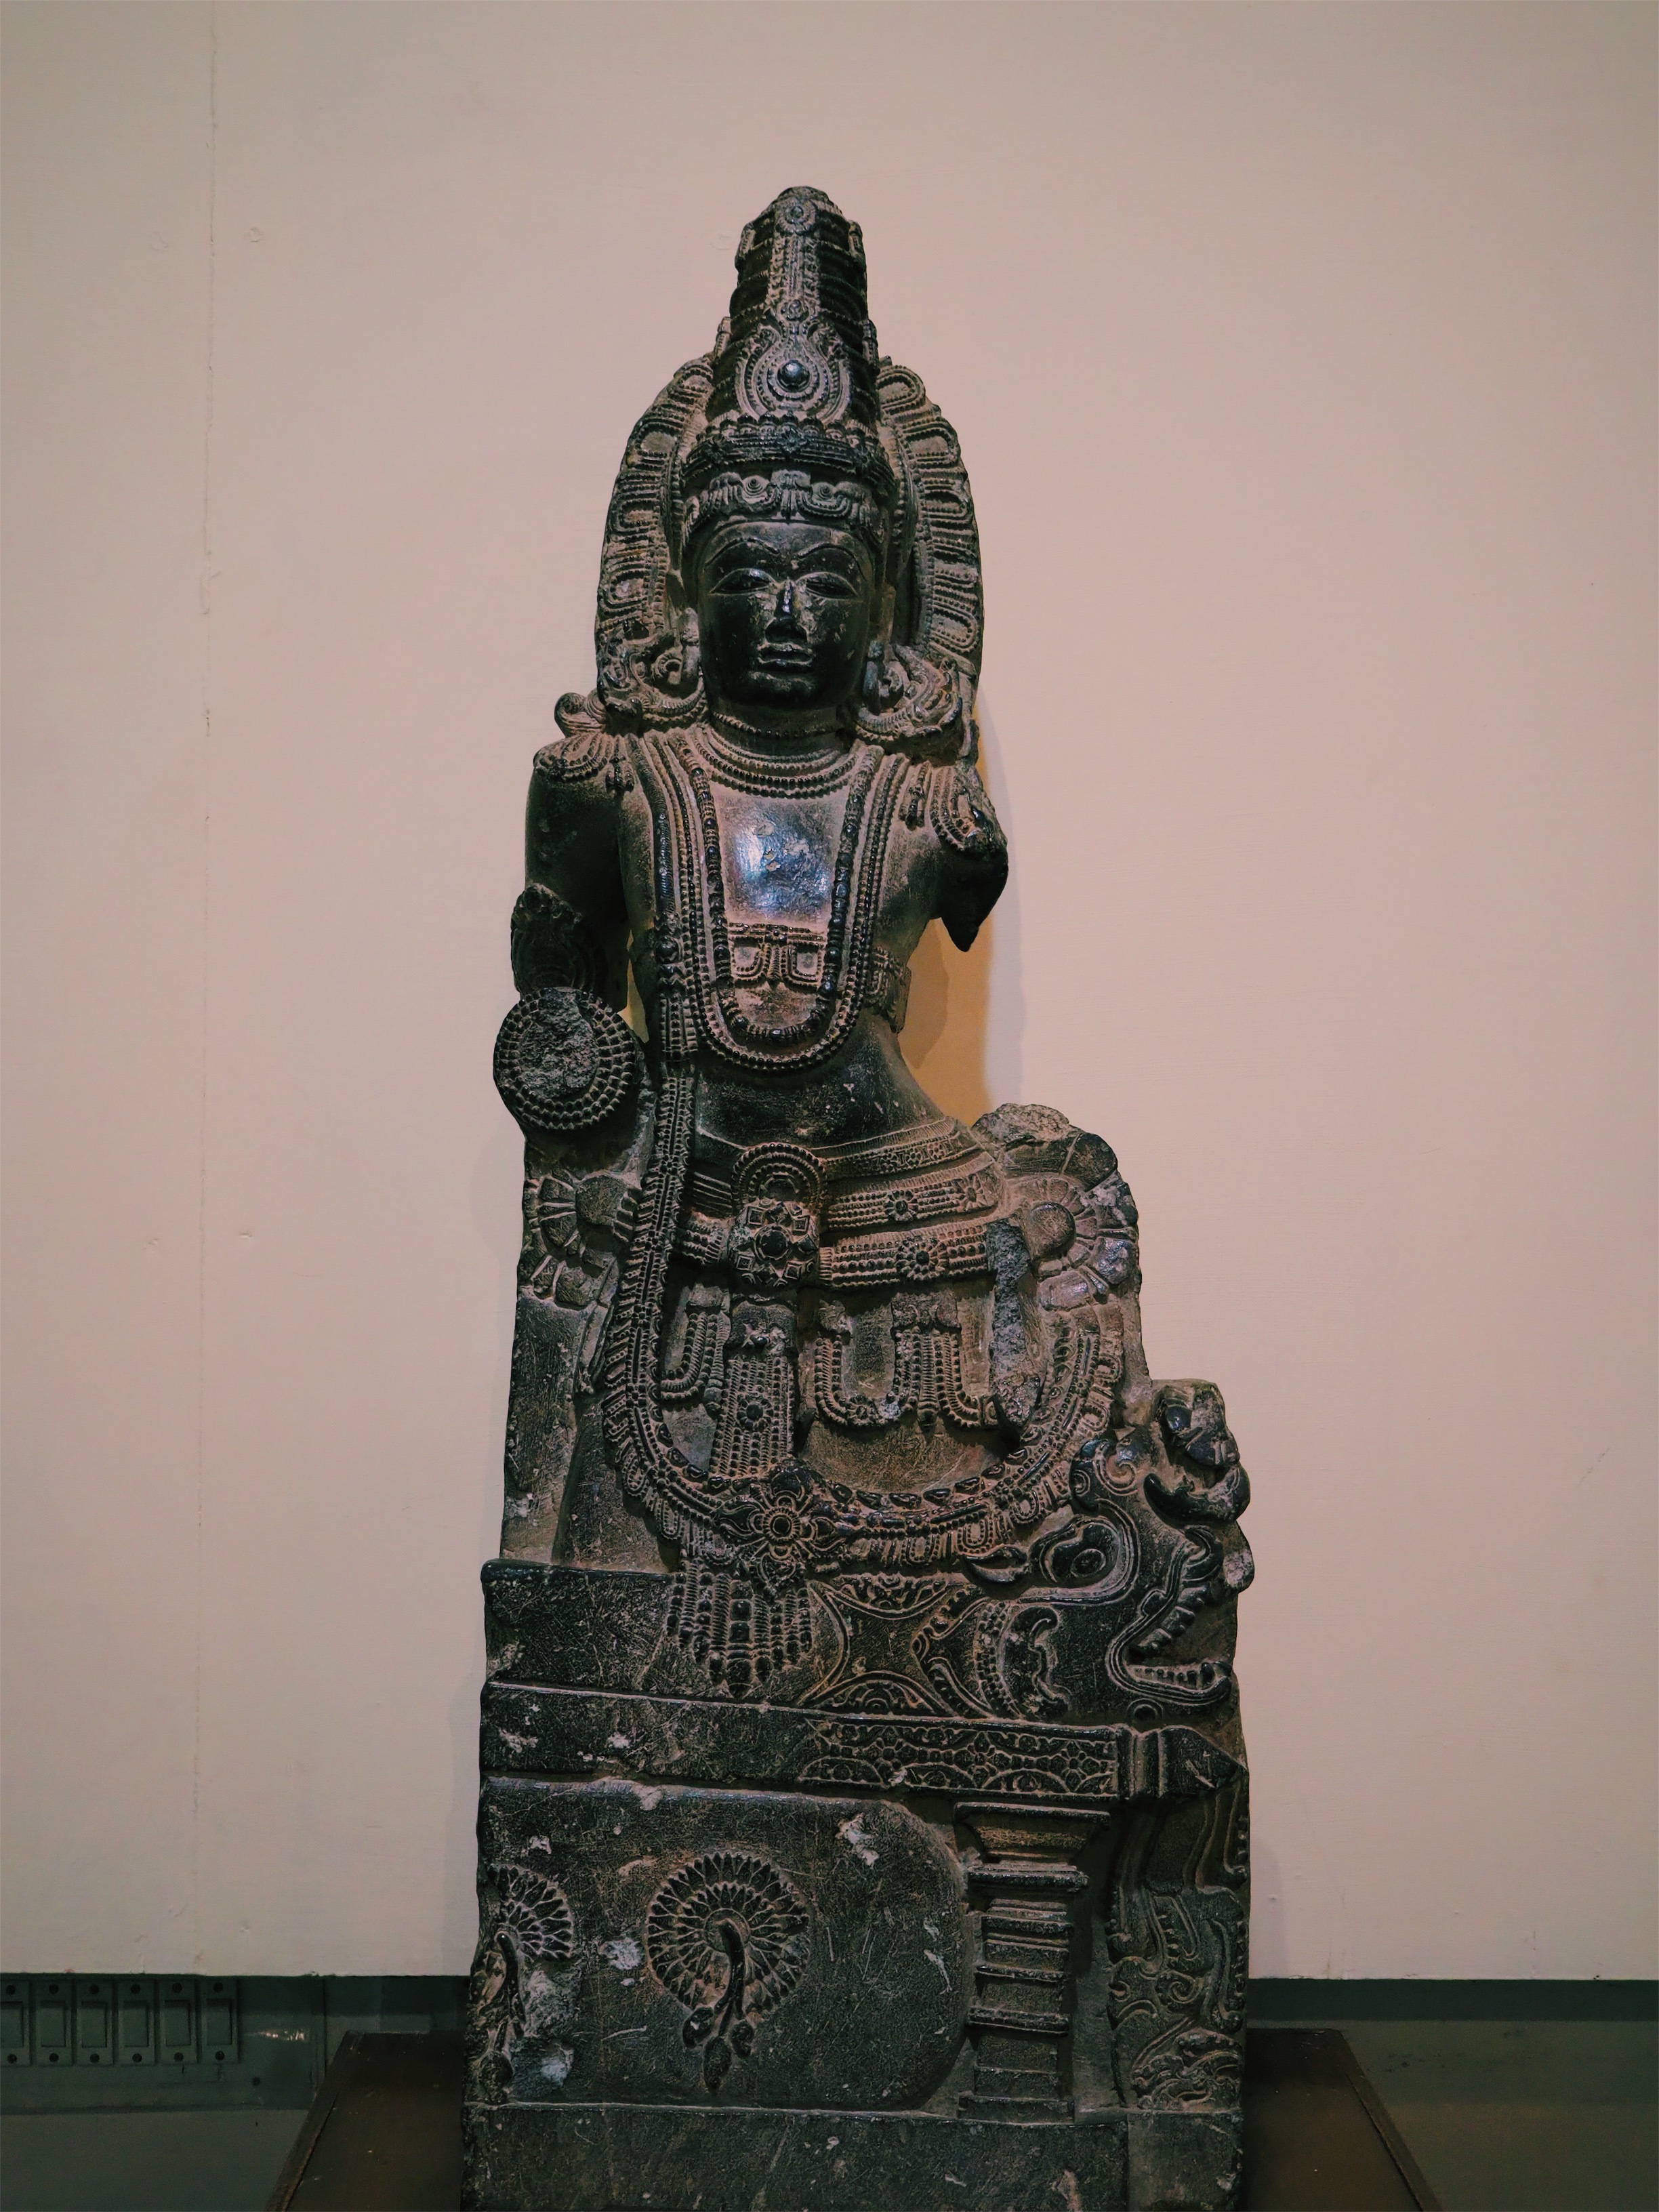
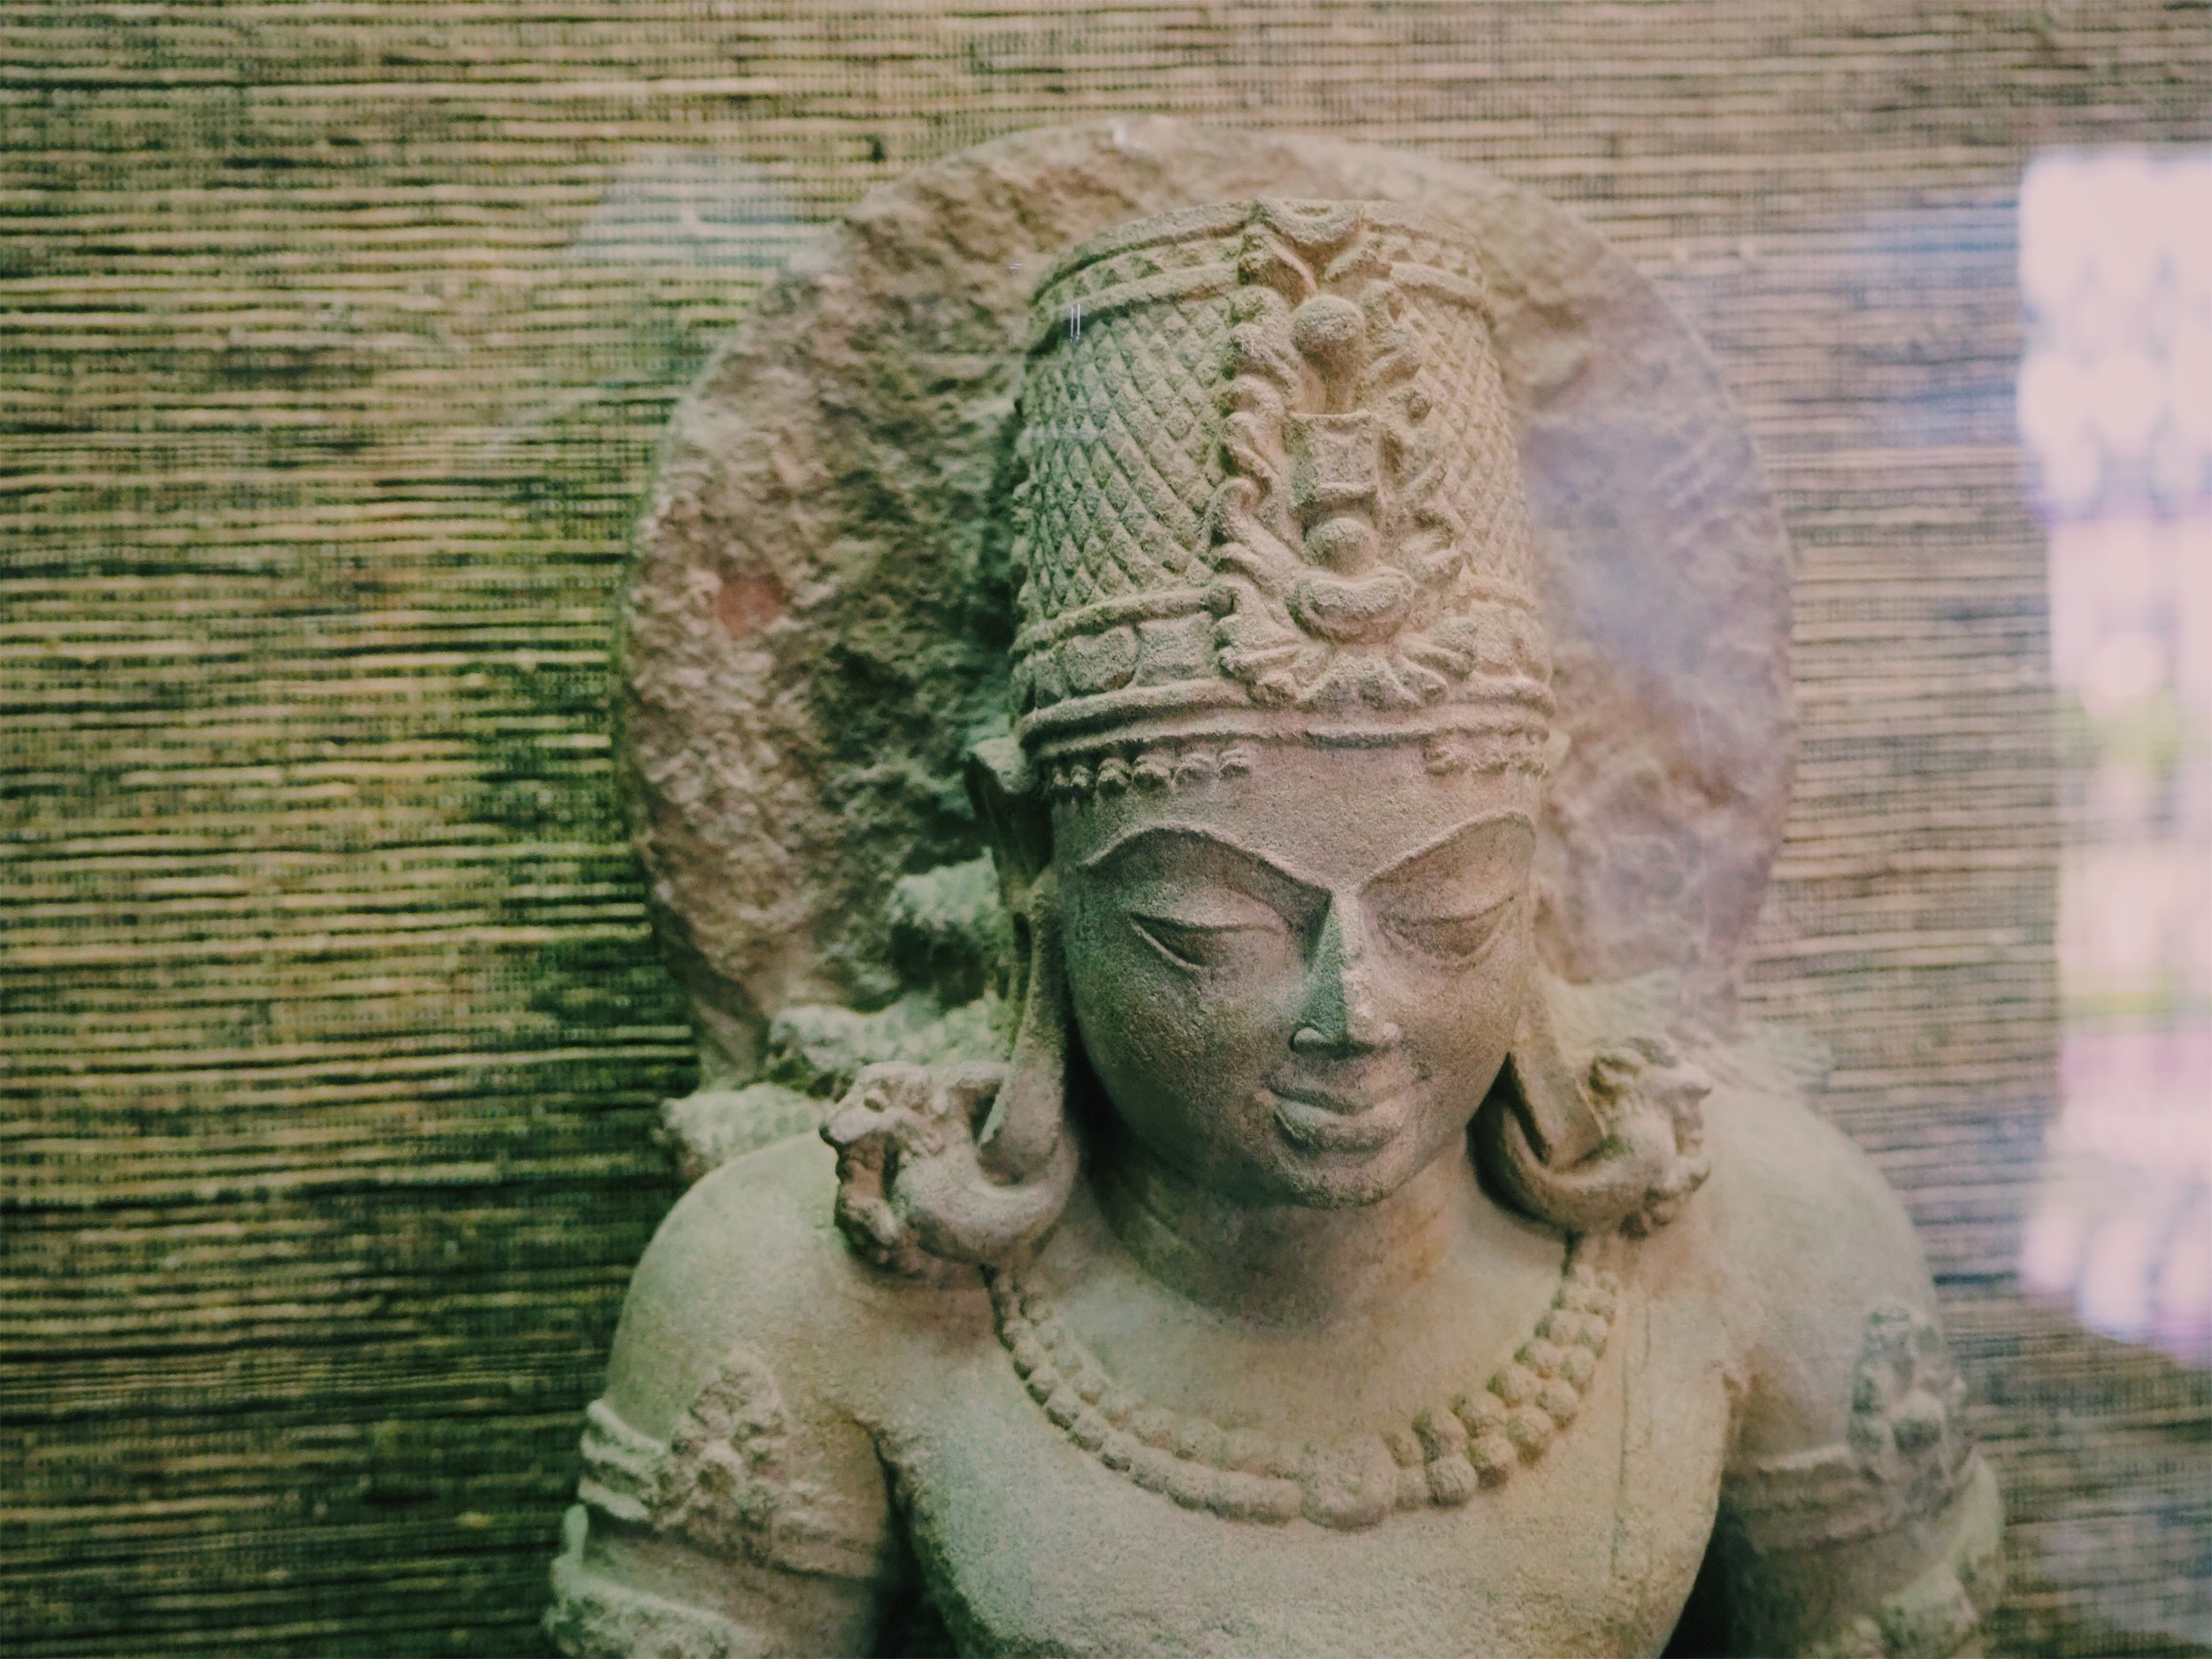
The second wing on the ground floor housed some statues. I’m not too sure about the origins but one thing really stood out for me: a lot of the human features looked very Polynesian: broad noses, thick lips and ringlets of curls for hair.
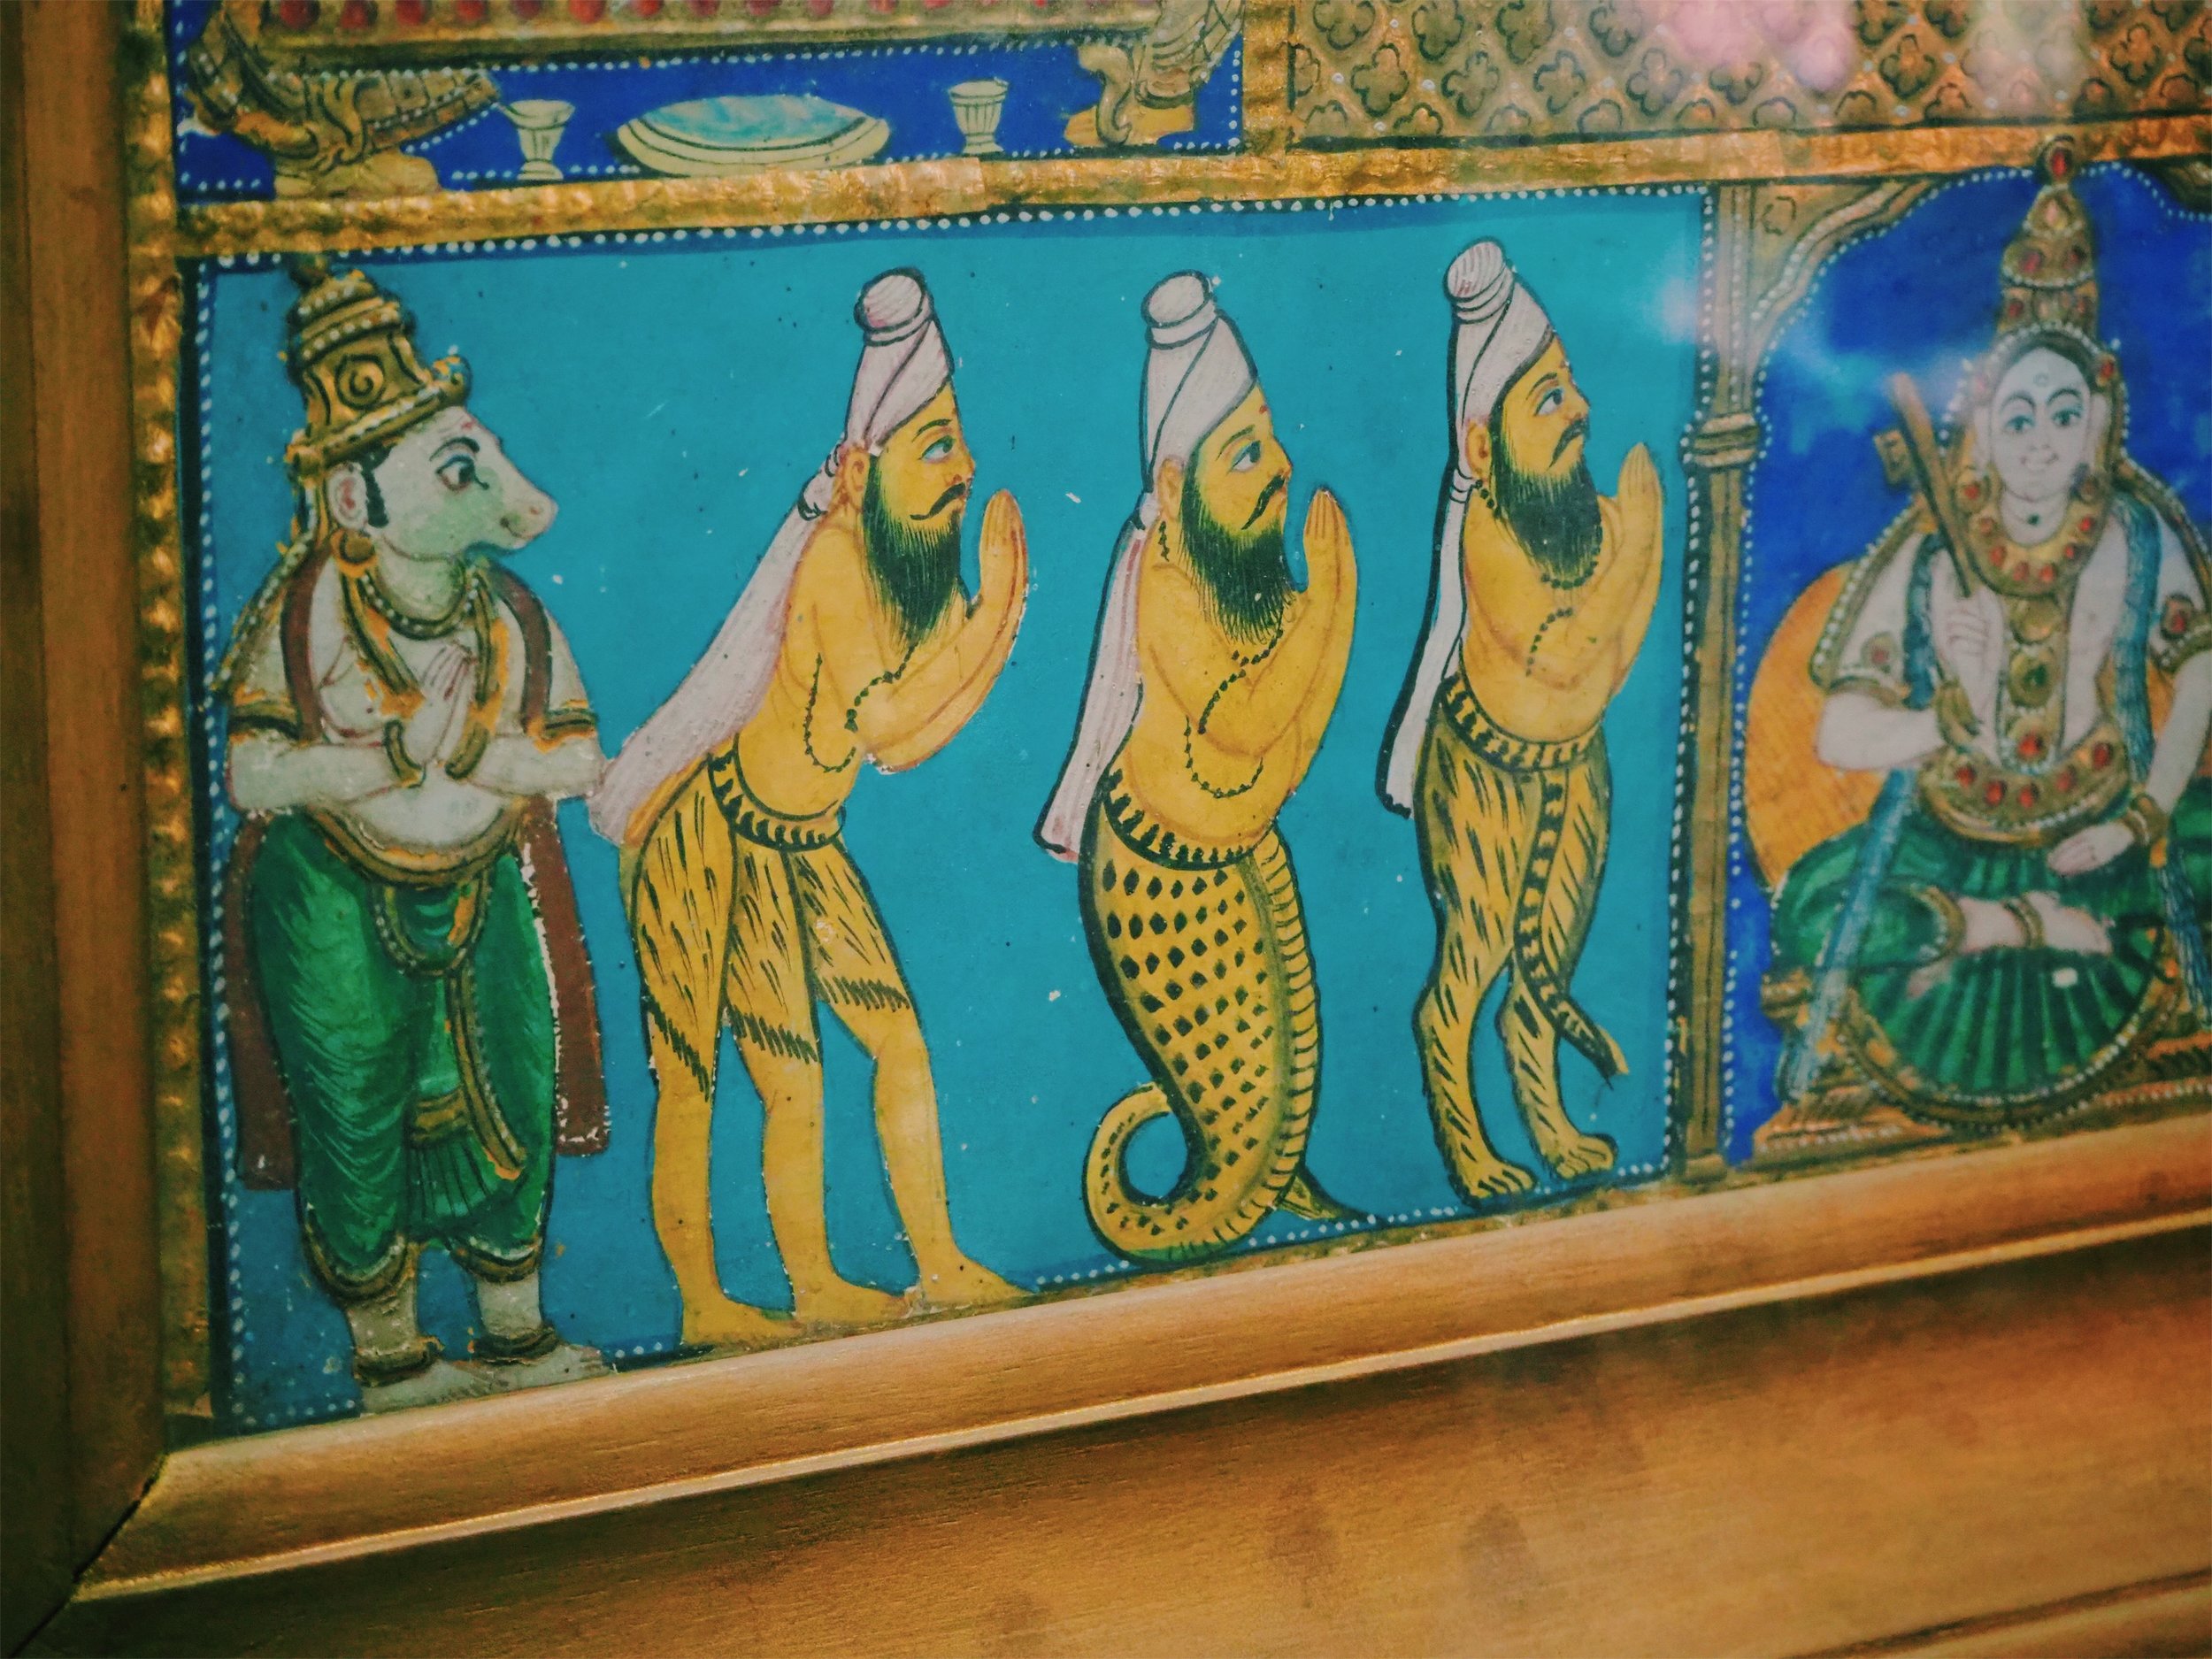
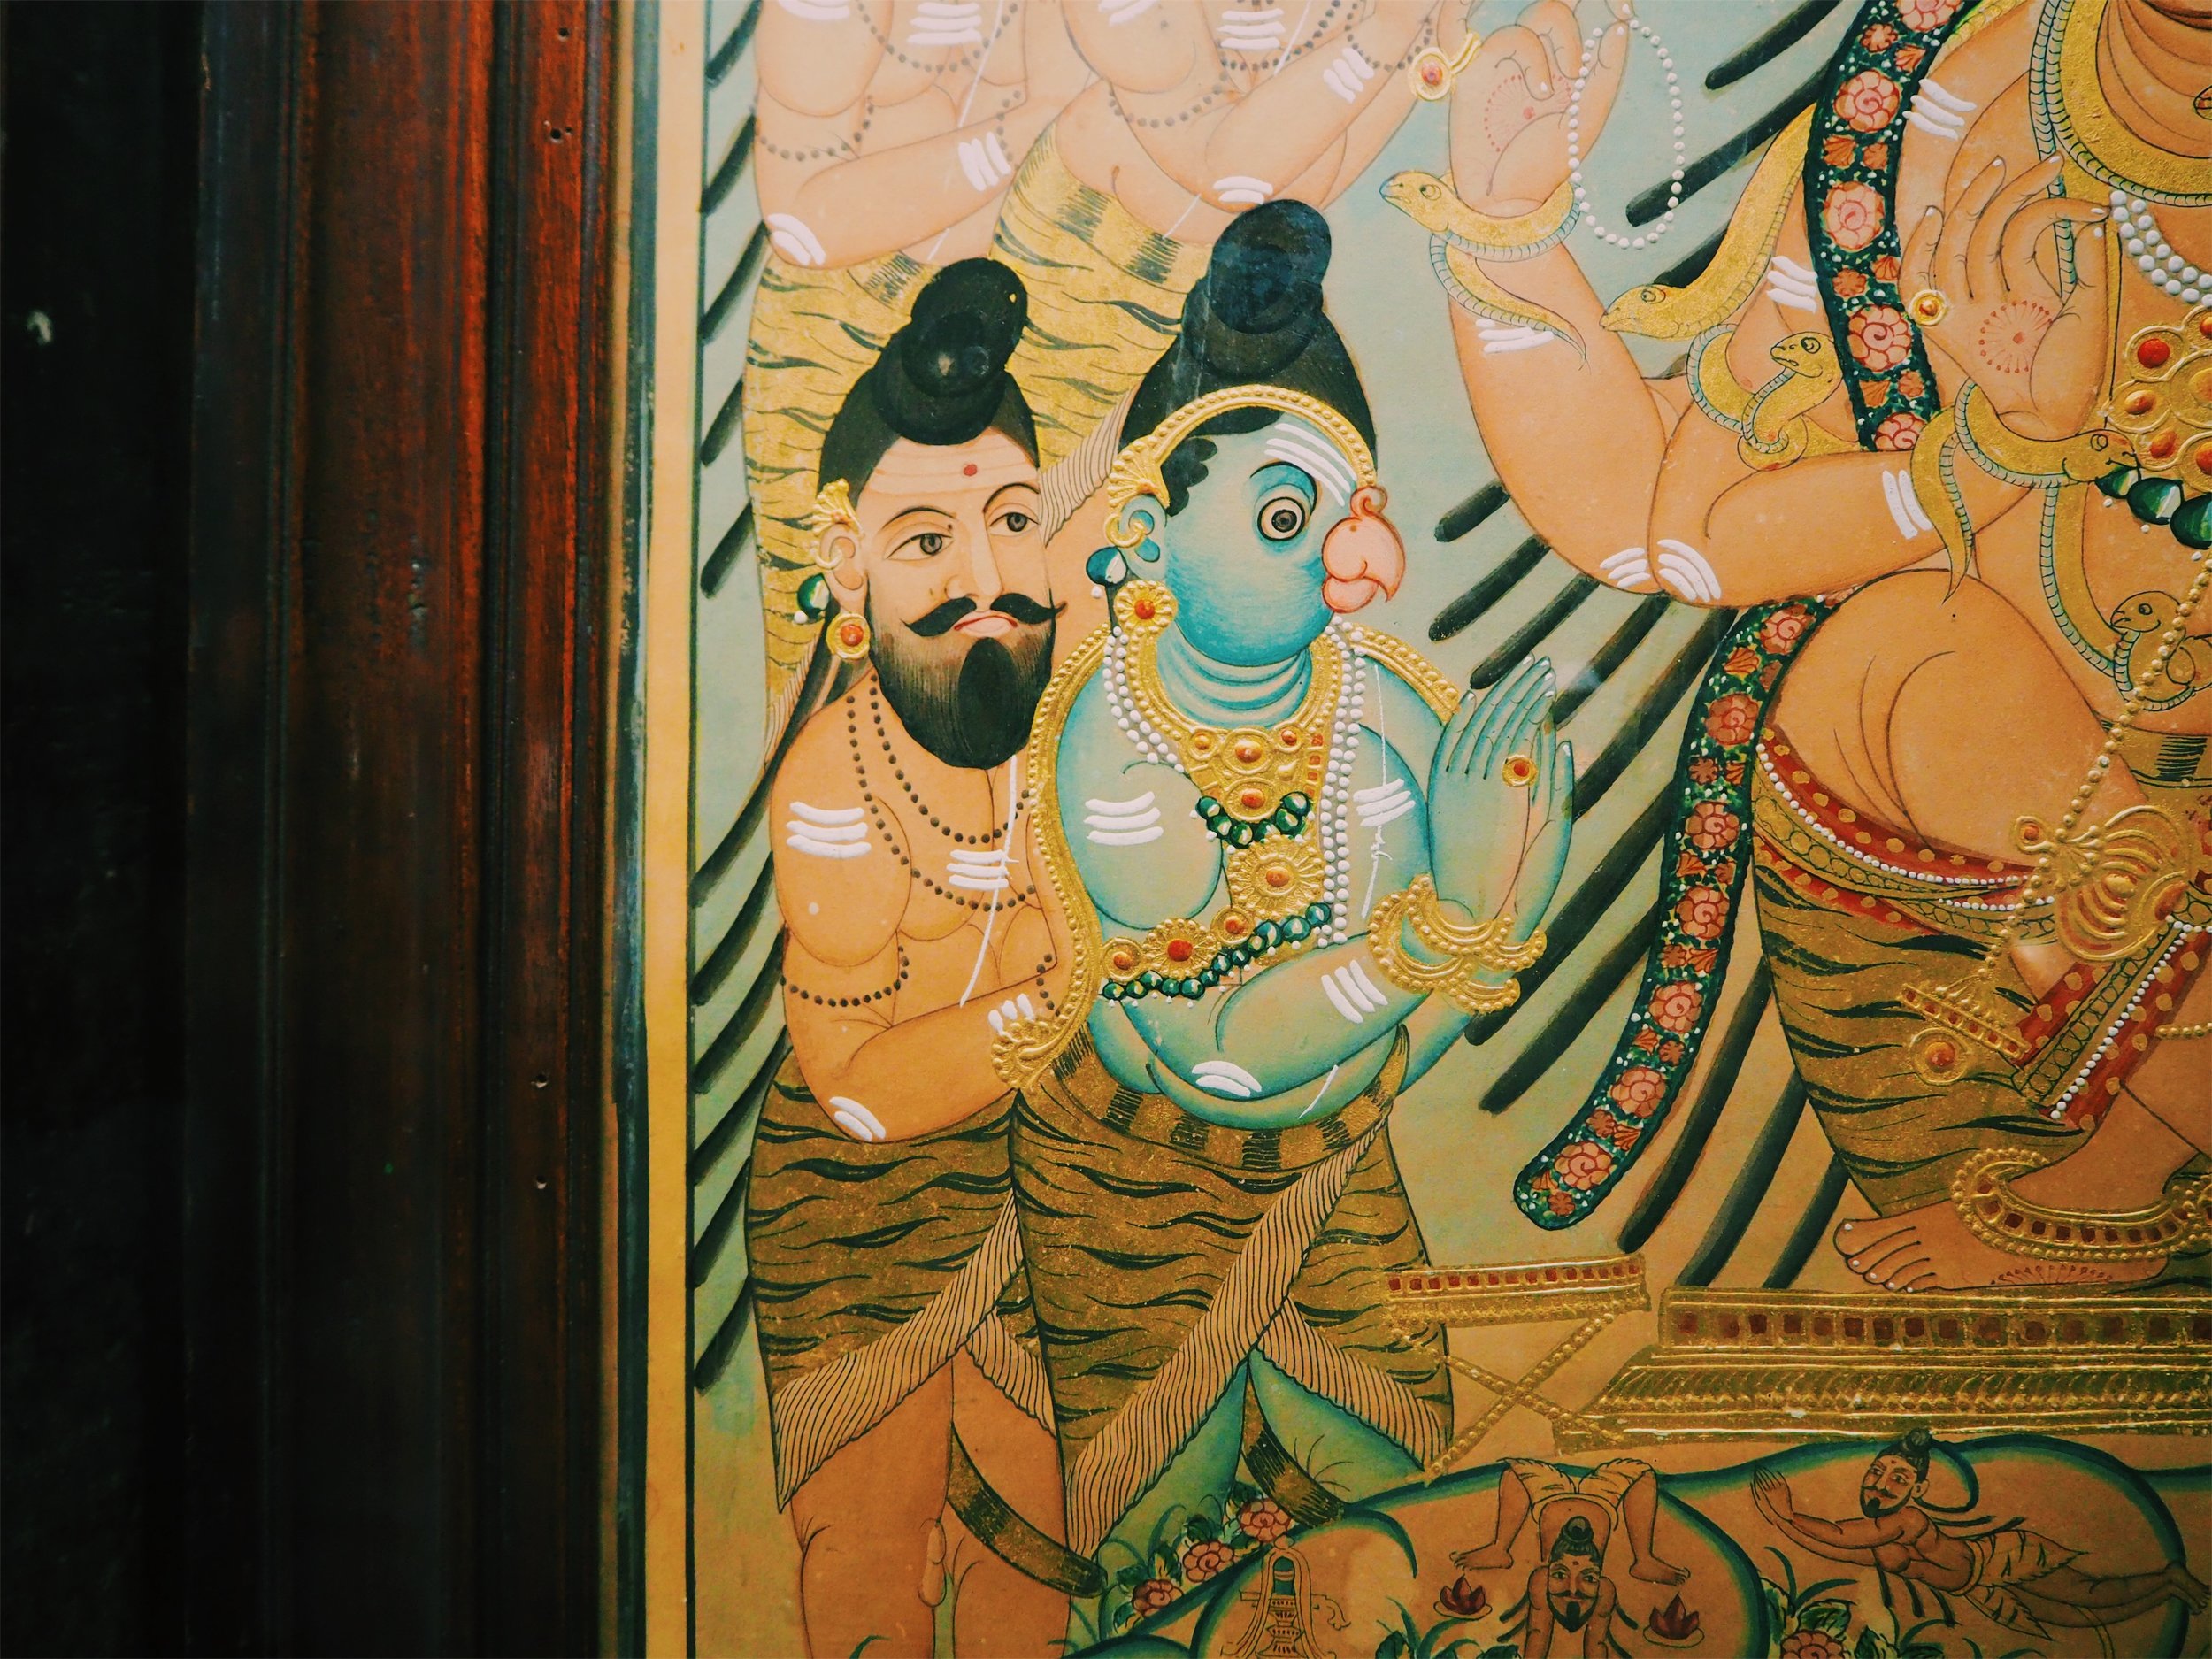

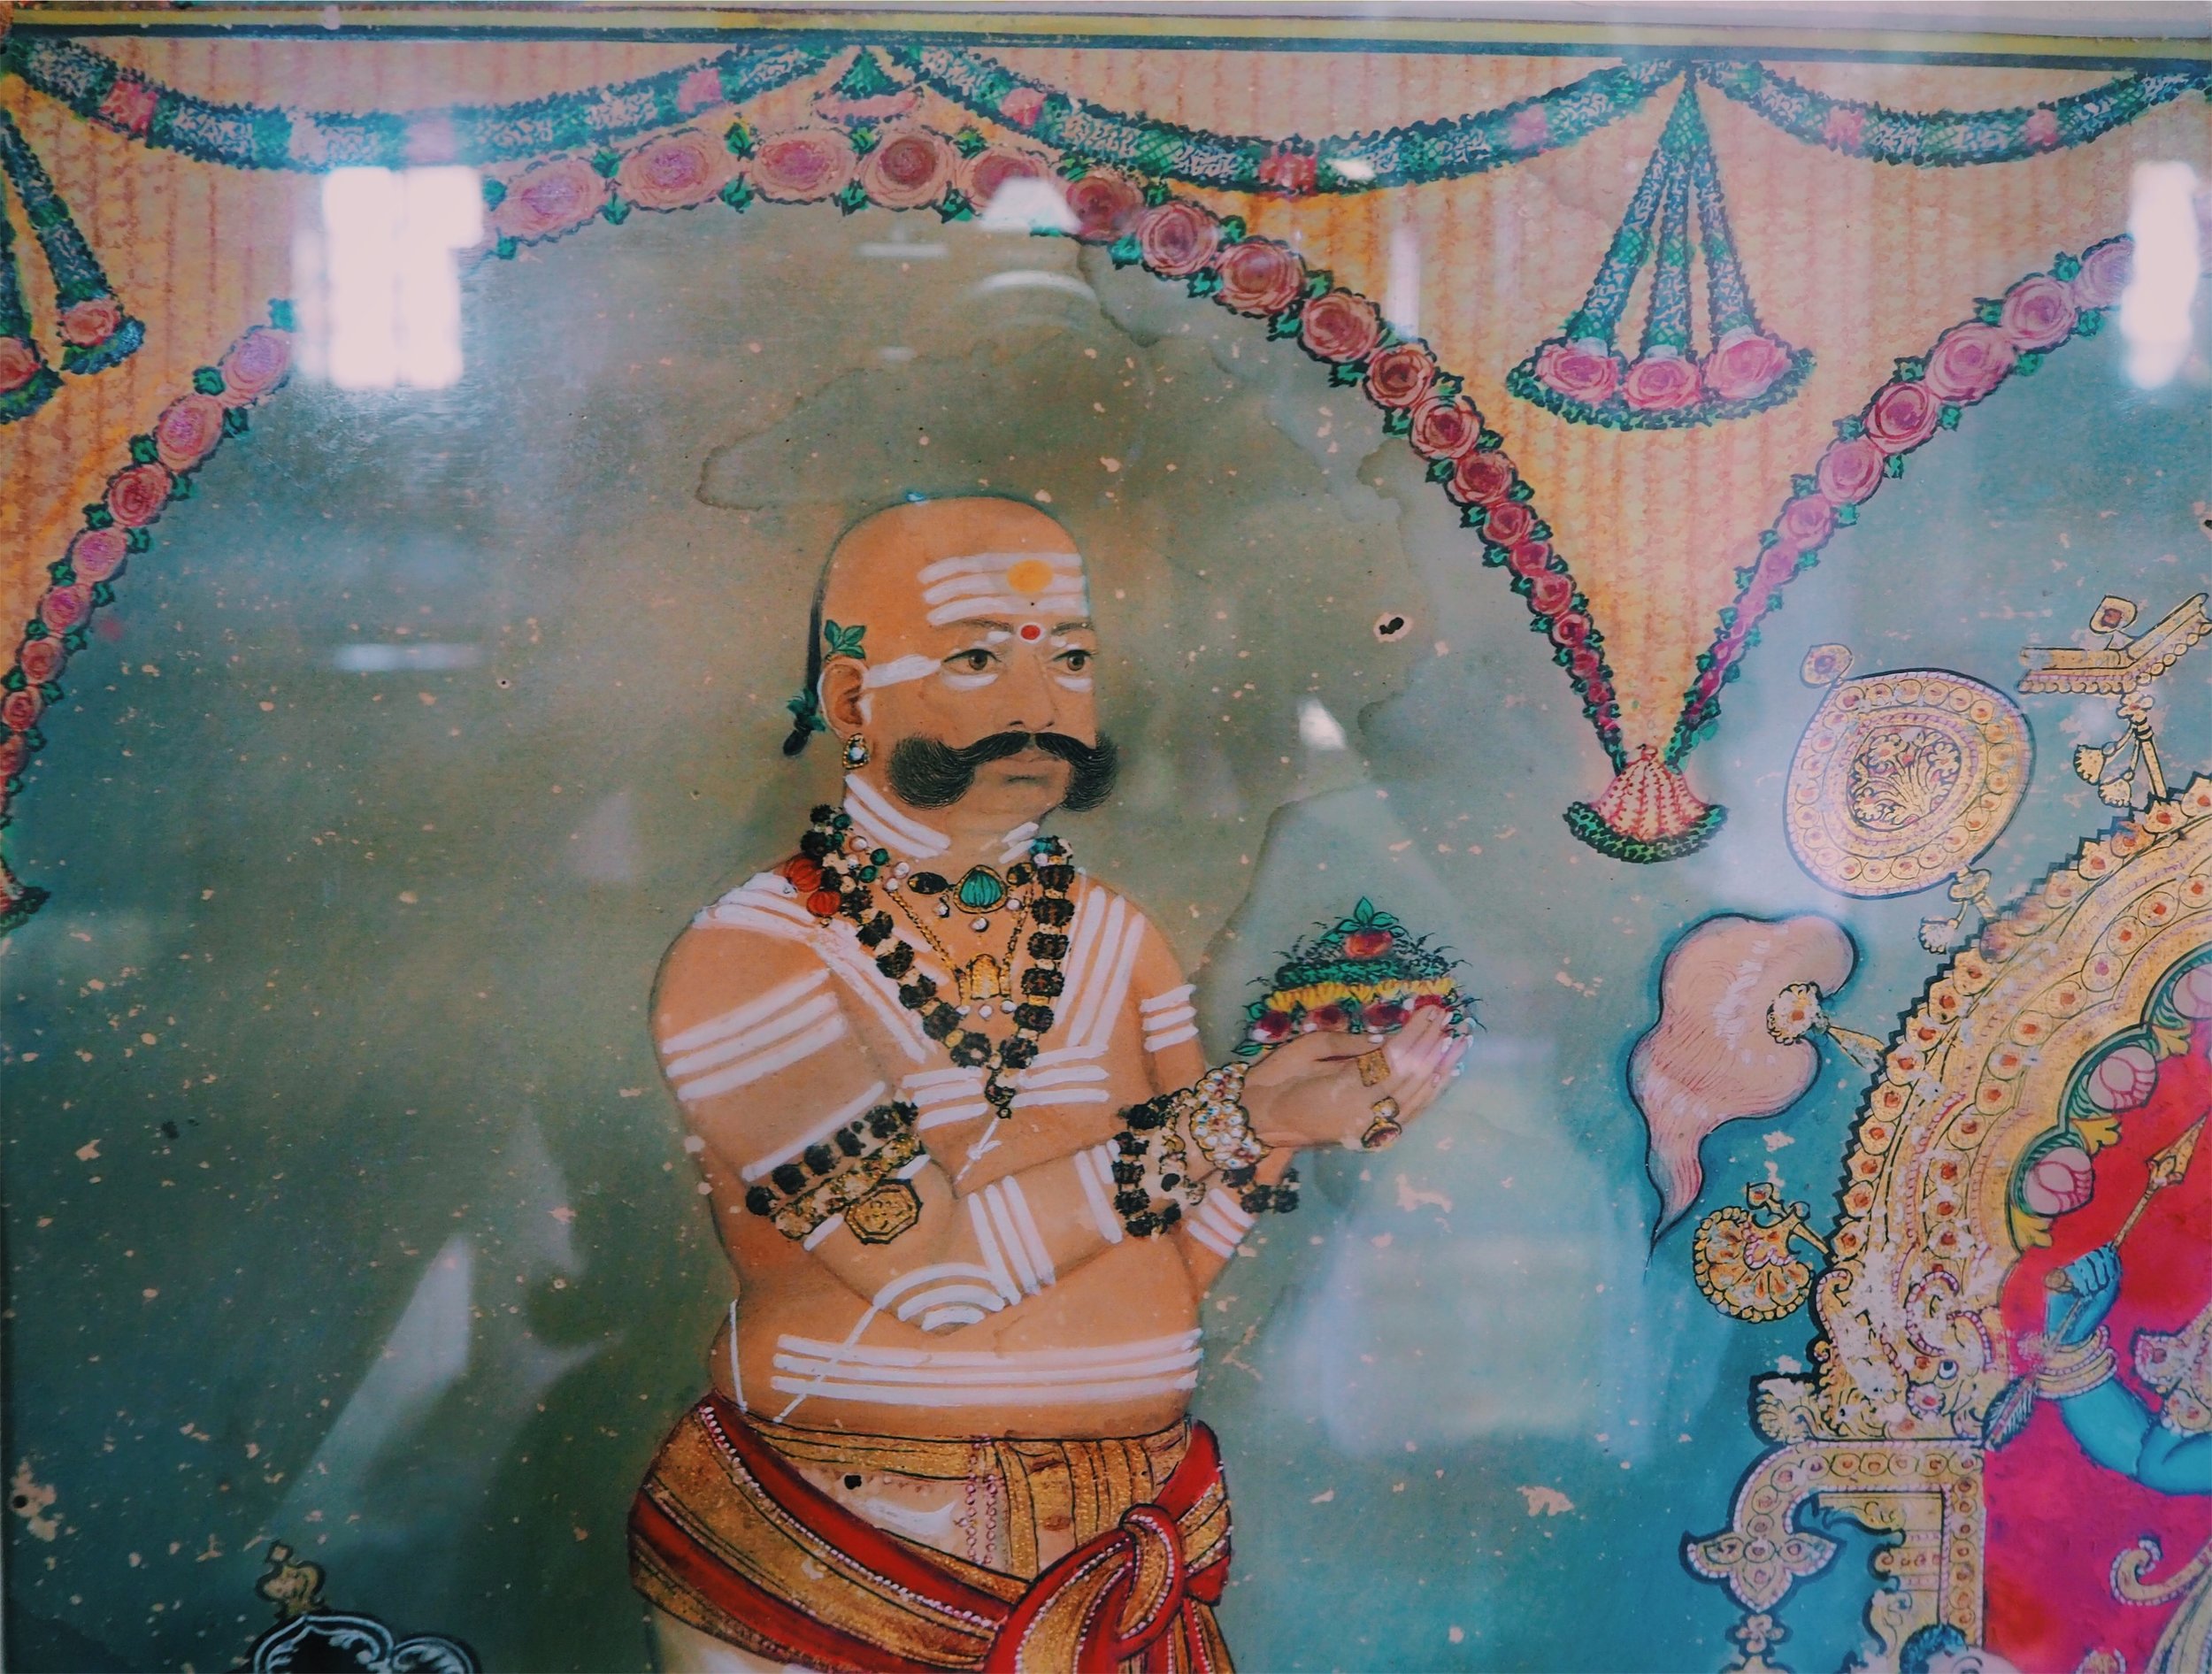
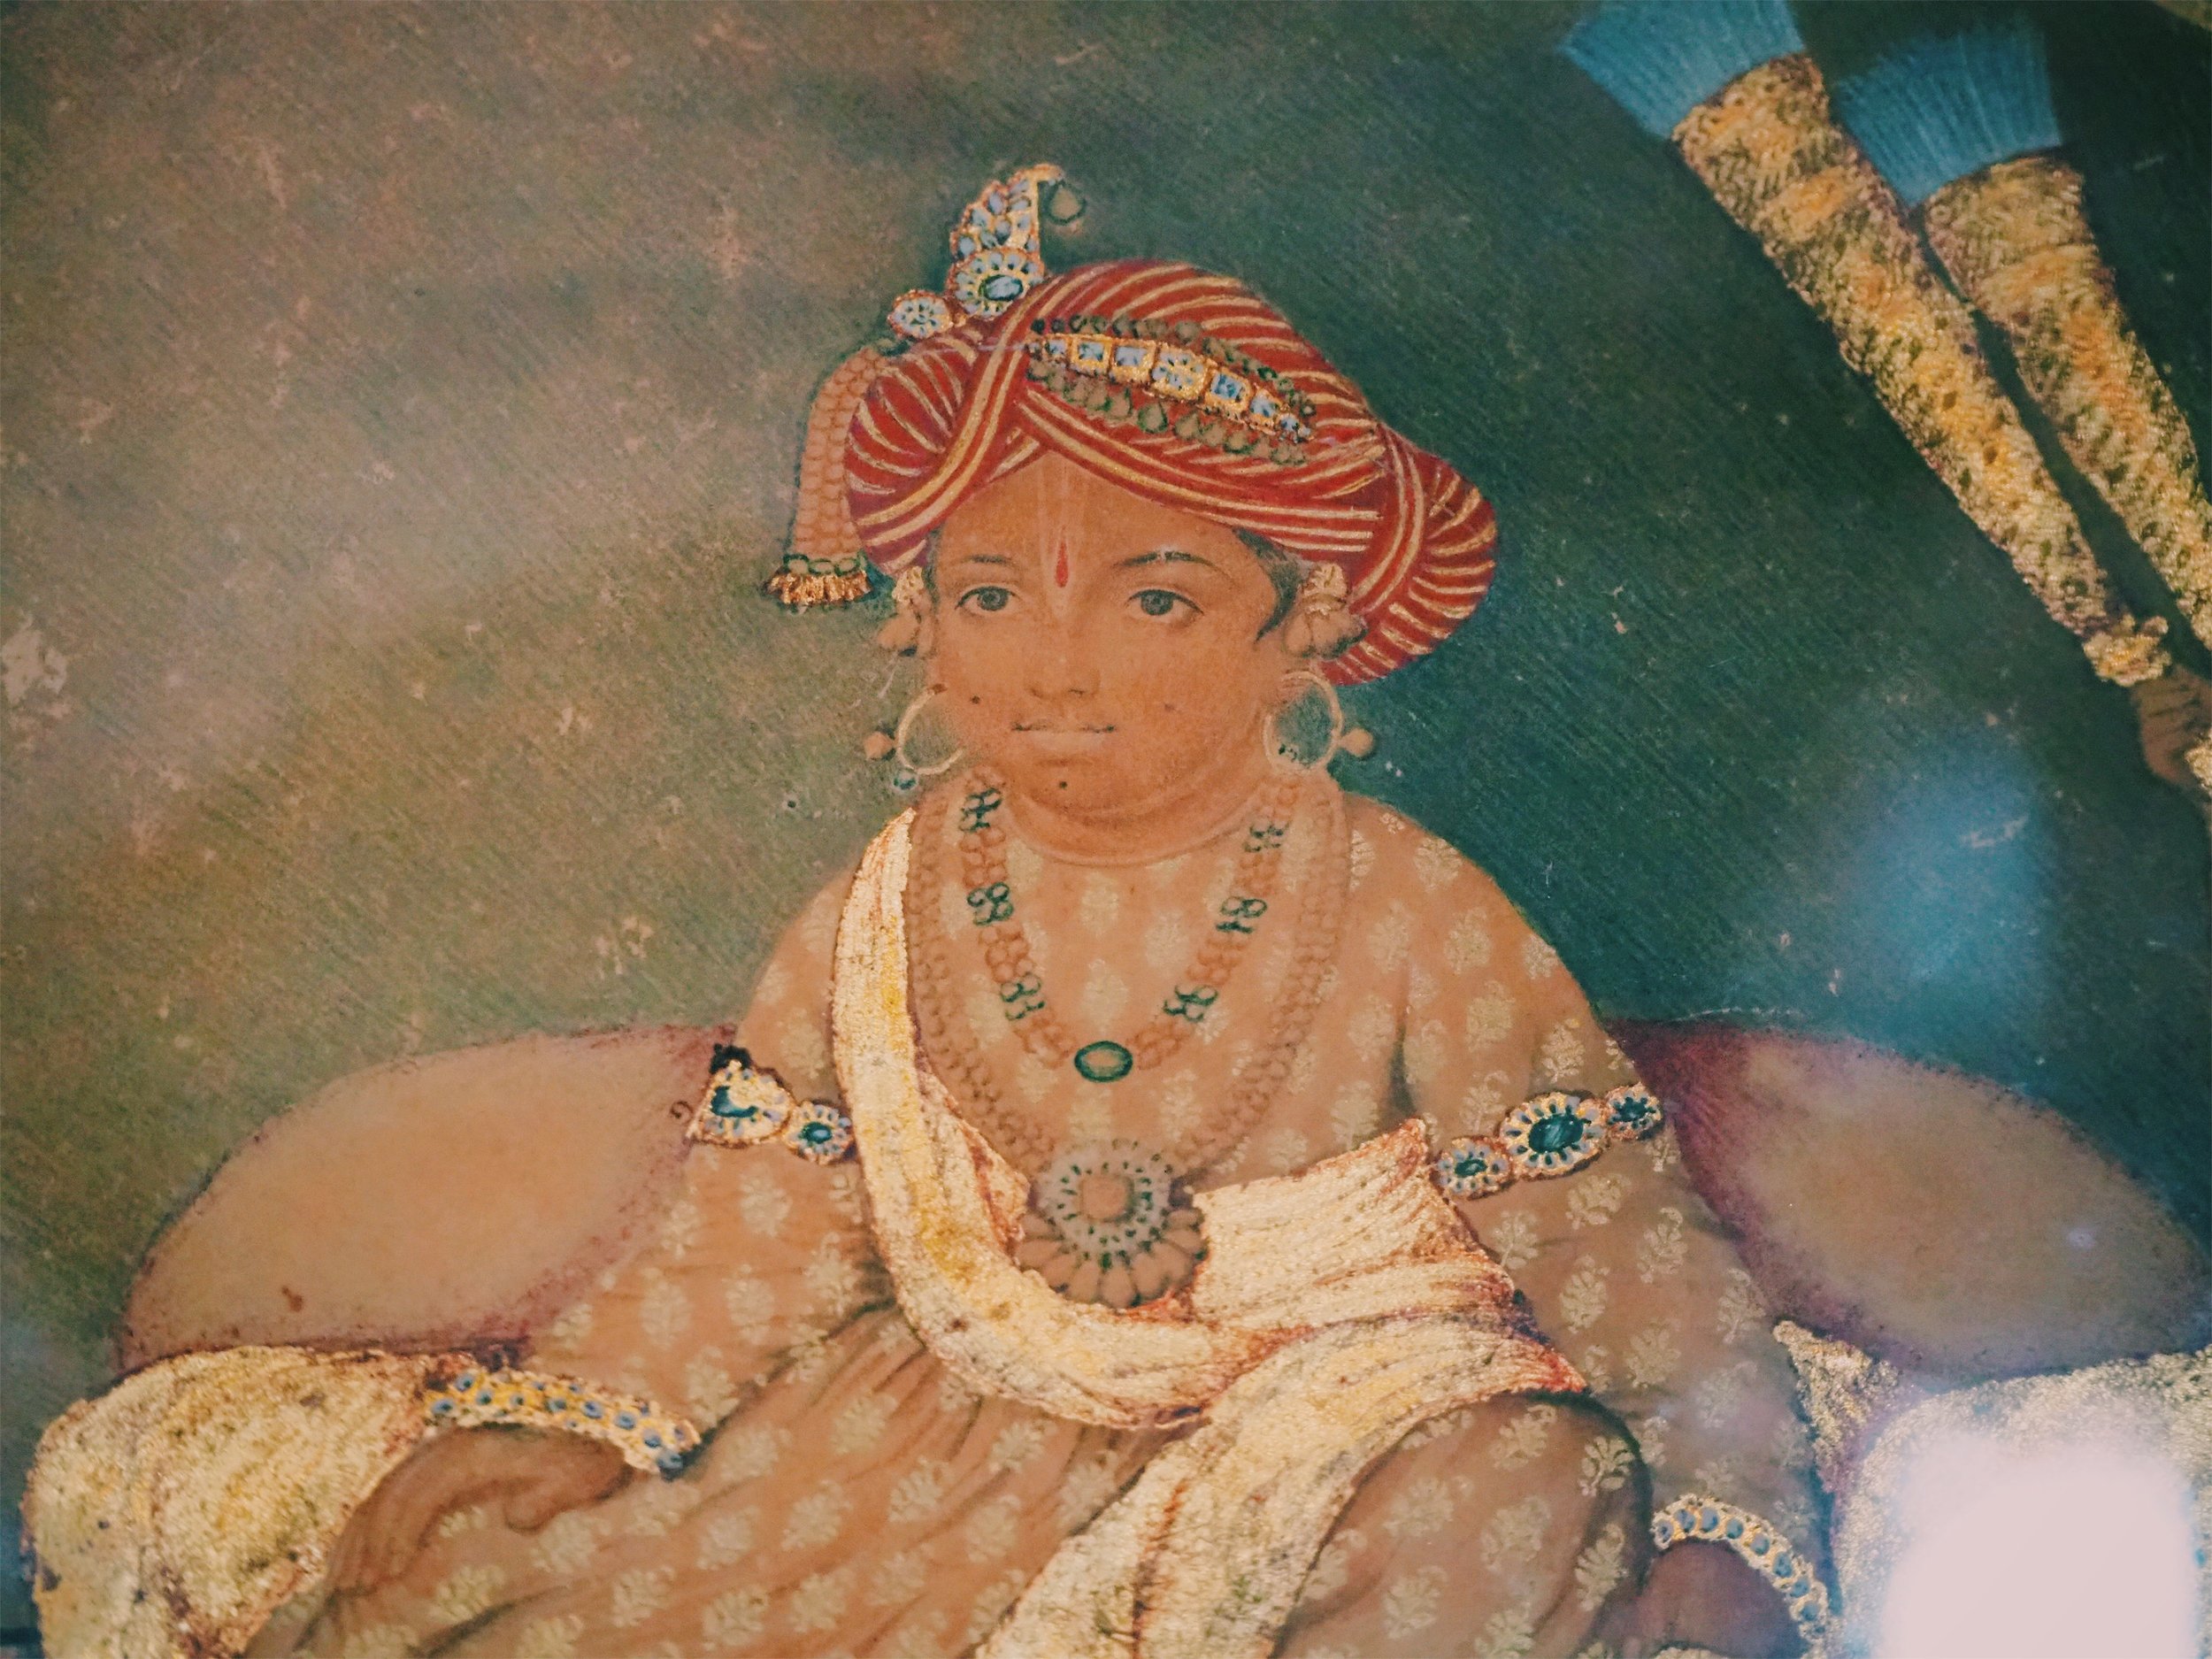

The top floor housed a mash of paintings from Mysore style to Miniatures. I especially enjoyed the Mysore style paintings where the faces were painted to have such a personality to them. Unlike miniature paintings and other Indian painting styles, this style actually showed emotions and personalities on the faces and they all weren’t just generic expressions with stoned eyes (I’m looking at you, Mughal style). An example of this is the image above of the woman with ash on her forehead.
One thing that put me off was that some of the Tanjore Painting-type artworks seem to have been touched up very recently. Some of the colours looked too fresh to be an original. They also lacked any information which led me to believe they were reproductions to give viewers an example of the art styles and imagery.
I would say its an interesting place to visit on a day when you don’t have much planned. It would be a great place to practice sketching sculptures since they are larger in number, but they are mostly all the usual human subject in standing poses. If you are the kind to pull out small elements from paintings for ideas or would like to sketch ornamental elements from miniature paintings then this might also work for you.
However my advice would be to go around 11:30am and on a weekday to avoid the rush of annoying locals who try and touch things, have their kids running around, press their faces against the glass displays and loom over your shoulder watching you draw. The staff at the museum couldn’t care less if people misbehaved so if you have no patience for this kind of thing then avoid going on holidays.
Below are some scans of the sketches I did on the spot, a detailing and colouring in large areas were done in studio. All of them were done in colour pencils: Prismacolour Premier in a range of earth tones.

All photographs and images (c) Pia Meenakshi unless mentioned.
Residency Planning

Hello,
To revisit my earlier post, I had briefly talked about the artists residency I would be attending in Japan in April.
When I was looking into applying for residencies and researching the ones I selected, I was desperately trying to find blog posts or any information really, about how artists (especially freelance, with limited income) can plan their finances and trips to a foreign country. For me, this would be my first solo trip out of India and that too on a limited budget/for work/not for leisure. It was mind numbing and scary as hell to be the person single handedly deciding EVERYTHING - what residency makes sense to me? What about flights? How do I find that perfect flight timing? What about stay? Food and any additional travel? How will I manage alone? What if I need emergency money? How am I going to pay for all this?
What I decided to do was write about my experience planning for this residency, document what I’m doing there and how I, as an artist, view Japan. I hope this blog will be a documentation of this big step and I am willing to share all my planning tips and advice, if you ever decide to do something like this yourself.
Why is a Residency important?
I want to talk about this because I came across the idea of artists residencies fairly late in life and I wish I had known this earlier. If you are the kind of person who hasn’t travelled or who loves travelling AND you are an artist, this is perfect for you. I think its important (any age), for a person to explore art through a different country. It exposes you to so many kinds of people, so many techniques, art forms and toughens you up.
I started travelling out of India only after I got married. Before that I didn’t consider travel to be important. I’d spend my savings on materials and infrastructure for my studio. After getting married, I did my first trip abroad with my husband and his parents- we went to Laos. His parents are toughened travellers and can really rough it out. I loved the trip and got to explore so much of the traditional arts, crafts and food of Laos and Thailand. Now the places I have visited are Laos, Thailand, Singapore, Ethiopia and Japan, and I have explored the art scene in everyone of them and I wish I had explored the idea of a short art residency earlier. Its the perfect experience to make you more self sufficient, understand your art better and be able to become a global person.
Basics: What Residency to pick?
The first question to ask yourself is what do you want out of it? Do you want a place to sit quietly and produce a body of work? Do you want a residency that offers short courses/classes/workshops? What country are you interested in? It should be a place where you are comfortable knowing (or not knowing the language) a place where you are open to the food on offer and a place you can manage travelling around by yourself. A lot of things have to be accepted when staying in a country for a long period- food and local transport being the biggest factors. There is a website called ResiArtis which is an international directory of all residencies and you can search by location, facilities etc. Some residencies offer grants, which brings me to my next topic.
Funding:
Most residencies offer grants that can be applied to, some residencies are invite only and cover most of your expenses, but there are ones like the one I am attending where you have to pay a fee since there is teaching and tools involved. For this reason it makes sense to plan WAY ahead so you have time to get your finances in place. My residency required me to pay an advance before hand to book my slot so make sure you have at least some money on hand and read the residency websites carefully.
To fund my residency I’m doing a bunch of things side by side:
- Working on whatever incoming commercial projects are there (2 children’s books at the moment)
- I started working 3 days a week at a design office for a fixed fee (salary) every month. Its very hectic since I don’t have many days left in the week to dedicate to other projects, so that means I don’t get much time off
- I’m also working on small paintings and personal projects on the side that I can sell to help fund my trip.
- Patreon is another route I am considering exploring in the coming months. Its a monthly subscription type platform where my work can be funded by those who enjoy it, for small fee every month and I send you rewards/stuff in return. I want to explore this to get some nice products and originals out to all of you.
I will update here again about Patreon. I can put in some Japan specific art/rewards if you enjoy that kind of thing.
Trip Planning:
It is important to start looking into your flights and stay details before hand. Its also recommended to search the internet for interesting things to see/do during your time there. Airbnb is a great place for local experiences/workshops and of course to find cheap stay options. I’m using Airbnb to find a place to stay in Kyoto and Tokyo. Just a simple room. I will be doing some work related stuff- picking up pigments etc and meeting some artists and I will be needing a place to crash for around 15 days after my residency.
Another helpful gem is Skyscanner. They help you in finding the cheapest flights. Always keep an eye on the timings and keep in mind that you shouldn’t reach too early/too late and be stranded out of your place of stay. If all your flights are the same airlines, check their local office in your city- they might have cheaper tickets.
Do all your research on local transportation, what you will be doing in your free time, how are you going to get around, what the local cuisine is, how safe the area is, how friendly the people are. If you can, I would recommend taking a few extra days after the residency to go check out the local museums, art supply stores, book stores and smaller galleries. Its worth that extra few days to get a taste of the art scene of a new country.
TIPS:
To help with organising info, I noted down everything in a spreadsheet. I used Google Sheets so I could edit it on any system. I made different tabs for: expenses on hand (how much money you have at the mo), how much more to save, residency itinerary, additional travel plans, any other important notes. For example, my residency requires a health certificate so I remember to get that done too
Make sure you have some basics in place like a 6 month (minimum) valid passport. For a Japanese visa I needed 3 years income tax returns and a good bank statement with sufficient money. It also helps to have a fixed amount coming into the account (like a salary for example) so you are more financially stable. Check the visa requirements before hand so you have enough time to prepare. Even if you are not a salaried employee, make sure you have good balance of credit/debit transactions in your account, this helps when applying for a visa.
Check the rules and attitudes of the country you are visiting. Make sure you follow the culturally acceptable dress code and behaviour.
Account for expenses such as buying important art supplies and materials. Most residencies expect you to buy your own or buy it locally. So if your residency is in a village in the middle of nowhere, make sure you take a day to go to the nearest city and buy supplies or take it beforehand. Also stock up on any personal items which are not available at the residency. Since its a solo trip, you should be prepared with all medicines, food and personal items.
Always ask your residency hosts all the questions. Some will guide you before-hand about the food, local transport and schedules of your time there. Mine was strict in informing us that we have o be housed at their residence and classes are compulsory from morning to evening. They informed us that weekends are free, so I know I can plan for a short trip around the area. They informed us that a local lunch box delivery is available and that there is a kitchen in place for us to cook. These things are important to note. I found that in Japan restaurant and 7-11 food is inexpensive but buying veggies from the farmers market is expensive. It also helps to ask if they have a cycle/bike/car rental system in that area so you can explore on your own.
Always keep minimum 1/3rd amount of your day to day expenses as “extra” money in case of an emergency. Example: if your daily food, commute etc for the whole trip is coming upto 1,50,000, then keep an extra 50,000 as backup. Its always useful incase you have some unexpected expense, such as an emergency train ticket, additional day’s room rent or any medical emergency.
Always keep a family or friend informed about EVERYTHING, especially if you are going solo. Let someone be aware of your flights, stay details, itinerary and let them have access to send you money if you are in an emergency. Karnataka Bank has a travel debit card that can be recharged from here by anyone with access. So if you run short, someone can put money in the card from here so you can withdraw from there.
Hope this little write up helped you if you ever plan to go abroad solo or attend a residency.
Artists Residency
Hello,
Its been awhile since I wrote a blog post, but I thought this would be the best medium to update you all on what is happening at my end, especially since I haven’t had the time to keep my Instagram updated (does anyone even use Facebook anymore?).
To start off with, I’m definitely not dead, inactive or gone off the rails. I have been here, working from my home studio, making paints for my brand Pigmenta and I have been planning a lot of travel for 2019.
Lets start off with the most exciting bit of news: I’ll be going to Japan in April 2019 for a month long art residency. For those who are unfamiliar, an artists residency is a place (usually a foreign country) where an artist can stay for as long as decided and work on a personal project or body of work. Most residencies have to be applied to, and most residencies ask you to pay for your board and studio facilities. There is usually an exhibition in the end, organised by the residency themselves. Its basically a place for a bunch of artists to live together, create a body of work and travel and explore that country.

The residency I applied to and got selected for is called Mi-Lab Artist-in-Residence in Kawaguchiko, Japan. This residency is super special and unlike any other because this is a residency where I will be taught Japanese Woodblock printing (Mokuhanga) during my stay there. I was selected for the Beginner’s course and I will be there from April to May learning this new (to me) but ancient printing technique.
Why Mokuhanga?
I decided to learn this new technique for a bunch of reasons.
Firstly, it was the first illustrated-anything I ever came across as a child. It was thanks to my grandfathers collection of books on Ukiyo-E prints and a book on Van Gogh, that I got into creating art in the first place. As a kid I would recreate Van Gogh paintings in colored pencil, and paint images of the beautiful Kimono-clad girls from Ukiyo-E prints.Japanese woodblock printing is super special for a bunch of reasons: you can be a print maker without a huge studio or any heavy duty machinery. All prints are made by hand and the materials are fairly simple.
Secondly, the art that can be created through this process can have a very illustrated feel. Traditional Japanese prints can easily be mistaken for modern illustrations because of their beautiful use of outlines and gradients. Using the same techniques, an artist can also incorporate embossing, gold-leaf and other metallic affects on their prints.
Wood carving techniques illustrated in the wonderful book by April Vollmer “Japanese Woodblock Print Workshop: A Modern Guide to the Ancient Art of Mokuhanga”
Thirdly, every block of wood is carved by hand, by the artist. If anyone knows me they know I like struggling with hand-done difficult work and I always wanted to learn wood carving. This would be the perfect blend of art making and wood working.

A ukiyo-e print showing various techniques, including the paper marbling and repeat patterns on the kimono
Fourthly, every print is colored/tinted by hand. The inks used are not the horrible, sticky and smelly oil based inks of Western print making. Instead they use beautiful powdered mineral/earth/plant pigments that are mixed by hand to create watercolours. Yes, prints are made with watercolours. Since I make paints as a business, exploring how the Japanese artists mix and create with their traditional pigments is something I really want to explore.

A print by April Vollmer, showing how any visual style can be made into beautiful woodblock prints
I will write a bigger post dedicated to this form of art soon.
So to conclude this section: I want to explore a traditional art form, which can still go hand in hand with my illustration style and aesthetic. I have always been fascinated by Japan and its traditional culture and its been the biggest inspiration for me growing up (I don’t mean Anime). It would be a dream to learn this technique and explore the country some more. I will be travelling around Japan after my residency and will be back only in June. I have lined up meetings with some of the most important woodblock print (Mokuhanga) artists and a Japanese painting (Nihonga) artist while I am there and I’m exploring options of furthering my knowledge on this technique.
If I have missed out on one thing, it is studying a fine art technique. Graphic design and illustration is a wonderful option for earning an income but, as an artist I long to involve myself with a medium that lets me explore a more personal and artistic side. I plan to use this technique in some sort of mixed media-style and create some blend of illustration, painting, printing and other techniques.
To reach this goal I have been planning and working my butt off since March. I plan on writing a few more blog posts around this topic. I would love to give you an insight into how I have planned for this solo adventure and how I am trying to make this happen.
My next few posts will explore topics on how someone can plan for a residency, some more information about Mokuhanga and maybe some in-depth looks into my trip planning. Once I finish the course, I plan to document it here.
If you are personally interested in Japanese culture/arts/travel you can send me a request to write about anything you would like to know.
I would eventually like to maintain a blog on how I see Japan as an artist. Let me know if that interests you?